This post contains affiliate links. As an Amazon Associate I earn from qualifying purchases.
Quick answer The sleek updos that last best through New Year's Eve are the slick-back low bun, the braid-wrapped bun, the classic French roll and the rope-twist top knot. Most take 15 minutes at home; a French roll or side chignon is worth booking a stylist for.
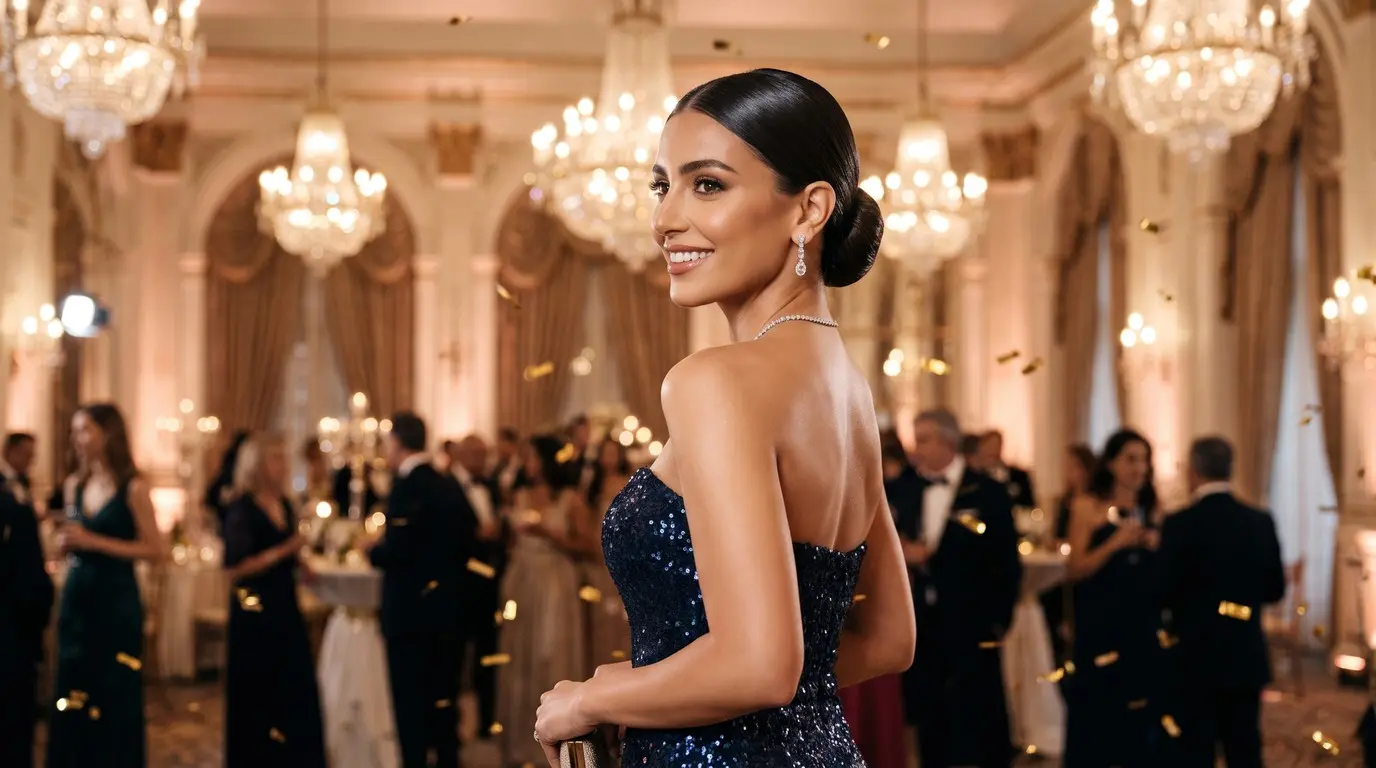
The best New Year’s Eve updos have one job that a brunch updo doesn’t: they have to look as glassy at the countdown as they did when you left the house. That is why sleek, pinned-tight shapes keep winning the night. A slick-back bun or French roll shows off earrings and a neckline, photographs cleanly under flash, and gives dancing, coats and confetti nothing to tangle.
Polished updos are a lasting classic rather than a passing trend, so the skill is in the build. Underneath every look here is the same order: a heat protectant or volumizer, a shine serum through the lengths, dry shampoo or volume powder at the roots for grip, then a sheer, flexible-hold hairspray.
Below are 20 variations on the low bun, high pony-bun, chignon, French roll and top knot, each with who it suits, what to ask your stylist, a fine-versus-thick adjustment and how well it holds.
Jump to a look (20)
- Center-Part Slick-Back Low Bun
- Deep Side-Part Glass Bun
- Figure-Eight Knotted Low Bun
- Braid-Wrapped Low Bun
- Ballerina High Pony-Bun
- Looped Pony-Bun with Fanned Ends
- Velvet-Ribbon High Bun
- Classic Nape Chignon
- Side-Set Chignon
- Pearl-Pinned Rolled Chignon
- Two-Tendril Sleek Chignon
- Classic Twisted French Roll
- Claw-Clip French Roll
- Wet-Look French Twist
- Sleek Twisted Top Knot
- Two-Strand Rope Top Knot
- Sculpted-Edge High Bun for Coily Hair
- Tucked Mini Bun for Bobs
- Barrette-Stacked Low Twist
- Sleek High Bun for Box Braids
1. Center-Part Slick-Back Low Bun

Hover on images and discover how pinning can transform your collection of favorites!
The baseline: a sharp center part, hair brushed flat over the ears and coiled at the nape. It suits shoulder-length or longer hair of any texture, and many stylists like a center part on oval and heart-shaped faces. Ask for ‘a slicked center-part low bun, pinned, not just tied.’
It takes 15 minutes at home and is among the most secure looks here. Fine hair: dust volume powder on the ponytail before coiling. Thick hair: use the two-band method, one elastic for the ponytail and a second for the bun.
2. Deep Side-Part Glass Bun

Hover on images and discover how pinning can transform your collection of favorites!
A deep side part sweeps one glossy panel across the forehead before everything gathers into a low bun. It suits straight to wavy hair past the collarbone, and stylists often suggest the diagonal line to soften a square jaw or a round cheek.
Ask for ‘a deep side part, smoothed with serum, low bun behind the opposite ear.’ Doable at home in 15 minutes. Fine hair: pin the swept panel behind the ear so it cannot slide. Thick hair: flat-iron the front panel first so it lies flush.
3. Figure-Eight Knotted Low Bun

Hover on images and discover how pinning can transform your collection of favorites!
Instead of a coil, the ponytail is split in two, tied in a literal knot, and the ends tucked under and pinned. The result is a flat, sculptural shape that sits neatly under a high collar or a coat. Best on straight or blown-out hair at least bra-strap length.
Ask for ‘a knotted low bun with the ends hidden.’ Manageable at home with practice; allow 20 minutes. Fine hair: a light crimp on the underside adds grip. Thick hair: knot once only and anchor with four U-pins. Expect one re-tuck before midnight.
4. Braid-Wrapped Low Bun

Hover on images and discover how pinning can transform your collection of favorites!
A slim three-strand braid taken from the ponytail wraps around the base of the bun, hiding the elastic and locking the coil in place. It suits medium to very long hair, and it is especially kind to thick, heavy hair because the braid acts as a belt.
Ask for ‘a sleek low bun with a braid wrapped around the base.’ At home, 20 minutes. Fine hair: braid loosely and gently widen it so it reads fuller. Thick hair: split the bun over two elastics. One of the longest-lasting styles on this list.
5. Ballerina High Pony-Bun

Hover on images and discover how pinning can transform your collection of favorites!
Hair is pulled to the crown in a tight ponytail, then wound into a compact bun. Stylists often recommend this lifted line for adding height to a round face. It suits straight, wavy or stretched curly hair from shoulder length down.
Ask for ‘a high ballerina bun, no bumps at the crown, edges smoothed.’ At home in 15 minutes: tilt your head back as you tie so the nape stays taut. Fine hair: a mesh bun donut fills out the shape. Thick hair: two bands and at least six pins.
6. Looped Pony-Bun with Fanned Ends

Hover on images and discover how pinning can transform your collection of favorites!
On the last pass of the elastic, the ponytail is pulled only halfway through, leaving a loop with straight ends fanning out above it. It works on mid-length hair that is too short for a full bun, and on blunt cuts, where the ends look deliberate.
Ask for ‘a high looped bun with the ends left out and flat-ironed straight.’ Easy at home in 10 minutes. Fine hair: mist the fan with sheer-hold spray and pinch it into shape. Thick hair: tuck half the loop under to slim it. Check the fan once or twice through the night.
7. Velvet-Ribbon High Bun

Hover on images and discover how pinning can transform your collection of favorites!
A plain sleek high bun finished with a long velvet or satin ribbon tied at the base, tails left hanging down the back. It suits any hair long enough for a bun, and it pairs well with a strapless or square neckline, where the tails have space to show.
Ask for ‘a smooth high bun with room at the base for a ribbon.’ At home in 15 minutes. Fine hair: tie the ribbon over the elastic for extra bulk. Thick hair: choose a wide ribbon so it stays in proportion. Knot it twice; a bow alone loosens with dancing.
8. Classic Nape Chignon

Hover on images and discover how pinning can transform your collection of favorites!
A chignon differs from a bun in that the hair is rolled under on itself and pinned into a soft horizontal oval at the nape, with no visible elastic. It suits shoulder-length to long hair and sits well with a high neck or halter.
Ask for ‘a classic low chignon, rolled under, smooth sides.’ A stylist gets the cleanest roll, though a patient beginner can manage it in 25 minutes. Fine hair: roll around a small hair pad. Thick hair: divide into two rolls and pin them together. It holds through the night when pinned into the base.
9. Side-Set Chignon

Hover on images and discover how pinning can transform your collection of favorites!
Everything sweeps diagonally to sit behind one ear, leaving the opposite side of the neck bare, which makes it a strong match for a one-shoulder or asymmetric dress. It suits medium to long hair, straight or wavy. Ask for ‘a side chignon set low behind the ear, with the opposite side slicked tight.’
Better left to a stylist, because the slicked side has to stay taut all night. Fine hair: crisscross two bobby pins behind the ear as an anchor before rolling. Thick hair: add a few pumps of spray gel on the sweep for extra hold.
10. Pearl-Pinned Rolled Chignon

Hover on images and discover how pinning can transform your collection of favorites!
A low chignon studded with pearl pins pushed along the roll at even intervals, so the accessory does structural work as well as decorative. It suits fine to medium hair particularly well, since each pin adds another anchor point. Ask for ‘a low rolled chignon with pearl pins set into the seam.’
At home, 20 minutes once you can roll a chignon. Fine hair: use spiral pins, which twist in and grip. Thick hair: seat ordinary U-pins first and treat the pearls as decoration. Pair it with a bare neckline rather than a necklace.
11. Two-Tendril Sleek Chignon

Hover on images and discover how pinning can transform your collection of favorites!
The chignon stays tight, but two slim front strands are left out at the part, flat-ironed straight and tucked just behind the cheekbones. Stylists often suggest those vertical lines for softening a wide forehead or strong jaw, though it comes down to taste.
It suits hair with face-framing layers or grown-out bangs. Ask for ‘a low chignon with two thin, straight tendrils, nothing wispy.’ At home in 20 minutes. Fine hair: keep the tendrils pencil-thin so the bun keeps its bulk. Thick hair: run a drop of serum down each strand to stop it puffing.
12. Classic Twisted French Roll

Hover on images and discover how pinning can transform your collection of favorites!
Hair is gathered at the nape, twisted upward against the head and the ends tucked into the vertical seam, which is then pinned shut. It suits shoulder-length to mid-back hair; very long hair needs folding first. Ask for ‘a classic French twist, tight seam, smooth crown, no height at the front.’
This is the look most worth booking a stylist for, since the hidden pinning takes training. Fine hair: backcomb lightly inside the seam only. Thick hair: a zigzag row of bobby pins up the centre before twisting gives the roll something to grip.
13. Claw-Clip French Roll

Hover on images and discover how pinning can transform your collection of favorites!
The at-home shortcut: twist as for a French roll, then secure with one large claw clip instead of a row of pins. It suits collarbone-to-mid-back hair of any texture and takes five minutes. No stylist needed, but if you are having a blow-dry beforehand, ask for ‘a smooth finish with no bend at the ends.’
Fine hair: choose a smaller clip with close-set teeth, and spray texture at the roots first. Thick hair: use a metal clip with a strong spring. It is the easiest look to redo in a bathroom mirror at midnight.
14. Wet-Look French Twist

Hover on images and discover how pinning can transform your collection of favorites!
A French twist with a high-gloss front: gel worked from hairline to crown and combed straight back so the comb lines show. It suits straight to wavy hair, and short layers that normally escape a twist. Ask for ‘a wet-look French twist, gel through the front only, lengths dry.’
Achievable at home in 25 minutes if you can already do a twist. Fine hair: use spray gel rather than a heavy pot gel, which can separate strands and show scalp. Thick hair: apply gel in two thin layers. The set front barely moves all night.
15. Sleek Twisted Top Knot

Hover on images and discover how pinning can transform your collection of favorites!
Higher and smaller than a ballerina bun, sitting right on top of the head, with the ponytail twisted into a rope before coiling. It suits long hair that is fine to medium in density, because a heavy knot in this position pulls.
Ask for ‘a tight top knot on the crown, twisted, ends tucked under.’ At home in 10 minutes. Fine hair: this is your strongest high option, as the twist concentrates what you have. Thick hair: split the ponytail into two ropes, as in the next look. Re-pin if it begins to tilt.
16. Two-Strand Rope Top Knot

Hover on images and discover how pinning can transform your collection of favorites!
The ponytail is split in two, each half twisted the same way, then the pair wound around each other in the opposite direction before coiling. That counter-twist is what stops it unravelling. It suits long, thick or layered hair that slips out of an ordinary knot.
Ask for ‘a rope-twist top knot, pinned at four points.’ At home in 15 minutes. Fine hair: the rope can look thin, so coil it flat like a rosette instead of stacking it. Thick hair: this is where the two-band method earns its keep. One of the sturdiest high styles for dancing.
17. Sculpted-Edge High Bun for Coily Hair

Hover on images and discover how pinning can transform your collection of favorites!
For coily and tightly curled hair: the lengths are smoothed back with gel and a soft brush, gathered high, and the knot left as a rounded puff or wrapped smooth, with the hairline laid in soft swoops. Ask for ‘a sleek high bun with laid edges, tension kept off the hairline.’
At home in 30 minutes, including time under a satin scarf to set the gel. Fine strands: use a lighter gel and keep tight styles occasional to spare the edges. Dense hair: smooth in four sections before gathering. Once set, it lasts all night and beyond.
18. Tucked Mini Bun for Bobs

Hover on images and discover how pinning can transform your collection of favorites!
Proof that chin-to-shoulder hair can go up: the top two-thirds is slicked into a small low bun, and the short underlayer at the nape is twisted upward and pinned flat beneath it. It suits bobs and lobs, straight or wavy.
Ask for ‘a slicked-back mini bun with the nape pieces pinned up and hidden.’ At home in 15 minutes with plenty of bobby pins. Fine hair: dry shampoo on the nape pieces helps the pins grip. Thick hair: use mini elastics and spray gel on the sides. Expect to re-pin the nape once.
19. Barrette-Stacked Low Twist

Hover on images and discover how pinning can transform your collection of favorites!
A low horizontal twist held by two or three slim metal barrettes stacked along one side, so the hardware replaces most of the pins. It suits fine to medium hair from collarbone length down, and it flatters a V-neck or plunging neckline by keeping the detail at the back and side.
Ask for ‘a low twisted roll, smooth on top, secured so I can add barrettes.’ At home in 10 minutes. Fine hair: mist the section before clipping so the barrettes do not slide. Thick hair: use long French-clasp barrettes and add hidden pins underneath.
20. Sleek High Bun for Box Braids

Hover on images and discover how pinning can transform your collection of favorites!
For knotless or box braids, twists and locs: gather the braids at the crown, wrap them around the base and tuck the ends under, then smooth the hairline with a little edge control. It suits mid-back or longer protective styles.
Ask your braider for ‘braids light enough to wear up’ at the install; small-to-medium braids put less weight on the scalp. At home in 10 minutes. Fewer, finer braids: wrap flat for a wider bun. Many or jumbo braids: use one long braid as the tie instead of an elastic. If it feels tight, loosen it.
The Bottom Line
The pattern across all 20 looks: sleekness comes from the prep, and hold comes from the anchor. Brush every section flat before you tie it, check the crown in a hand mirror for bumps, and pin into the base of the style rather than its surface. Low buns and French rolls are the most secure; high knots look sharpest but ask more of your elastics.
One actionable tip: pack a midnight kit. A travel-size sheer-hold hairspray, four bobby pins, a spare elastic, a clean spoolie or toothbrush for flyaways and a small claw clip all fit in a clutch. Spray the spoolie, not your head, and sweep strays back in the direction of the style.
Frequently Asked Questions
Should I wash my hair on New Year's Eve or do an updo on day-old hair?
Stylists disagree, and both approaches work. Many recommend washing and blow-drying the day before, so hair is clean but has some grip. Others slick unwashed hair straight back: one tutorial builds a sleek low bun on day-four hair, since natural oil helps it lie flat. Freshly washed, very fine or silky hair needs dry shampoo at the roots first.
What products keep a sleek updo in place all night?
Layer in this order: a heat protectant or volumizer on damp hair, a shine serum through the lengths, then dry shampoo or volume powder at the roots for grip. Finish with a sheer, flexible-hold hairspray, and add a spray gel where you need extra hold, such as the hairline and the nape.
How do I avoid bumps at the crown and make the pins actually hold?
Brush hair back in sections with a smoothing brush, hold the ponytail in one hand and check the crown with a hand mirror before you tie it. For pins, push each one against the direction of the twist, then flip it and slide it into the base so it locks. Crisscrossed bobby pins hold better than parallel ones.
Do sleek updos work on both fine hair and thick hair?
Yes, with different adjustments. Stylists often say fine hair tends to drop as the night goes on, so low buns, a light crimp underneath or texture powder help it grip. Thick hair needs more pins and the two-band method: one elastic to make the ponytail and a second to hold the bun, so no single band carries all the weight.
How do I use a blow-dryer or flat iron safely before a sleek updo?
Apply a heat protectant before any hot tool. Blow-dry on damp hair, but use a flat iron or curling iron only on completely dry hair, because ironing wet hair is the one genuinely damaging step. Keep irons near 150C/300F for fine or bleached hair and 180-200C/355-390F for coarse hair.
Keep Reading
Sources
- 196620 13 best holiday hair tutorials for every occasion from a family dinner to a work party bustle.com
- New years hairstyles whowhatwear.com
- today.com today.com
- Different hairstyles for new year eve party salonist.io