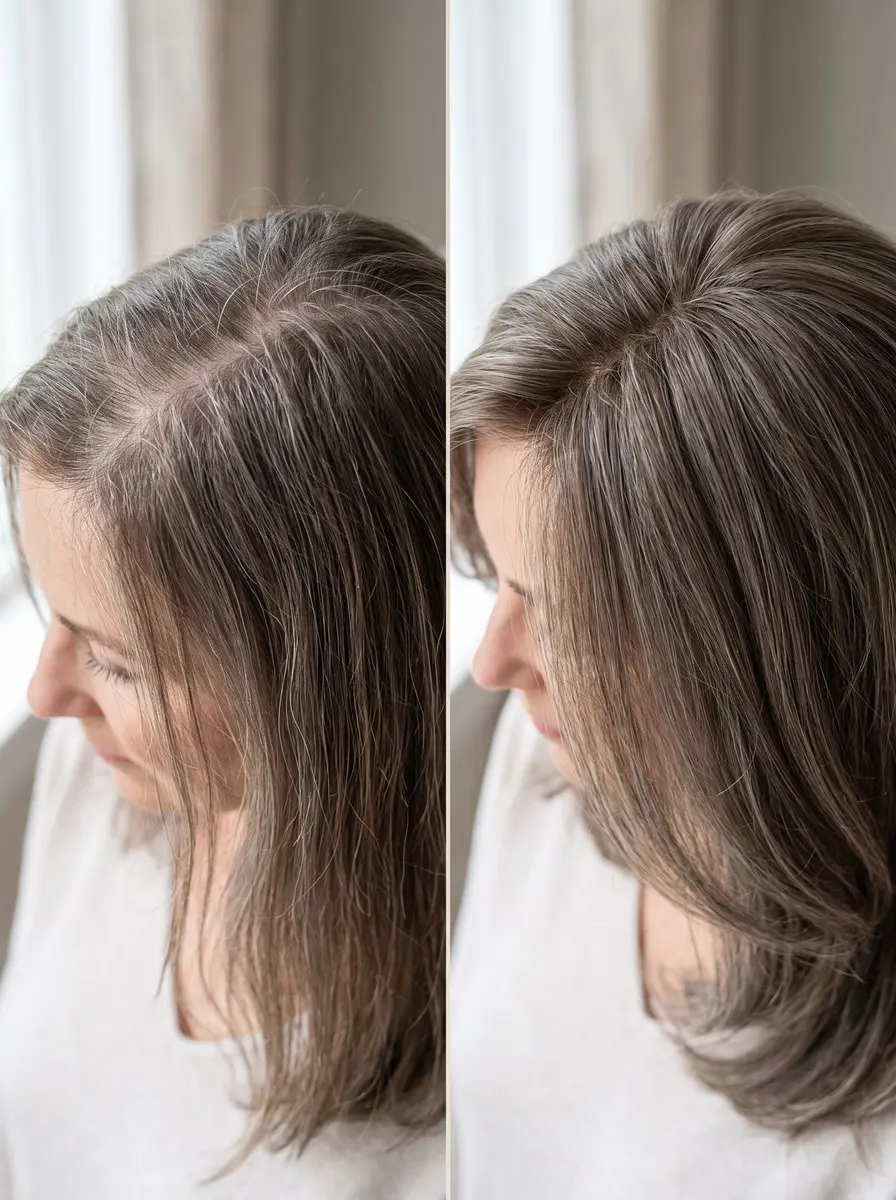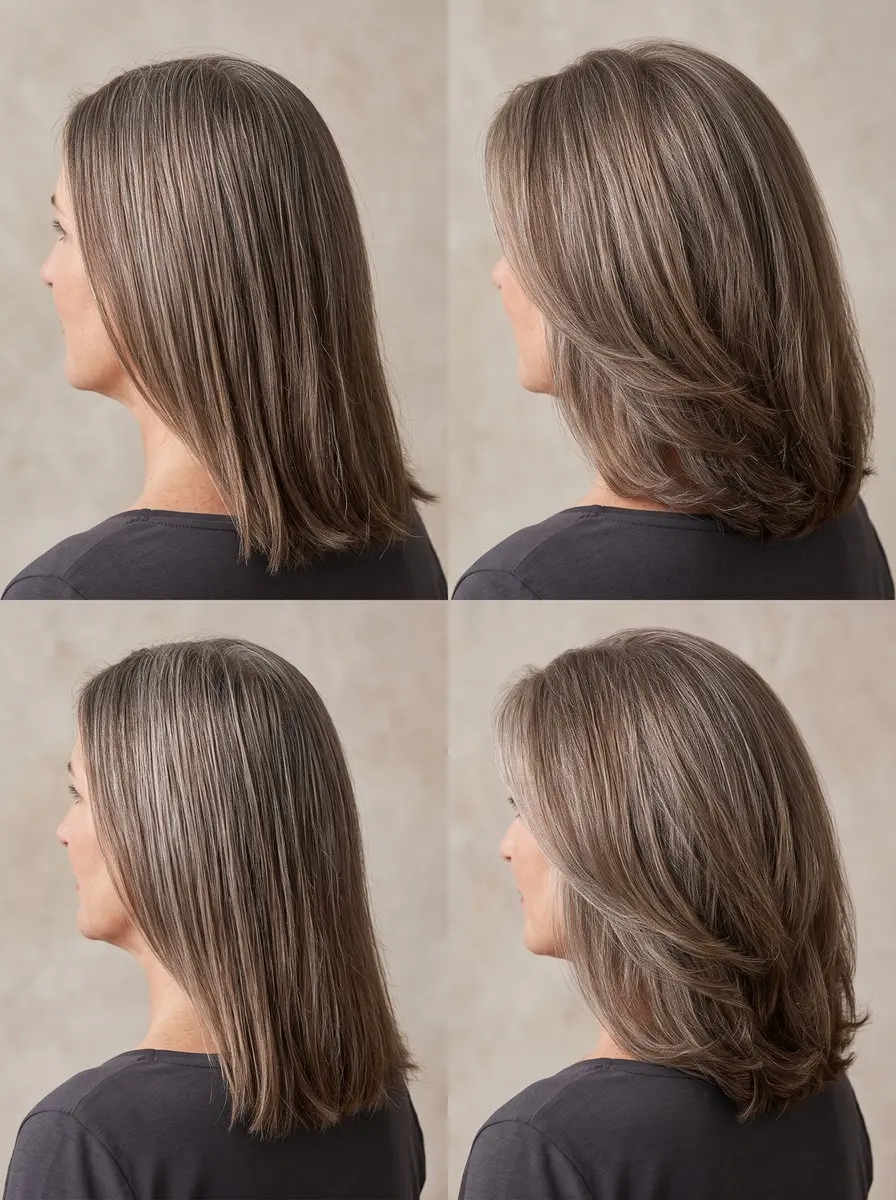
To add volume at the crown, clarify your roots, work root-lift mousse into damp hair, rough-dry upside down to about 80%, then dry the crown sections straight up with a round brush and let them cool on velcro rollers before switching to a new part.
If you want to add volume at the crown, you’re tackling one of the most common fine-hair complaints, especially from your 40s on: the front looks polished, but the back of the head lies close to the scalp and shows in every side-on photo. It’s usually a styling problem with styling fixes. The crown collapses for a few reasons: oil, product and heavy conditioner settle there, the same part every day trains hair to lie flat, the crown’s natural swirl pushes it one way, and long top layers drag it down.
This routine tackles each cause in order, from wash day to a mid-day refresh, and explains why every step works, whether your hair is silver, colored or natural. You’ll need a blow-dryer, a round brush, velcro rollers and a few light products. Plan on 30 to 45 minutes the first time, and less once it becomes habit.
What You’ll Need
- Clarifying shampoo (residue-removing shampoo) — Strips the oil, conditioner and styling buildup that settle at the crown so the roots are free to lift.
- Root-lift mousse (volumizing foam) — Gives damp roots a light, flexible hold so the lift you dry in lasts through the day.
- Ceramic round brush, 1.5-2 inch barrel — Holds warmth around each crown section so the root dries standing up; pick the smaller size for shorter or finer hair.
- Large self-grip velcro rollers — Hold each crown section upright while it cools, setting the lift without extra heat.
- Dry shampoo or dry texture spray — Absorbs afternoon oil and adds grip at the part and crown for the mid-day revival.
As an Amazon Associate, HairAide earns from qualifying purchases. Some links above are affiliate links — they cost you nothing extra and help support free tutorials.
Step-by-Step
-
Start on wash day with a clarifying shampoo, working the lather into the scalp and crown, because oil, styling-product buildup and heavy conditioner settle there and weigh the roots down. Shampoo twice if you use dry shampoo or hairspray most days: the first lather breaks up residue and the second actually cleans the scalp. Condition only from the mid-lengths to the ends, and keep masks, creams and oils off the top of your head entirely. Clarify about once a week and use a light volumizing shampoo in between; the roots are ready when they feel light and squeaky-clean rather than slick.
-
Blot hair with a towel until it is damp, not dripping, then apply a golf-ball-sized puff of root-lift mousse, working from the back of the head toward the front. Give the crown the most product and the face-framing pieces the least, since the front only needs to move while the crown needs to stand up, and too much at the hairline turns stiff. Split the crown into three or four small sections and press the mousse onto the scalp at the base of each, because lift is built in the first inch of hair, not along the lengths. The roots should feel slightly tacky, with no foam sitting in clumps.
-
Mist a light heat protectant over the damp hair, then take the concentrator nozzle off the dryer and rough-dry with your head tipped forward, or by pushing the crown hair against the direction it naturally grows, until it is about 80% dry. Wide, unfocused airflow lets the hair dry fuller instead of being blown flat against the scalp, and drying against the growth pattern breaks the crown’s habit of lying one way. If you have a swirl at the crown, push the hair across it from both sides, and dry it toward the side opposite the part you plan to wear. It’s ready when the surface feels dry but the roots still feel faintly cool.
-
Clip the nozzle back on and dry the crown first, while it still has enough moisture left to mold, working in sections no wider than your round brush. Lift each section straight up from the scalp, point the nozzle at the base, and roll the brush under so the root dries standing up rather than lying back. A smaller barrel gives tighter, higher lift on short or fine hair; a larger barrel gives softer volume on longer lengths. Keep going until the roots are completely dry, because any dampness left at the base lets the lift fall limp.
-
Don’t release a crown section while it’s still warm: let it cool on the brush for a few seconds with a burst from the cool button, or roll it straight onto a large velcro roller seated at the scalp. Hair holds the shape it cools in, so a section let go while hot drops back toward flat. Set three to five rollers across the crown and top, leave them for 10 to 15 minutes while you do your makeup, then unwind them gently, never pulling, since fine hair snags in velcro. You should see a rounded lift right at the root, not a curl through the lengths.
-
When the rollers come out, don’t drop back into your usual part: move it an inch to the opposite side, or draw a zig-zag with the tail of a comb from the hairline back to the crown. Hair parted in the same spot every day gets trained to lie flat on either side of the line, so flipping it to a new side makes the roots stand up against their habit. A zig-zag part also blurs that line, so less scalp shows through at the top. Fluff the new part with your fingertips rather than combing it flat; it should sit visibly higher than your old one.
-
For extra height, lift a 1- to 2-inch section at the crown straight up and use a fine-tooth comb or boar-bristle teasing brush to push three or four short strokes toward the scalp, in the bottom inch only. Tease the underside of each section, then lay the smooth top layer over the cushion so the teasing supports the shape without showing. Short, light strokes build a soft pad that props the roots up; long, hard strokes knot the hair and rough up the surface. To take it out, never rake a brush down from the root: mist a detangler, loosen it with your fingers, then brush from the ends upward in small sections.
-
Finish with a light mist of flexible-hold hairspray over the crown from arm’s length, then, when the lift sags in the afternoon, spray dry shampoo or a dry texture spray right at the part and crown roots. These powders soak up scalp oil and add grit between strands, so the roots lean on each other instead of slipping flat. Wait a minute, massage it in with your fingertips, then flip your head and shake the roots, or set one velcro roller at the crown for ten minutes. Use it lightly and wash it out at your next shampoo, because powder left to build up is one of the very things that flattens the crown.
-
If the crown still collapses after all this, the cut is probably working against you, often with long, single-length top layers that hang heavy. Ask your stylist for a short internal layer at the crown: a common salon method is to comb a square section straight up, tease it, and make one horizontal cut, so the shorter, stronger hairs push the longer ones up and hold the volume. Ask them to vary the cutting line so the layer blends without leaving a dent, and to keep the top layer long enough to cover it. Book a trim every six to eight weeks, because that internal layer loses its shape as it grows out and stops pushing up.
Common Mistakes to Avoid
- Conditioning from the scalp, or smoothing leftover cream or oil over the top of your head, which flattens the roots before you even start styling.
- Letting go of the round brush while the section is still warm: hair sets as it cools, so a hot release drops flat.
- Stopping with the roots still slightly damp, because damp roots fall limp however well the lengths are styled.
- Raking a brush down through teased hair from the root, which snaps strands instead of loosening the knots.
- Piling on dry shampoo day after day without washing it out, until the buildup itself weighs the crown down.
Pro Tip
Set each crown roller ‘on base’: take a section no wider than the roller, hold it straight up or slightly forward of vertical, and roll it down so the roller sits directly on the spot the section came from. A roller that drops behind its base gives you bend in the lengths but almost no lift at the root.
Frequently Asked Questions
Why is my hair always flat at the crown?
The crown flattens when oil, product buildup or heavy conditioner settle at the roots, when you part your hair in the same place every day, when the natural swirl at the crown pushes hair to lie one way, or when long, heavy layers weigh the top down. Clarifying, drying against the growth direction and changing your part fix most cases.
Will blow-drying my crown every day damage my hair?
Daily blow-drying is manageable if you protect the hair. Mist a heat protectant through damp hair before the dryer comes out, use medium rather than maximum heat, and keep the airflow moving instead of holding it on one section. Rough-drying first means the round brush only handles the last 20% at the crown, which cuts the time any section spends under direct heat.
Is teasing or backcombing bad for fine hair?
Gentle teasing is fine now and then: short strokes in the bottom inch of the underside of a section build a soft cushion without much stress. The damage comes from pushing hard, teasing the surface, or ripping it out with a brush. To remove it, mist a detangler, loosen the hair with your fingers, then brush from the ends up in small sections.
How long does crown volume last, and how do I bring it back?
A crown dried completely and cooled on rollers usually holds through the day and often into day two, though humidity and sleeping on it flatten it sooner. To revive it, spray dry shampoo or texture spray at the part and crown roots, massage it in, then flip your head and shake the roots, or set one velcro roller there for ten minutes.
What haircut adds volume at the crown?
Ask for a short internal layer at the crown. The stylist combs a square section straight up, teases it and makes one horizontal cut, so the shorter, stronger hairs push the longer ones up. Varying the cutting line keeps it from leaving a dent. Trim it every six to eight weeks, because the layer loses its shape as it grows out.
You Might Also Like
- 20 fullness-building bixie cut ideas for fine hair to inspire your next look
- 20 low-effort lob ideas for women over 60 to inspire your next look
- how to make a blowout last longer
- blow-drying curtain bangs for lifted roots
- heatless beachy waves for fine hair
- short hairstyles for women over 60 with glasses
Done in order, these steps give you lift that starts at the root and stays: clean roots, product only where it’s needed, a crown dried and cooled standing up, and a new part that keeps it there. A crown set this way usually carries through the day with a quick dry-shampoo refresh, so you only need the full routine on wash days.
If you’ve followed every step and the crown still flattens by lunch, change the cut next. Book a stylist, ask for a short internal crown layer that hides under the top layer, and keep it on a six-to-eight-week trim schedule so it keeps lifting.
Sources
- A pro salon technique for crown lift: comb a square crown section straight up, tease it, and make one horizontal cut. The shorter hair is stronger than the longer pieces and pushes them up to hold volume. Varying the cutting line prevents dents that can contribute to breakage. esteticamagazine.com
- For root and crown volume in fine hair: apply heat protectant, rough-dry with no nozzle to about 80% dry so the shaft 'fattens up', apply a root-lift mousse from back to front (lighter at the face), set the crown first with a thermal round brush, and make sure hair is fully dry because damp hair falls limp. samvilla.com
- Stylists say oil, product buildup and heavy conditioner settle at the crown and weigh it down. A clarifying wash before styling frees the roots. cecred.com