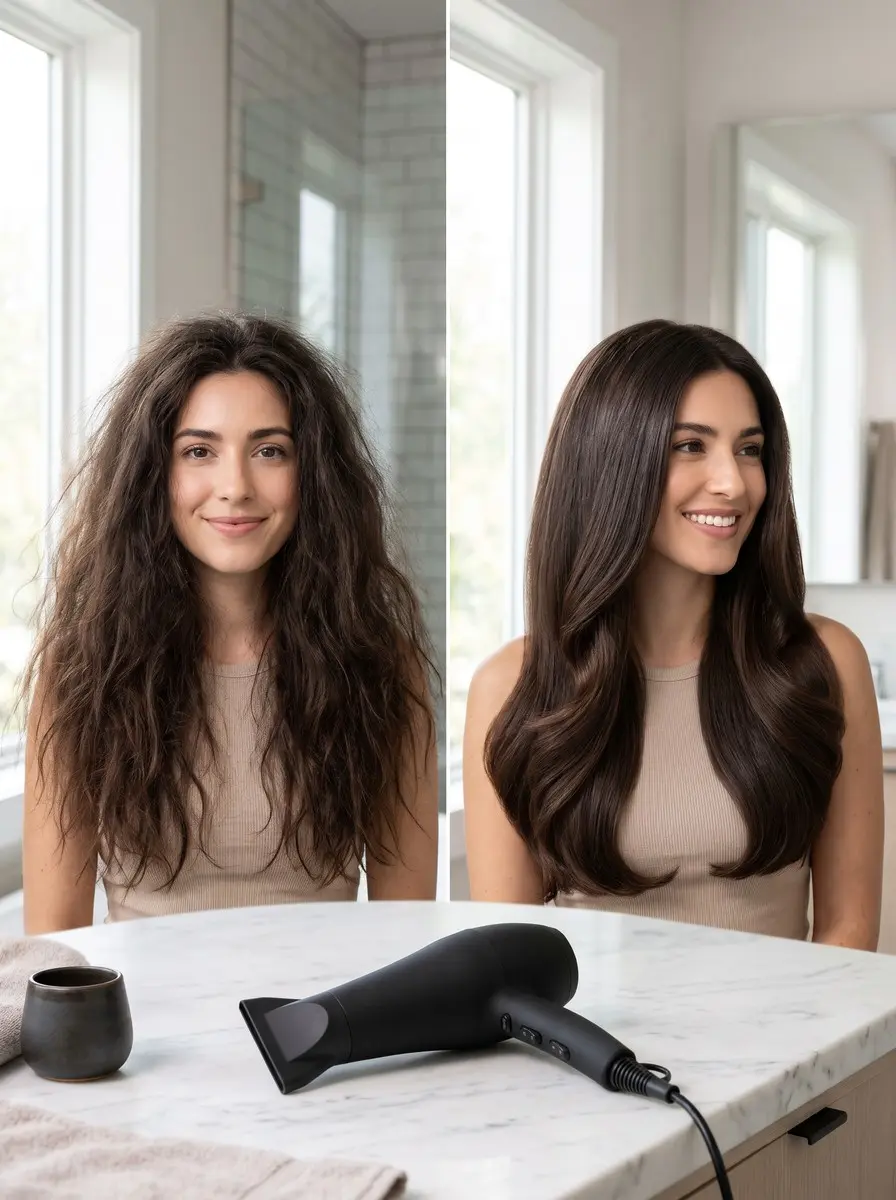
Quick answer To choose a hair dryer, start with your hair. Look for roughly 1800-2000 W for thick or long hair and 1400-1600 W for fine or damaged hair, separate heat and speed controls, a cool-shot button, and a concentrator for smooth styles or a diffuser for curls.
You probably use your hair dryer more than any other hot tool, yet it’s usually the one bought with the least thought: whatever is on sale, or whatever has the biggest number on the box. That’s where the trouble starts.
Fine hair turns flat and frazzled, thick hair takes forever to dry, and curls get blown into a frizzy halo. Almost every one of those problems comes from a dryer that doesn’t suit the hair it’s drying.
This guide shows you how to choose a hair dryer using a simple decision tree. You start with your hair type and length. Then you match the wattage, heat and speed settings, technology, attachments and weight to it. Along the way it separates the features that change your result from the ones that are mostly marketing. You don’t need a salon budget, just about 20 minutes and the checklist below.
Time 20-30 minutesDifficulty BeginnerSteps 8
Hair Dryer Features by Hair Type
| Hair type | Wattage (rule of thumb) | Settings to use | Attachment |
|---|---|---|---|
| Fine, thin or damaged | 1400-1600 W | Low heat, higher speed | Concentrator for smooth styles |
| Thick or long | 1800-2000 W | Medium heat, high speed | Concentrator for smooth styles |
| Curly or wavy | Match to density | Low-medium heat, low speed | Diffuser |
What You’ll Need
As an Amazon Associate, HairAide earns from qualifying purchases. Product links in this guide are affiliate links: they cost you nothing extra and help keep these tutorials free.
- Ionic ceramic hair dryer with separate heat and speed switches It gives you the adjustable heat, speed and cool-shot control the steps call for, in the wattage range that matches your hair.
- Universal diffuser attachment It adds wide, gentle airflow for curls if your dryer didn’t come with one, as long as it fits your barrel snugly.
- Heat protectant spray Sprayed on damp hair before blow-drying, it shields hair from the dryer’s heat.
- Vented round brush Paired with the concentrator nozzle, it gives a smooth, bouncy blowout, and the vents let air pass through as you dry.
Step-by-Step
Step 1 Start with your hair type and length
Before you look at a single spec, describe your hair on two counts: strand thickness (fine and thin, or thick and coarse) and length (short, shoulder-length or long). Then add condition and texture: is it bleached or heat-damaged, and do you want a smooth blowout or defined waves and curls?
These answers decide everything that follows. A dryer built for thick, long hair can overpower fine, fragile strands, and a dryer with no diffuser does little for curls. You’re done when you can sum up your hair in one line, such as ‘long, thick and wavy, worn smooth’ or ‘fine, bleached and shoulder-length.’
Step 2 Match wattage to thickness and length
As a rule of thumb, many guides suggest roughly 1800-2000 W for thick or long hair and around 1400-1600 W for fine, thin or damaged hair. For curly hair, go by density: thick curls sit at the higher end and fine curls at the lower.
Stylists often say ‘the higher the better’ for wattage, and for dense hair that holds up, because more power keeps the airflow strong and cuts total drying time.
Wattage is the power the dryer draws, though, not a direct measure of airflow; motor design matters too, so a compact high-speed dryer can move plenty of air at a modest wattage. Use the number on the box to narrow the shelf, not to make the final decision.
Step 3 Prioritize separate heat and speed settings
Look for at least three heat settings and two speed settings, ideally on separate switches. For fine or damaged hair, adjustable heat and speed matter more than raw wattage. Separate controls let you pair low heat with a higher speed, which dries fine, thin or bleached hair efficiently without blasting it at maximum temperature.
Thick or long hair dries fastest on high speed with medium heat, while curls do best on low speed with low-to-medium heat so the airflow doesn’t break up the curl pattern. Check the switch layout before you buy, because a dryer that locks heat and speed together on one switch can’t make those combinations at all.
Step 4 Decode ionic, ceramic and tourmaline
Ionic dryers release negative ions, which manufacturers say speed up drying and reduce frizz. What most people actually notice is less static and fewer flyaways, which helps thick, frizz-prone hair, though some people with very fine hair find it looks flatter.
Ceramic means a ceramic heating element or coating that spreads heat evenly and avoids hot spots, a real benefit for damaged hair, but on cheap models it can be a thin coating that wears off.
Tourmaline is a crushed mineral added to that coating to combine ionic output with infrared heat, so think of it as a stronger version of the ionic claim rather than a separate technology. Ignore any promise that a dryer will ‘repair’ hair or ‘add shine’ on its own: no dryer adds moisture, so judge it on even heat, airflow and settings.
Step 5 Choose the right attachments
A concentrator nozzle narrows the airflow into a flat, focused stream, so you can direct air down the hair over a brush for smooth, straight styles instead of blowing it in every direction.
A diffuser does the opposite: it spreads the air over a wide bowl so waves and curls dry in their natural shape, with less disturbance and less frizz. If you wear your hair both ways, buy a dryer that comes with both, or check that a universal diffuser fits the barrel snugly.
A loose attachment slides off mid-style and leaks air. Having the right attachment for your style is usually a bigger upgrade than any extra technology on the box.
Step 6 Insist on a true cool-shot button
Hair holds the shape it’s in as it cools, so a blast of cool air at the end of each section sets the bend or smoothness you just created and helps it last. A cool shot can also cut frizz, because hair that cools while it’s held smooth stays smoother than hair that cools as it falls freely.
Check reviews or try the button in store: on some dryers it only lowers the temperature slightly, while the best ones blow genuinely cool air and sit where your thumb naturally rests. If the cool air still feels warm on your wrist, the button is mostly decorative.
Step 7 Test the weight and ergonomics
A full blowout on long or thick hair can mean holding the dryer up for 20 minutes or more, so weight and balance matter as much as power. If you can, hold the dryer overhead for a minute in the store.
A lighter or well-balanced model keeps your arm and wrist from tiring, so you’re less likely to rush and hold it too close.
Also check that you can reach the switches without shifting your grip, that the cord reaches comfortably from your outlet, and that there’s a hanging loop for storage. If your hair is short or fine and dries in a few minutes, a compact travel-size dryer may be all you need.
Step 8 Keep it clean and moving
Whatever you buy, check that the rear filter cap twists off easily. Lint and hair build up there and starve the motor of air, which weakens the airflow and makes the dryer run hotter.
Clean the filter about once a month, or whenever you can see grey fluff, with the dryer unplugged and cool, and let a washable filter dry completely before you put it back.
When you dry, keep the dryer moving and hold the nozzle about six inches (15 cm) from your hair rather than parking it on one section, so no patch of hair takes concentrated heat. A built-in overheating shut-off is a useful safety extra, but with a clean filter it should rarely trip.
Common Mistakes to Avoid
- Buying on wattage alone and ignoring whether heat and speed adjust separately. For fine or damaged hair, the setting combinations matter more than the number.
- Drying fine, bleached or damaged hair on the highest heat because ‘hotter is faster’, when lower heat at a higher speed dries it with much less stress.
- Running the diffuser on high speed, which blows curls apart and creates the frizz the diffuser is meant to prevent.
- Throwing away the concentrator nozzle and aiming open airflow at a brush, which scatters the air and leaves smooth styles fuzzy.
- Never cleaning the rear filter, so the airflow weakens, drying takes longer and the motor runs hotter.
Pro tip Rough-dry on high speed at your hair type’s heat setting, with no brush and no attachment, until your hair is about 80% dry. Then clip on the concentrator and pick up the brush for the rest, so the slow, close-up styling only happens on hair that’s already nearly dry.
The Bottom Line
Choosing the right hair dryer comes down to a short checklist: wattage that suits your hair’s thickness and length, separate heat and speed settings, a real cool-shot button, the attachment your style needs, and a weight you can hold through a full blowout. Get those right and the technology labels are a bonus, not the reason you buy.
Once it’s home, clean the filter monthly. Replace the dryer if it smells burnt, cuts out mid-use or blows noticeably weaker even with a clean filter. If your hair is breaking, badly damaged after bleaching, or never comes out smooth no matter which dryer you use, book a stylist who can assess the damage and show you a blowout technique suited to your hair.
Frequently Asked Questions
What wattage hair dryer is best for thick hair?
As a rule of thumb, thick or long hair does best with roughly 1800-2000 W, while fine, thin or damaged hair does well at around 1400-1600 W. Wattage measures the power a dryer draws, not its airflow, so look for the right range and separate heat and speed controls too. For fine or damaged hair, those adjustable settings matter more than the wattage itself.
Is an ionic hair dryer worth it?
For thick, frizz-prone hair, often yes. Manufacturers say the negative ions speed up drying and reduce frizz, and what most people notice is less static and fewer flyaways. If your hair is very fine and you want volume, a ceramic dryer with adjustable low heat may suit you better, because some fine hair looks flatter after ionic drying.
Can blow-drying every day damage your hair?
Frequent high heat can leave hair dry and brittle, so mist a heat protectant onto damp hair, use the lowest heat that dries it efficiently and keep the dryer moving. Blow-dryers are made for damp hair. If you finish with a flat or curling iron, use it only on completely dry hair, with a ceiling of about 150°C/300°F for fine or bleached hair and 180-200°C/355-390°F for coarse hair.
How often should I clean my hair dryer filter?
About once a month, or sooner if you see lint on the rear vent. Unplug the dryer, let it cool, twist off the filter cap and brush out the fluff. If the filter is washable, rinse it and let it dry completely before refitting it. A clogged filter cuts airflow, slows drying and makes the motor run hotter.
Is an expensive hair dryer worth the money?
Sometimes. A higher price usually buys a lighter body, a quieter or stronger motor, better-placed controls and a longer warranty, which matter most if you often blow-dry long or thick hair. If you dry your hair a few times a week, a mid-priced dryer with separate heat and speed switches, a true cool shot and the attachment your style needs covers almost everything.
Keep Reading
Sources
- sa.damasjewellery.com sa.damasjewellery.com
- dealeaphotography.com dealeaphotography.com
- nbcnews.com nbcnews.com