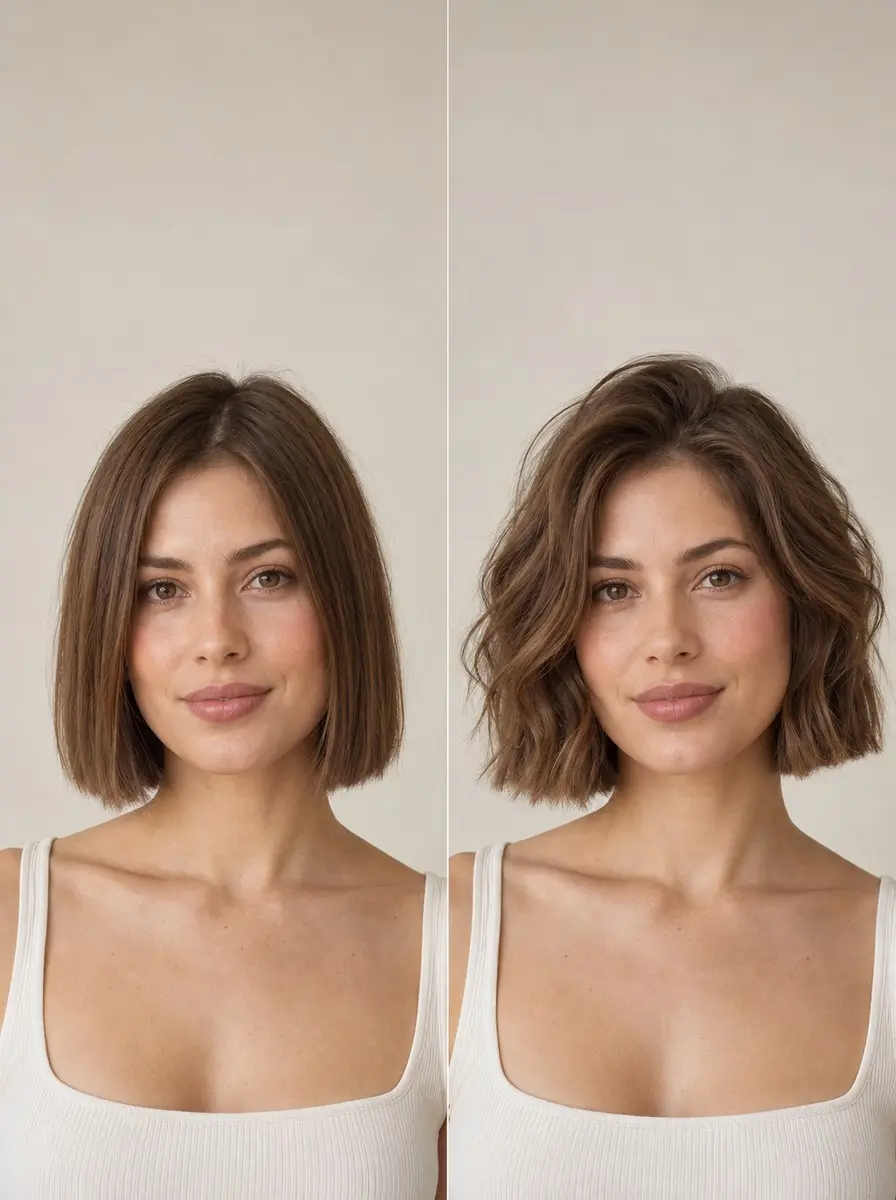
Quick answer To curl short hair with a wand, use a 13-25mm (1/2 to 1 inch) barrel on second-day hair. Take sections no wider than the barrel, point the wand down and wrap away from your face, leaving 1-2 inches of the ends out. Let each curl cool before you touch it.
Most curling-wand advice assumes long hair, so learning to curl short hair with a wand means rethinking barrel size, section size and how much of the end you leave off the barrel. Try a long-hair tutorial on a bob and a 32mm barrel gives you one lazy bend that is gone by lunch.
The ends flick out over your collar and the roots dent where the curl started. Short hair isn’t harder to curl. It just runs out of length quickly, so those three choices matter far more than on long hair.
This guide is organised by length (ear, chin or collarbone), not by tool. You’ll match a 13-25mm barrel to your cut, wrap in a direction that opens up your face, set each curl while it cools and fix the three failures that send most people back to straight hair. Allow about half an hour the first time.
Time 25-40 minutesDifficulty IntermediateSteps 8
Wand Setup by Short Hair Length
| Length | Barrel | Ends left out |
|---|---|---|
| Ear length or pixie grow-out | 13-19mm (1/2-3/4 in) | About 1 in |
| Chin-length bob | 19-25mm (3/4-1 in) | 1-1.5 in |
| Collarbone length | 25mm (1 in) | 1.5-2 in |
What You’ll Need
As an Amazon Associate, HairAide earns from qualifying purchases. Product links in this guide are affiliate links: they cost you nothing extra and help keep these tutorials free.
- Dry shampoo Optional: on freshly washed hair it adds the grip that second-day hair already has, so short sections don’t slide off the barrel.
- Heat protectant spray Goes on the dry lengths before the first section to reduce damage from repeated passes of the wand.
- Curling wand, 13-25mm A small barrel lets a short section wrap enough times to form a real curl instead of a single bend.
- Sectioning clips They hold the top hair out of the way while you work, then pin each curl flat while it cools.
- Heat-resistant styling glove Optional: protects the fingers that guide short sections close to the barrel; many wands include one, but editions vary, so check the box list.
- Wide-tooth comb Separates cooled curls into soft waves without breaking them into frizz the way a bristle brush does.
- Texture spray Adds grit and piecey separation to the finished waves without weighing short hair down.
- Flexible-hold hairspray Optional: a light mist over the pinned, cooled curls helps stubborn hair keep its shape longer.
Step-by-Step
Step 1 Start with dry, second-day hair
Curl hair that was washed the day before, because a little natural oil gives the strands enough grip for the curl to hold. Freshly washed, conditioned hair is slippery, so short sections slide off the barrel and relax within the hour.
If you have to start with clean hair, spray dry shampoo through the roots and mid-lengths and work it in with your fingers to add that grip. Finish by misting a heat protectant over the lengths and letting it dry. Before the wand goes near your hair, it should feel dry everywhere, including at the nape.
Step 2 Match the barrel to your length
Use a 13-19mm (1/2-3/4 inch) barrel for ear-length hair or a growing-out pixie, 19-25mm (3/4-1 inch) for a chin-length bob, and 25mm (1 inch) for collarbone length. A tapered 13-25mm wand covers all three.
The reason is geometry: a 32mm barrel is about four inches around, so once you leave the ends free, a short section makes barely one turn. That gives you a bend rather than a curl, and a bend drops out fast.
On a 25mm barrel the same section wraps more times, which makes a firmer curl that holds. If you want a looser finish, keep the smaller barrel and break the curls up more at the end instead of going up a size.
Step 3 Section no wider than the barrel
Clip the top half of your hair up with sectioning clips and work upward from the nape. Make each section no wider than the barrel and about half an inch deep. Hair that hangs off the end of the wand gets no heat, which is where frizzy, half-curled pieces come from.
Fine hair can take sections the full width of the barrel, so a chin-length cut usually works out to about a dozen sections. Thick hair needs narrower, thinner slices so the heat reaches the middle, which often means closer to 20.
On a blunt one-length bob, leave the bottom row at the nape straight or only slightly bent and start curling from the row above, so the cut line stays crisp and the bob doesn’t puff out into a triangle.
Step 4 Point the wand down and wrap away
Hold the wand vertically with the tip pointing at the floor and start the wrap about half an inch from the scalp. Wind the section away from your face, laying it flat around the barrel like a ribbon so every strand touches the heat.
Stop while the ends are still free: leave about 1 inch out on ear-length hair, 1-1.5 inches on a chin-length bob and 1.5-2 inches on a collarbone cut. Ends wrapped onto the barrel crimp or flick instead of falling straight. Wear a heat-resistant glove on the hand that guides the hair, since your fingertips stay close to the barrel on short hair.
Hold for a few seconds (about five on fine hair, eight to ten on thick) and keep the wand vertical, because tilting it outward turns the ends up into a flick. Wrap the front pieces away from your face, and at the back alternate the direction row by row so neighbouring curls don’t merge into one solid ringlet.
Step 5 Pin each curl while it cools
Slide the wand out downward so the curl drops into your palm as a coil. Pin it flat against your head with a sectioning clip pushed through the centre of the coil, not clamped across the root.
Heat loosens the hydrogen bonds in the hair, and they re-form as the hair cools, so whatever shape the hair cools in is the shape it keeps. Touching or brushing a warm curl lets it set straighter.
Leave the clips in until the hair feels cool all the way through, usually about ten minutes after the last section. This set-and-hold step makes the biggest difference between short-hair curls that last all day and curls that sag by noon.
Step 6 Work up through the crown
Let down the next row and repeat, working up to the crown and finishing with the face-framing pieces. Always wrap those away from your face so they open it up instead of falling into your eyes.
On a layered cut, the short crown layers run out of length first, so curl them on the narrow end of a tapered wand or on your smallest barrel and leave only about an inch of the ends out. Pin and cool the top sections exactly like the lower rows. The top layer gets handled the most during the day, so it needs the full set more than anywhere else.
Step 7 Break up and finish the curls
Once every curl is cool, take out the clips and shake the roots loose with your fingers. Then run a wide-tooth comb or your fingers through the lengths to separate the coils into soft, piecey waves. Go gently and stop sooner than you think you should: short curls loosen quickly, and you can always break them up more later but you can’t put them back.
Spray texture spray from about eight inches away and scrunch lightly. It adds grit and separation without the crunch that heavy products leave on short hair. Don’t use a bristle brush at this stage, because it splits each curl into frizz instead of waves.
Step 8 Fix flicks, kinks and drop-outs
If the ends flick outward, either the wand was tilted or the last inch got wrapped, so re-curl just that piece with the wand pointing straight down and the ends left free. Kinked roots come from starting the wrap too far down the strand or from a clip clamped across the root while the hair was still warm.
Start the wrap half an inch from the scalp and push the clip through the centre of the coil instead. Curls that fall within an hour usually mean the barrel is too big, the sections are too thick or the hair was freshly washed.
Drop a barrel size, take thinner sections and leave the pinned curls to set for longer. For hair that still won’t hold, lightly mist the pinned, cooled curls with a flexible-hold hairspray before you take the clips out. It fixes the cooled shape without making it stiff.
Common Mistakes to Avoid
- Using a 32mm wand because long-hair tutorials do: short hair only gets about one turn around it, which gives you a bend that drops within the hour.
- Taking sections wider than the barrel, so hair hangs off the end with no heat and comes out as frizzy, half-curled pieces.
- Wrapping the ends onto the barrel, which makes them flick outward or crimp instead of falling straight below the curl.
- Touching, brushing or shaking out curls while they’re still warm, before they have set into their new shape.
- Clamping a clip across the root of a warm curl, which leaves a dent at the scalp that is hard to hide.
Pro tip For a more lived-in wave than the ribbon wrap gives, twist each section into a loose rope before you wrap it, and take it a little thinner than usual so the heat still gets through. On short hair, the twist breaks the curl into piecey texture and stops neighbouring sections fusing into one solid ringlet.
The Bottom Line
Done well, a wand turns a flat bob or a growing-out pixie into soft, separated waves that last from morning to evening. The method comes down to the right barrel for your length, sections no wider than the barrel, ends left free, and a pinned set that cools completely before anything touches the curls. Once the routine is second nature, a whole head of short hair goes quickly.
On day two, refresh just the front and the crown instead of redoing everything. If your curls still drop whatever barrel or set you use, or the ends keep flicking because the cut sits on your collar, book a stylist. A little internal layering or a slightly shorter perimeter often fixes what technique alone can’t.
Frequently Asked Questions
What size curling wand is best for short hair?
A 13-25mm (1/2 to 1 inch) barrel suits most short hair. Use 13-19mm for ear-length hair or a growing-out pixie and 19-25mm for chin-length to collarbone-length cuts. A 25mm wand works better on short hair than a 32mm one, which gives a short section barely one turn and leaves a bend that drops.
What temperature should I set my curling wand to for short hair?
Keep fine or bleached hair at about 140-150°C (280-300°F) and coarse hair at 180-200°C (355-390°F). Short, thin sections heat through quickly, so you rarely need the top of the dial. Always apply a heat protectant first, and only use the wand on completely dry hair, because wet hair under a hot barrel is the one genuinely damaging mistake.
Why do my wand curls fall out within an hour?
Usually the barrel is too big, the sections are too thick, or the hair is freshly washed and slippery. Switch to a 19mm or 25mm barrel, take sections no wider than it, curl second-day hair, and pin each curl until it is completely cool. If hair still won't hold, lightly mist the pinned curls with a flexible-hold hairspray.
Can you curl a pixie cut with a curling wand?
Yes, as long as the top is long enough to wrap around the barrel at least once: roughly three inches or more on a 13mm barrel, once you leave about an inch of the ends out. Curl only the longer top and crown pieces, wrapping away from the face. Leave the short sides and nape alone, because there a wand makes a kink rather than a curl.
How long do wand curls last on short hair, and how often can I redo them?
Set properly on second-day hair, wand curls on short hair usually last through the day and often into the next morning. Instead of re-curling the whole head every day, refresh only the face-framing pieces and the crown on day two, which keeps heat exposure down. If curls never last the day, ask a stylist whether heavy, blunt weight in the cut is pulling them flat.
Keep Reading
Sources
- How to curl short hair with a wand haiirology.com