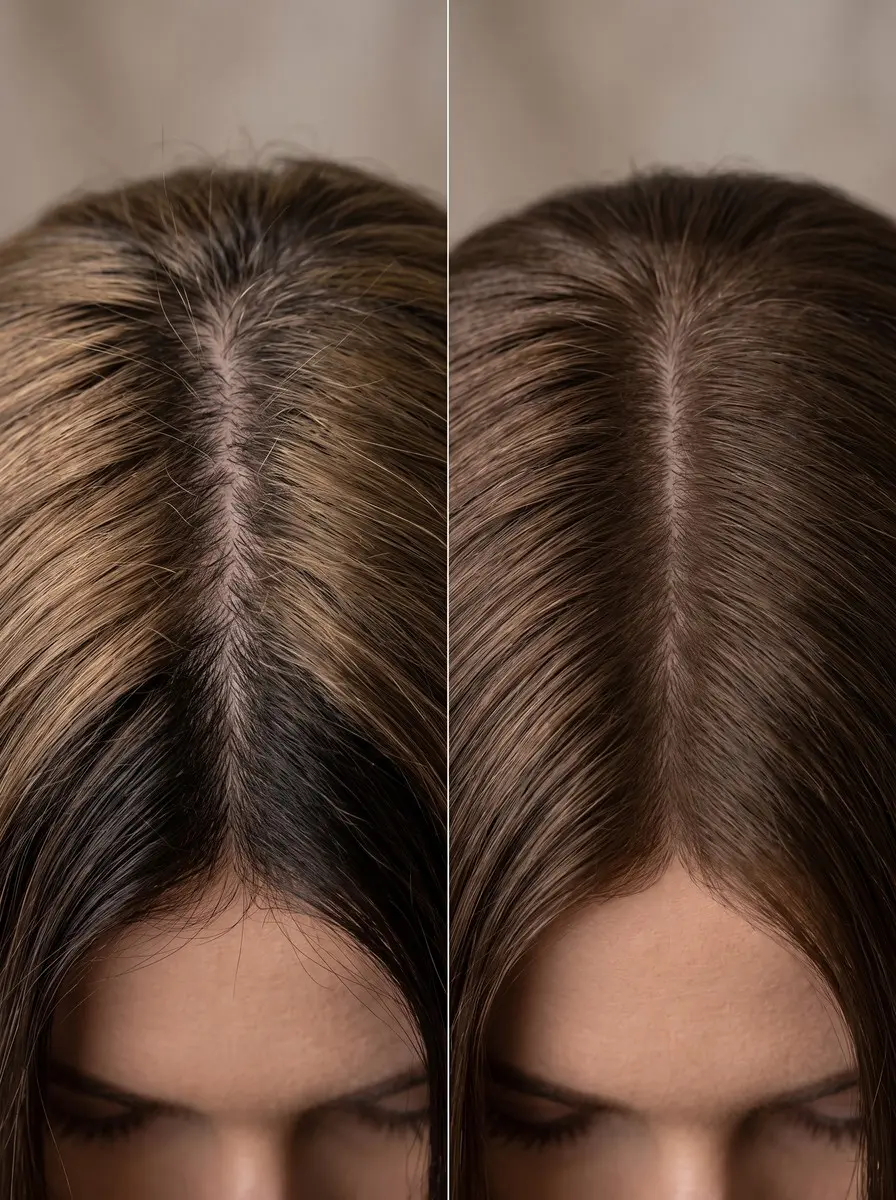
To do a root touch-up at home, section dry hair along the part, mix a shade-matched demi- or permanent color, and paint it only onto the new regrowth for the timed processing period, then rinse, condition, and blend with a blow-dry.
That stripe of regrowth along your part where your natural color meets your dyed lengths doesn’t require an emergency salon booking — a root touch-up at home genuinely can fix it in under an hour, using the same demi- or permanent color your stylist would reach for. The trick isn’t the product; it’s precision. Painting color only onto the new growth, timing the process correctly, and blending the line where old and new color meet are what separate a seamless refresh from an obvious two-tone stripe.
This guide walks through exactly how professionals limit color to the regrowth, avoid the buildup that comes from recoloring already-treated lengths, and melt away any visible demarcation line. Whether you’re covering gray, maintaining a warm brunette base, or keeping bright blonde roots from showing, the same core technique applies — section, apply, time, blend.
What You’ll Need
- Root touch-up color kit (shade-matched to your base color) — This is the product that actually deposits fresh pigment into the regrowth.
- Tint brush and non-metal mixing bowl — Lets you mix color evenly and apply it precisely to thin regrowth sections.
- Sectioning clips — Isolates the regrowth line so you don’t accidentally overlap color onto treated lengths.
- Petroleum jelly or barrier cream — Protects your hairline, ears, and neck skin from staining during application.
- Color-safe, sulfate-free conditioner — Rinses in after processing to lock in tone without stripping the fresh color.
As an Amazon Associate, HairAide earns from qualifying purchases. Some links above are affiliate links — they cost you nothing extra and help support free tutorials.
Step-by-Step
-
Section clean, dry hair into four quadrants along your natural part and comb through to expose the regrowth line clearly. Clip the top layers up and out of the way so you can see exactly where new growth meets your existing color.
-
Put on gloves and mix your root touch-up color and developer per the kit instructions in a non-metal bowl until the mixture is a uniform, streak-free consistency. Apply a thin layer of petroleum jelly along your hairline and ears first to prevent staining.
-
Using a tint brush, apply the color mixture only to the regrowth section, starting at the part and working outward in half-inch subsections. Keep application about a quarter-inch away from previously colored lengths so you avoid overlap and banding.
-
Once all regrowth is fully saturated, set a timer for the processing time listed on your product, typically 20 to 45 minutes. Check color development at the minimum time by wiping a small strand clean with a damp cotton pad.
-
Rinse thoroughly with lukewarm water until it runs completely clear, then follow with the color-safe conditioner included in your kit or a sulfate-free conditioner. This helps lock in tone and rinses away any residual color before you style your hair.
-
Gently towel-dry your hair, then blow-dry it on a low or medium heat setting while brushing through the roots to blend the new color into your existing shade. Use a round brush at the part line to soften any hard edge between old and new color.
-
Part your hair in two or three different spots and check the result under natural light for any missed patches or harsh lines. Touch up small gaps with any leftover color mixture if you’re still within the product’s processing window.
Common Mistakes to Avoid
- Applying color to the full lengths again instead of just the regrowth, which causes buildup, dullness, and uneven tone over repeated touch-ups.
- Skipping the strand-check and over-processing the regrowth, which can create a harsh, obvious line where the fresh color meets your existing shade.
- Rushing sectioning and missing thin strips near the part or behind the ears, which show up clearly in photos or bright light.
- Grabbing a different color line than your last application without checking the shade’s undertone, which can leave roots looking noticeably warmer or cooler than the lengths.
Pro Tip
In the last five minutes of processing, pull the remaining color mixture through about an inch of your previously colored hair with a wide-tooth comb — this ‘melts’ the line where old and new color meet so there’s no visible demarcation.
Frequently Asked Questions
How often should I do a root touch-up at home?
Most people need a touch-up every 3 to 6 weeks, since hair grows at a steady rate of about half an inch a month and that regrowth becomes visible against your color once the line at your part starts to stand out. Subtle, close-to-natural colors can stretch toward 6 weeks, while high-contrast looks like dark roots on platinum blonde often need attention closer to every 3 weeks because the line shows up faster, not because the hair itself grows any quicker.
Can a root touch-up kit fully cover gray hair?
Yes, as long as the kit is formulated for gray coverage and you use a permanent formula rather than demi-permanent, since permanent color deposits pigment more thoroughly on resistant gray strands. Stubborn or high-percentage gray regrowth sometimes needs a slightly longer processing time within the product's listed range, or an occasional double-process if a single application leaves it looking faded.
Does a root touch-up damage hair as much as coloring the full length?
It's generally gentler overall, since you're not re-exposing already-colored lengths to developer and pigment every few weeks, which is what causes cumulative dryness and breakage. The regrowth itself still processes with peroxide or ammonia, though, so keep application tight to the new growth and protect your hairline rather than assuming touch-ups are damage-free.
What's the difference between a drugstore root touch-up kit and salon-grade root color?
A drugstore kit is pre-mixed into one of a handful of standard shade families, while a colorist custom-blends salon color to match your exact tone, including subtle warm or cool undertones a box formula can't replicate. Box kits work well when your color is a close, simple match; noticeably lightened, multi-tonal, or color-corrected hair is where a salon-grade blend is more likely to look seamless.
Can uneven hair porosity make my root touch-up look patchy?
Yes — your regrowth is virgin hair with different porosity than lengths that have been previously colored or lightened, so the same color mixture can process differently on either side of that line. Keeping application precise to the regrowth, timing it exactly, and using the mid-process comb-through 'melt' technique helps even out how the two porosities take the color.
You Might Also Like
- 35 gray hair color ideas to inspire your next look
- embracing gray hair at every length
- caramel highlights for thin hair
Once it’s rinsed and dried, your regrowth should disappear seamlessly into your existing color, with no visible line at the part. Since you’ll be blow-drying to blend the fresh color, spritz damp hair with a heat protectant before you start — it’s a simple step that keeps the treated hair from drying out under repeated warm air.
Plan on repeating this process every 3 to 6 weeks depending on how quickly your particular regrowth line becomes noticeable. If your color has shifted brassy or uneven over several touch-ups, or you’re trying to lighten more than one or two shades, book a salon visit instead — a colorist can correct tone and lift safely in ways a box kit can’t.