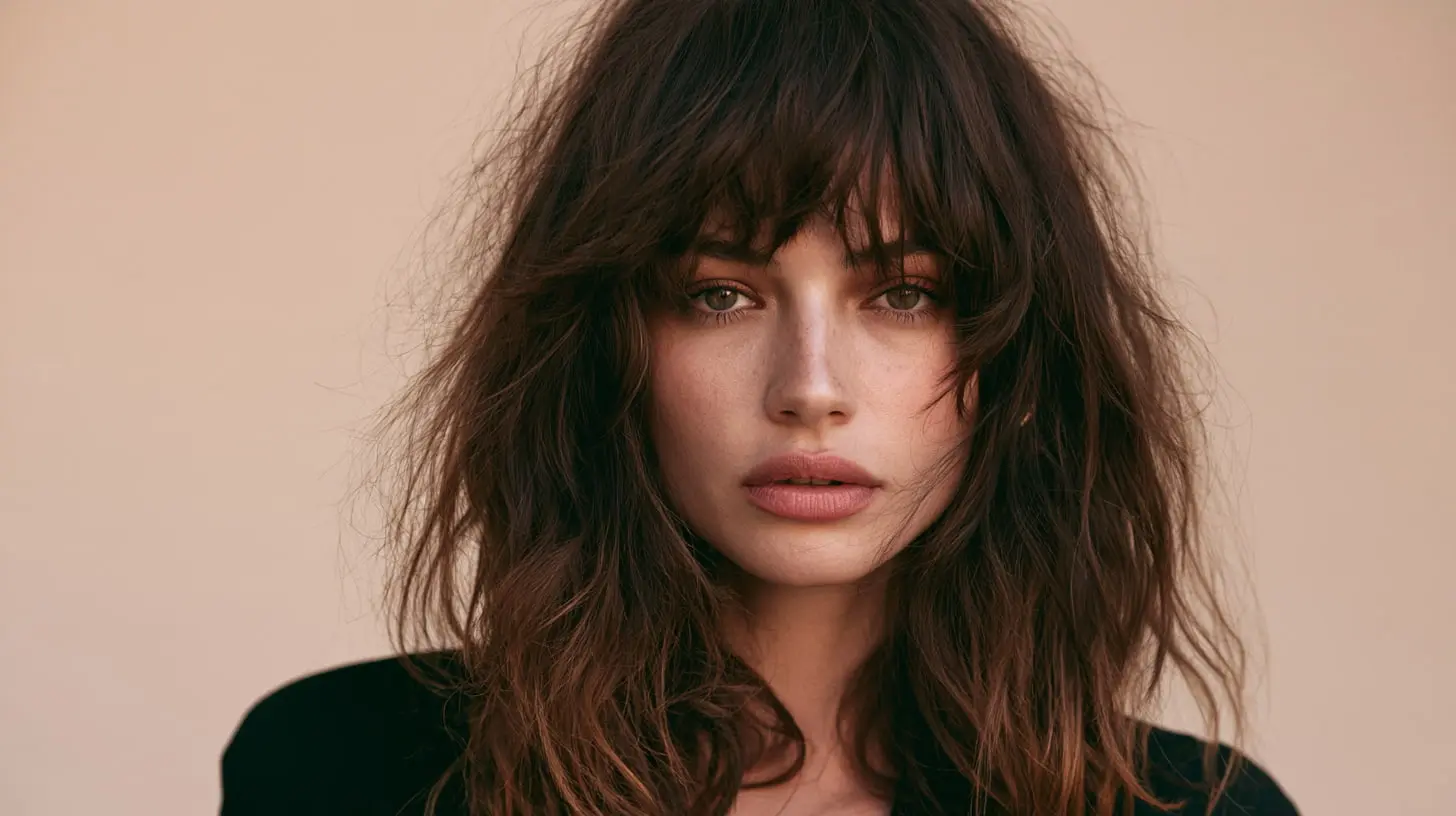
A textured fringe can transform a haircut without requiring a dramatic change in length. Unlike a perfectly blunt bang, textured fringe uses layering, separation, and natural movement to create a softer, more relaxed result. It can frame the eyes, balance facial proportions, and make even a simple haircut feel more distinctive.
The style is also highly adaptable. Fine hair can benefit from airy, piecey bangs that create visual dimension, while thick hair can be lightened with internal layering. Waves and curls naturally produce texture, and short cuts can be reshaped with a choppy or side-swept fringe.
Whether you prefer polished movement or an intentionally tousled finish, these 15 textured fringe hairstyles offer ideas for different lengths, hair types, and personal styles.
1. Wispy Textured Fringe

Hover on images and discover how pinning can transform your collection of favorites!
A wispy fringe is light, separated, and easy to wear. Fine sections fall gently across the forehead, allowing some skin to remain visible. This prevents the bangs from looking heavy and makes them suitable for people trying fringe for the first time.
Ask your stylist to create soft, feathered ends rather than a strong horizontal line. Blow-dry the fringe forward using a small round brush, then separate the strands with your fingertips. Avoid heavy oils near the roots because they can cause delicate bangs to lose their airy texture.
2. Choppy Fringe with a Shag

Hover on images and discover how pinning can transform your collection of favorites!
A layered shag and choppy fringe are natural partners. Shorter pieces at the crown connect with the irregular bangs, creating movement around the entire head. The result feels relaxed, slightly rebellious, and easy to personalize.
This hairstyle works particularly well on naturally wavy hair, although straight hair can gain texture from styling products. Apply mousse or sea-salt spray before drying, then define selected ends with a small amount of matte paste. The bangs should look intentionally uneven without appearing carelessly cut.
3. Textured Curtain Fringe

Hover on images and discover how pinning can transform your collection of favorites!
Curtain fringe parts near the center and sweeps toward the cheekbones. Adding texture makes the shape feel more casual than traditional smooth curtain bangs. Light layering through the ends helps the fringe blend naturally into the rest of the haircut.
Use a round brush to direct each side away from the face, but avoid creating too much volume. The finished result should have soft bends rather than a dramatic curl. Textured curtain fringe looks especially attractive with long layers, collarbone cuts, and shoulder-length waves.
4. Piecey Fringe with a Pixie Cut

Hover on images and discover how pinning can transform your collection of favorites!
A piecey fringe gives a pixie cut extra personality and styling flexibility. Short, separated sections can be directed forward, swept to one side, or lifted slightly for a more tousled appearance.
Ask for longer pieces through the top and front so the fringe remains versatile. Rub a pea-size amount of lightweight wax between your fingers and apply it only to selected strands. Using too much product can make short hair appear stiff or greasy, so begin with less than you think you need.
5. Curly Textured Fringe

Hover on images and discover how pinning can transform your collection of favorites!
Curly fringe frames the face while celebrating natural movement. Instead of forming one solid shape, individual curls fall at slightly different lengths across the forehead. This creates softness and prevents the bangs from feeling overly controlled.
Because curls shrink as they dry, ask a curl specialist to cut the fringe according to its natural pattern. Apply leave-in conditioner and curl gel to wet hair, then air-dry or diffuse on low heat. Refresh flattened curls with water or curl spray between wash days.
6. Razor-Cut Fringe with a Bob

Hover on images and discover how pinning can transform your collection of favorites!
A razor-cut fringe adds lightness to a structured bob. The razor creates fine, tapered ends that contrast with the stronger outline of the haircut. This combination is ideal for anyone who wants a bob that looks polished but not severe.
The fringe can sit near the eyebrows or slightly above them, depending on your face shape and styling preference. Blow-dry it from side to side before directing it forward. This technique reduces stubborn separation and encourages the bangs to fall evenly.
7. Side-Swept Textured Fringe

Hover on images and discover how pinning can transform your collection of favorites!
Side-swept fringe creates a diagonal line across the forehead, adding movement and softening angular facial features. Textured ends prevent the style from looking like one heavy section of hair.
A deep side part helps establish the direction. The fringe should gradually blend into layers near the cheekbone or jaw. Use a round brush or flat iron to create a gentle bend, then finish with flexible hairspray. This style works with short, medium, and long hair.
8. Micro Textured Fringe

Hover on images and discover how pinning can transform your collection of favorites!
Micro fringe ends well above the eyebrows, making it a bold way to highlight the eyes and upper face. A textured version features lightly irregular, feathered ends rather than a perfectly straight line.
This fringe pairs beautifully with pixies, blunt bobs, shags, and long sleek hair. Use a small brush to guide the bangs into place, then apply a tiny amount of styling cream if individual pieces need definition. Short bangs require frequent trims because even a small amount of growth can noticeably change their shape.
9. Bottleneck Fringe with Layers

Hover on images and discover how pinning can transform your collection of favorites!
Bottleneck fringe is shorter through the center and becomes longer toward the cheekbones. The curved outline resembles the neck and shoulders of a bottle, creating a flattering frame around the eyes.
Textured ends make the transition between the short and long sections appear natural. Pair the fringe with medium or long layers for a cohesive silhouette. Blow-dry the center forward and direct the longer sides away from the face. The style grows out gracefully and can eventually become curtain bangs.
10. Wavy Fringe with a Lob

Hover on images and discover how pinning can transform your collection of favorites!
A wavy fringe adds softness and personality to a long bob. Rather than straightening the bangs, allow them to follow the movement of the rest of the hair. The slight irregularity creates a relaxed, modern finish.
Apply lightweight mousse to damp hair and scrunch it gently. Diffuse or air-dry, then adjust individual sections with a small curling iron if necessary. Avoid forming identical waves throughout the fringe; variation is what makes the texture look natural. A lob ending near the collarbone keeps the hairstyle versatile.
11. Feathered Fringe with Long Hair

Hover on images and discover how pinning can transform your collection of favorites!
Feathered fringe gives long hair movement around the face without removing much overall length. Fine, tapered pieces sweep across the forehead and blend into longer layers near the temples.
This style is inspired by retro feathered hair but has a softer, more wearable finish. Use a round brush to lift the roots and turn the ends slightly away from the face. A lightweight finishing spray will preserve the shape without making the hair feel rigid. The fringe can also be pinned back easily when desired.
12. Messy Fringe with a Bixie

Hover on images and discover how pinning can transform your collection of favorites!
The bixie combines the proportions of a bob with the lightness of a pixie. A messy textured fringe completes the haircut by connecting the longer crown layers with the shorter sides and neckline.
Use texture spray to add grip, then arrange the fringe with your fingers. Some pieces can fall forward while others move slightly to the side. The style should appear effortless but still maintain a recognizable shape. Regular trims help stop the bixie from becoming bulky around the ears and nape.
13. Textured Fringe for Fine Hair

Hover on images and discover how pinning can transform your collection of favorites!
Fine hair can wear fringe successfully when the bangs are kept light and strategically layered. Taking too much hair from the crown may make the remaining lengths look thin, so a narrow fringe section is usually more flattering.
Ask for soft, piecey ends that create movement without reducing density. Dry shampoo or a lightweight volumizing powder can add lift at the roots. Blow-dry on a low setting and avoid excessive product. A layered bob, lob, or shoulder-length cut can make the entire hairstyle appear fuller.
14. Thick Textured Fringe

Hover on images and discover how pinning can transform your collection of favorites!
A thick fringe creates a strong frame around the eyes, but internal texture keeps it from looking too heavy. Small amounts of weight can be removed beneath the surface while the outer shape remains full.
The fringe may be cut at eyebrow length or slightly longer and divided into loose sections. Use a paddle brush for smoothness, then separate the ends with a small amount of styling cream. Thick bangs often benefit from regular trims and occasional thinning to maintain comfortable movement.
15. Textured Fringe with an Undercut

Hover on images and discover how pinning can transform your collection of favorites!
Pairing textured fringe with an undercut creates a bold contrast between softness and structure. The sides or nape are clipped short, while the top remains long enough to form choppy, movable bangs.
Wear the fringe forward for a dramatic effect or sweep it aside to reveal more of the undercut. Matte clay or pomade can emphasize individual sections and provide flexible hold. This hairstyle is particularly effective on thick hair because the undercut removes bulk while leaving plenty of length for styling on top.
How to Style Textured Fringe
The best styling method depends on your natural texture. Straight fringe usually benefits from blow-drying immediately after washing because bangs can dry quickly in an unwanted direction. Move the hair from side to side with a brush before directing it forward or toward the desired part.
Wavy and curly fringe often looks best when handled less. Apply lightweight curl products while the hair is damp, then avoid touching it until completely dry. Once set, separate only a few pieces to create volume.
Texture spray, mousse, dry shampoo, light wax, and flexible hairspray are useful products, but they should be applied sparingly. Start with a small amount and add more only where needed. Too much product can eliminate the natural separation that gives textured fringe its appeal.
Fringe also tends to become oily more quickly than the rest of the hair. Wash just the bangs between shampoo days or refresh the roots with dry shampoo. Keeping skincare products away from the hairline can help the fringe stay clean longer.
Choosing the Right Textured Fringe
Consider your hair pattern, density, face shape, and daily routine before selecting a fringe. Wispy and curtain styles offer a softer introduction, while micro bangs and undercut combinations create a stronger statement. Curly and wavy fringe work with natural movement, whereas razor-cut and piecey bangs add texture to straighter hair.
Bring reference photos to your appointment and discuss how the fringe will behave without styling. A good cut should complement your natural texture rather than requiring constant correction.
Textured fringe hairstyles feel modern because they embrace movement and slight imperfection. Whether paired with a shag, bob, pixie, lob, or long layers, the right fringe can bring attention to your eyes and refresh your entire haircut while still feeling personal and wearable.