Quick answer To cut your own layers at home, gather dry, smooth hair into a ponytail and pull it forward over your forehead. Slide a second tie down the tail as a straight guide, then cut below it in small passes. Point-cut the line to soften it, release, and check that both sides match.
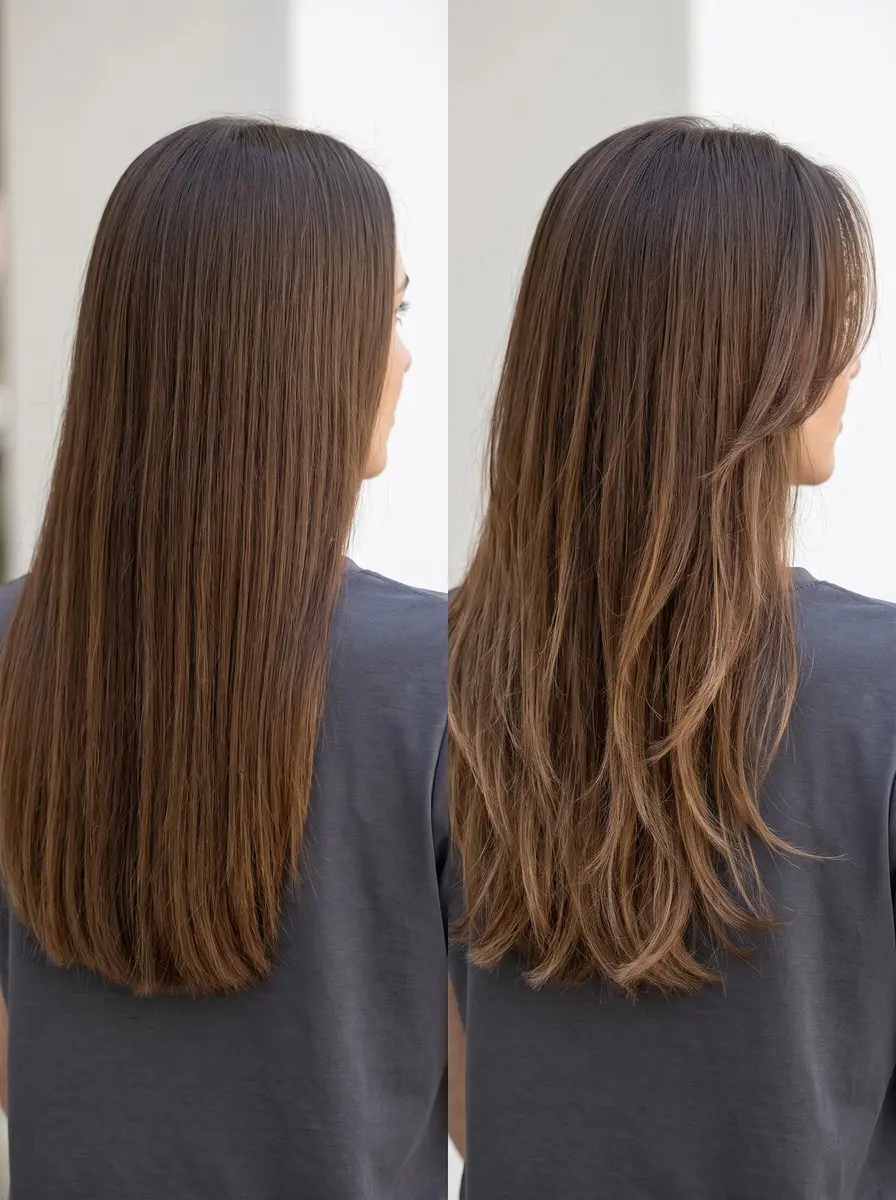
If you want to cut your own layers at home, the ponytail method is the simplest place to start. Long hair that has grown out to one heavy length tends to go flat at the crown and look dense at the ends, and layers fix that by moving weight up so the hair swings.
Salon cuts aren’t always easy to book or pay for, which is why this technique, which some people call the unicorn cut, is one of the most-searched DIY methods. You tie your hair into a ponytail, pull it forward and cut along a guide, and the hair falls into layers on its own.
It works well, but not for everyone. This guide begins with who should skip it, then covers the adjustments to plan before you pick up the shears: the extra rules for curly hair and a sectioning option for more control. After that come ponytail placement, cutting in small passes so you can always take off more, and a repair plan in case one side comes out uneven.
Time 30-45 minutesDifficulty IntermediateSteps 9
Ponytail Position and the Layered Result
| Ponytail position | Result | Good for |
|---|---|---|
| High on top of the head (crown) | Shorter, blunter, bob-like layers | Long hair wanting a bolder shape |
| Slightly forward of the crown | Long, soft layers | A first DIY cut |
| Pulled toward the forehead | Angled, shaggier layers | Long or curly hair wanting a shag feel |
| Top section only (sectioning) | Layers through the top; length kept underneath | Fine hair or more control |
What You’ll Need
As an Amazon Associate, HairAide earns from qualifying purchases. Product links in this guide are affiliate links: they cost you nothing extra and help keep these tutorials free.
- Professional hair-cutting shears Sharp, thin blades slice hair cleanly where kitchen or craft scissors crush and fray the ends.
- Snag-free seamless hair elastics You need two, one for the ponytail and one as the sliding guide, and seamless bands hold firmly without dents or breakage.
- Fine-tooth cutting comb It smooths out bumps before you tie the ponytail and keeps the tail straight for an even cut line.
- Sectioning clips They hold the lower hair out of the way for the sectioning option and keep the front pieces clipped for comparison.
- Soft measuring tape It lets you check that about an inch of hair sits below the guide band before you cut.
Step-by-Step
Step 1 Decide whether this method suits you
The ponytail method works best on long or curly hair. It produces strong, cascading layers, and long hair has the length to carry them. If your hair is above your shoulders, or you want a short layered cut such as a shag bob or a pixie, book a stylist.
Those shapes are built section by section, and a ponytail cut can’t do that. Very fine or thin hair is also a risk, because heavy layering takes away the bulk that makes ends look full. On fine hair, the sectioning option in step 4 is the safer choice.
Step 2 Gather real shears and prep dry hair
Use proper hair-cutting shears. Kitchen and craft scissors have thicker, duller blades that crush and fray the hair instead of slicing it, which leaves a choppy line and frayed ends that split sooner. You’ll also need two snag-free elastics, a fine-tooth comb, a few clips and, if you like, a soft measuring tape.
Start with clean, completely dry hair that you’ve air-dried or blow-dried smooth. Hair dries shorter than it looks when wet, so cutting it dry lets you see the real length you’re removing. You’re ready when you can comb through from root to tip without catching a knot.
Step 3 Plan for curls and shrinkage
Read this before cutting if your hair is curly or wavy. Wash and style the way you normally do and let your hair dry fully, so you can see where each curl actually sits.
Pulling curls into a ponytail stretches them, and any length you cut there will spring up shorter once it’s released. If you use the ponytail, cut about half as much as you would on straight hair and expect shrinkage.
If you’d rather see the real shape as you go, skip the ponytail and trim curl by curl, snipping each one where it naturally falls. Either way, the cut is right when the curls stack into a rounded shape with no flat or heavy shelf at the bottom.
Step 4 Choose sections for more control
Decide this before you tie anything. If you want layers to begin at a set point, such as below the chin or only through the top, use a section instead of one big ponytail.
Part a horseshoe-shaped section from temple to temple across the top of the head and clip the hair underneath out of the way. In the next steps, put only that top section into the ponytail, pull it forward and cut as described.
The layers form only in the top section, so the hair underneath keeps its length and weight. This is the better option for fine hair because it removes much less bulk, and it’s done when the layered top blends into the longer hair underneath without a visible ledge.
Step 5 Place and tie your ponytail
Where you place the ponytail decides how the layers fall. A high ponytail on top of the head, at the crown, gives a shorter, blunter, more bob-like layered result. A ponytail pulled toward the front hairline above your forehead gives a steeper, angled, shaggier finish.
Long, soft layers sit between those two, a little forward of the crown. Brush all the hair (or just your top section) up to that spot, smooth out every bump and bubble, then secure it tightly with the first elastic.
A ridge in the hair means that strand travels farther to the band than its neighbours, so it ends up cut shorter and leaves a hole in the layering. The ponytail is ready when the scalp side looks flat and smooth all the way around.
Step 6 Pull the tail forward and set the guide
Flip the ponytail forward over your forehead so it hangs in front of your face, and comb it straight down. Slide the second elastic down the tail until about an inch of hair hangs below it, keeping the band level and snug.
This band is your straight cutting guide, and without it, it’s easy to cut on a slant. If you’re using a measuring tape, check that inch before you go on.
You won’t cut all of it: the next step takes at most half an inch from the bottom of that inch, so the band stays clear of the blades. You can see your cut line clearly when the hair below the band hangs straight and centred.
Step 7 Cut a little at a time, then soften
Cut straight across, parallel to the guide band, taking no more than half an inch off the bottom of the hair that hangs below it. With the tail still bundled, you can’t yet tell how much movement the layers will have, and a second pass is easy while you can’t put length back.
Next, hold the shears vertically and snip small notches into the cut line, which is called point cutting. This breaks up the blunt edge so the layers blend instead of stepping. The line is finished when the ends of the tail look feathered and uneven in a soft way, not like a hard shelf.
Step 8 Release, shake out and check balance
Remove both elastics, shake your hair out and part it the way you normally wear it. Look in a mirror and use a hand mirror to check the back. Bring a matching strand from each side forward to your collarbones and compare where they end.
Even a well-centred ponytail can shift slightly, so small differences are normal. If the layers look too subtle, put the ponytail back in the same spot and take another quarter to half inch. You’re done when the shortest layer lands where you wanted and both front pieces end at the same point.
Step 9 Fix an uneven result or book a stylist
If one side is longer, match it to the shorter side, not the other way around. Clip the shorter side’s front piece next to the longer one and point-cut the longer piece to match in small snips.
For a choppy step between layers, point-cut deeper into that area to blend it. Don’t cut straight across, because that makes the line harder.
Stop and book a stylist if a hole shows near your face, if the layers end up shorter than your chin when you only wanted long layers, or if you’ve done three rounds of fixes and it still looks off. A professional can rebalance the shape much more easily before more length is gone.
Common Mistakes to Avoid
- Using kitchen or craft scissors, which fray the ends and leave a choppy, uneven line
- Cutting wet hair, which dries shorter than it looks, especially if it’s curly
- Leaving bumps in the ponytail, so some strands end up much shorter than the rest
- Taking off a lot in one pass instead of half an inch at a time
- Cutting the guide line straight across and stopping there, which leaves a hard shelf instead of soft, blended layers
- Trying the ponytail method on short hair or for a short layered cut it can’t build
Pro tip Before you cut, check that the guide band sits level by looking at the tail side-on in a mirror. A band tilted even slightly turns into a slanted layer once the hair is down, so straightening it is the easiest way to get an even result.
The Bottom Line
Done carefully, the ponytail method moves weight off your ends and gives long hair movement for the cost of a pair of real shears. Ponytail position decides the shape, small passes keep you safe, and point cutting softens the line so the layers blend. Refresh the cut when the shape starts to look heavy, usually every couple of months, and use the same ponytail position each time.
Book a stylist instead of doing it yourself if your hair is short, if you want a short layered cut, if your hair is very fine all over, or if a fix still looks lopsided after three careful rounds. A professional can rebalance the shape while there’s still length to work with, and you can go back to DIY refreshes once the layers are even again.
Frequently Asked Questions
Does the ponytail layer method work on fine or thin hair?
It can, but cutting the whole head this way removes a lot of bulk, and fine ends can look sparse afterward. Use the sectioning version instead, putting only the top horseshoe section in the ponytail so the hair underneath keeps its weight. Cut very little on the first pass and check the result before taking more.
Should I cut my own layers wet or dry?
Cut dry for this method. Wet hair stretches and dries shorter than it looks, so cutting it wet makes it easy to take off more than you meant to. Curly and coily hair should also be cut dry, ideally curl by curl in its natural pattern, because curls shrink far more than straight hair does.
How often should I recut my layers?
Most people refresh long layers every 8 to 12 weeks. Hair grows at about half an inch a month, so the layers gradually lose definition, the ends start to look heavy again and the face-framing pieces grow past where you wanted them. Recut when the shape looks flat, using the same ponytail position so the layers stay consistent.
Do I need to blow-dry or straighten my hair before cutting layers?
No. Air-dried hair works as long as it's completely dry and combed smooth. If you blow-dry, spray a heat protectant on damp hair first. If you smooth it with a flat iron, use the iron on completely dry hair only, at no more than about 150°C/300°F for fine or bleached hair or 180-200°C/355-390°F for coarse hair. Smooth hair means fewer ponytail bumps and a truer cut line.
What should I do if I cut my layers too short?
Stop cutting. Don't trim the rest of your hair to match the short section, because that only makes the shortest layer the new length all over. Style the area with texture so it blends in, and book a stylist to rebalance the shape. Shorter layers grow down into the rest of the hair over the following months.
Keep Reading
Sources
- Ponytail haircut method lorealparisusa.com
- Icymi the good news and the bad news about tiktoks diy ponytail shag haircut 4bbd07ce 3646 4aa5 bf15 c08847d0aa25 glamour.co.za