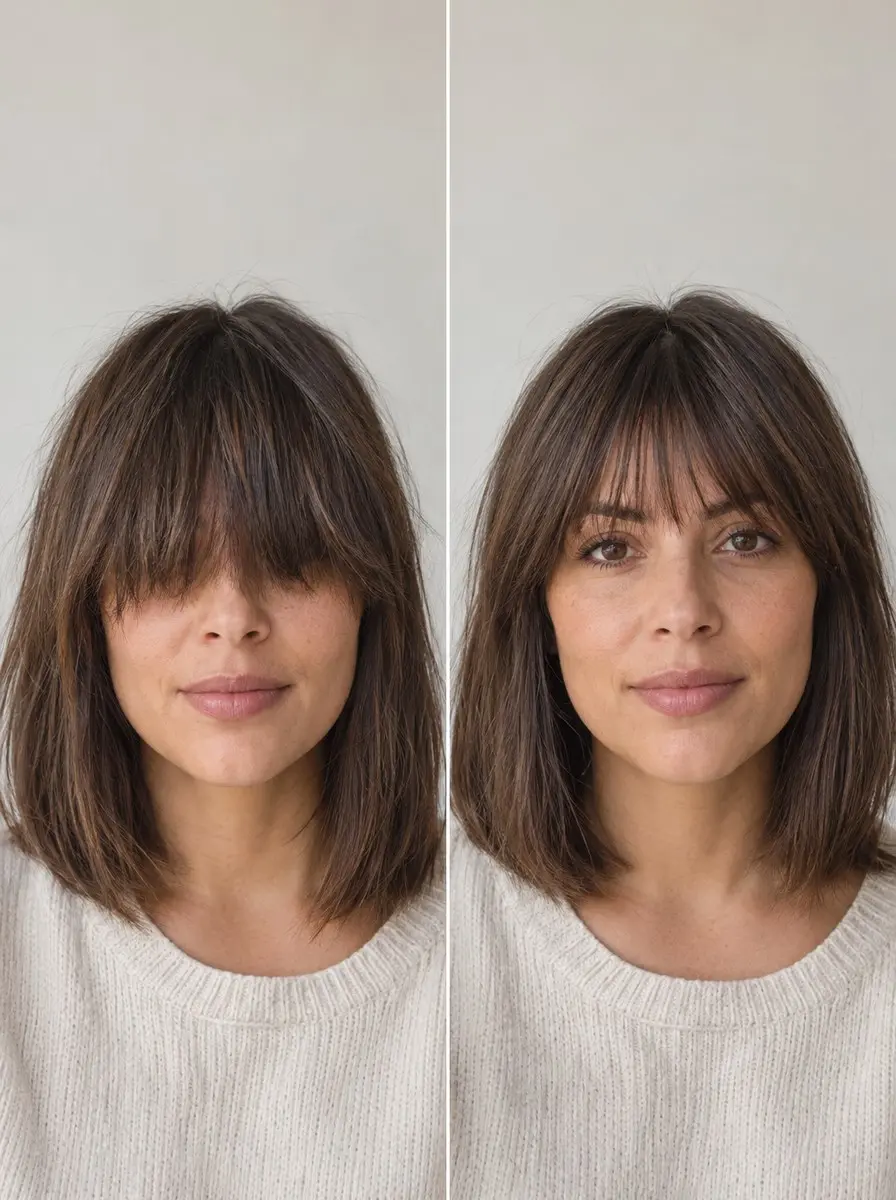
Quick answer To cut your own bangs at home, choose blunt, wispy or side-swept first, then section a triangle about iris to iris on clean, dry hair. Snip small pieces with sharp shears, leaving them longer than your goal, and point-cut the ends for a soft edge.
Overgrown bangs start poking your eyes long before the rest of your cut needs attention, and booking a salon visit just for a fringe trim can feel like overkill. Learning to cut your own bangs is tempting, but a fringe is also the easiest haircut to ruin in a few snips.
Stylists say the most common mistake is going too short, too fast, and bangs cut too wide or left lopsided at the corners are just as hard to live with.
The fix is to make your decisions before you pick up the shears. This guide starts with whether you should cut or just trim, then matches the bang type to your texture and cowlick. After that it walks through sectioning, cutting long and refining in tiny steps. Done this way, a home fringe trim is very doable, and there’s a clear checklist for when to put the scissors down and book a stylist instead.
Time 30-45 minutes, plus drying timeDifficulty IntermediateSteps 7
Bang Types at a Glance
| Bang type | Easiest on | Where to stop | Trim every |
|---|---|---|---|
| Blunt | Straight to wavy hair, no strong cowlick | At or just below the brows | 2-3 weeks |
| Wispy | Fine hair or a mild cowlick | Brow to lash level, point-cut deeper | 3-4 weeks |
| Side-swept | A cowlick you can follow | Diagonal, brow to cheekbone | 4-6 weeks |
What You’ll Need
As an Amazon Associate, HairAide earns from qualifying purchases. Product links in this guide are affiliate links: they cost you nothing extra and help keep these tutorials free.
- Hand mirror The wall mirror is for the cowlick check and the cut itself, and the hand mirror shows each side in profile so you can match the corners.
- Gentle everyday shampoo Clean hair falls naturally, while oil and leftover product make bangs clump and sit at a misleading length.
- Heat protectant spray Protects damp straight or wavy bangs from blow-dryer heat before you dry them smooth for cutting.
- Blow-dryer Dries straight or wavy bangs smooth and flat so you cut them the way they really sit (curly bangs air-dry instead).
- Fine-tooth cutting comb Combs bangs flat while blow-drying and lays each slice straight down so the cutting line stays even.
- Sectioning clips Hold the rest of your hair, temples included, firmly back so you don’t cut side pieces by accident.
- Hair-cutting shears Sharp, fine blades slice cleanly for a straight line and precise point-cutting, where kitchen scissors fold and chew the hair.
Step-by-Step
Step 1 Decide whether to trim or cut
Start by deciding which job you’re doing: trimming bangs a stylist already shaped is the safe home project, because you’re only following a line that’s already there.
Cutting brand-new bangs means choosing width, depth and shape from scratch, which is why one stylist guide recommends trimming at home only after a pro has set the shape. If you still want to cut your first bangs yourself, pick wispy or side-swept, which hide small errors far better than a blunt line.
Stop here and book a salon if you want a first-ever blunt fringe, a strong cowlick sits at the center of your hairline, your hair is curly or coily and you’ve never had curly bangs, or you’re fixing a cut that’s already too short.
Step 2 Match the bang type to your hair
With your hair dry and pushed back, look in the mirror for a cowlick, a spot at the hairline where the hair grows up or sideways instead of falling forward.
Then let your hair drop and note which way the front naturally falls, because the direction your hair spirals from the crown often decides which side your bangs want to sweep toward.
Blunt bangs are easiest on straight to wavy hair with no strong cowlick, wispy bangs are the most forgiving on fine hair or a mild cowlick, and side-swept bangs work with a cowlick by following its direction instead of fighting it. Choose your type before you cut, since each one finishes at a different length and angle.
Step 3 Prep clean, dry, smoothed hair
Wash with your usual shampoo so oil and leftover product don’t make the bangs clump, then dry them exactly the way you wear them every day. For straight or wavy bangs, blow-dry while damp, aiming the airflow down and combing the hair side to side across the hairline with the fine-tooth comb to relax any cowlick, until they’re completely dry and lying flat.
Let curly or coily bangs air-dry in their natural pattern instead, since that’s the shape you’ll be cutting. Never cut bangs wet: wet hair stretches, so a line cut at the brows can dry noticeably shorter, and curly or wavy hair shrinks even more.
Step 4 Section the bangs iris to iris
Part a triangle at the front of your head with its point set back where the top of your head starts to curve down, and its two front corners lined up with your irises when you look straight ahead.
Iris to iris is the width one stylist guide uses for a starting fringe. Comb that section forward and clip everything else firmly back with sectioning clips, including the hair at your temples, so you can’t snip side pieces by accident.
Starting narrow matters because a fringe that’s too wide can’t be undone until it grows out, while a narrow one can be widened next week. If you’re trimming existing bangs, simply follow the edges of the section your stylist already cut.
Step 5 Cut long in small sections
Take a one-inch-wide slice from the center of the section, comb it straight down and hold it between two fingers with slight tension, pulled low toward the tip of your nose, because keeping the hair low stops you from accidentally layering the fringe.
Cut straight across with sharp hair shears about half an inch longer than where you want the bangs to land, then repeat on the slices to the left and right, matching each one to the center.
Work up toward your goal in tiny passes of about an eighth of an inch, since you can always take more off but can never put length back.
Stop blunt bangs at or just below the brows and wispy bangs at brow to lash level; for side-swept, comb the section toward the side it will fall and cut a gentle diagonal running from brow level down to the cheekbone. On curly bangs, drop the tension and cut curl by curl, leaving extra length, because removing weight lets curls spring up tighter.
Step 6 Point-cut for a soft edge
Once the length is right, soften the line by holding the shears vertically and snipping tiny notches into the ends of each small slice. Keep the snips shallow on blunt bangs so the fringe still reads as a solid line, and go a little deeper on wispy bangs to create a see-through, piecey finish.
Point-cutting works because it breaks up a hard horizontal edge, so small unevenness disappears and the bangs move instead of sitting like a shelf. Leave the outer corners a touch longer than the center, which lets the fringe curve gently into the face-framing pieces rather than ending in a sharp step.
Step 7 Check from the front and side
Unclip the rest of your hair, shake your head and let the bangs settle, then push them around with your fingers so they fall the way they will during the day.
Check the line straight on, then use a hand mirror to look at each side in profile: the corners should match in length and both should blend into the side hair. If one corner is longer, take only that side up a sliver at a time and check after every snip, instead of evening out both sides back and forth.
Before you take off any more length, wear the bangs for a day, since a fringe often sits differently after normal styling and a night’s sleep.
Common Mistakes to Avoid
- Cutting too short, too fast, which is the most common bang mistake. The only real fix is time, since hair grows about half an inch a month, so sweep the bangs to the side or push them back while they grow and resist trimming the sides to match.
- Making the bangs too wide, with the section creeping toward the temples. Don’t narrow them by cutting the outer pieces shorter. Leave the extra width longer, blend it into face-framing pieces or sweep it to the sides until it grows out.
- Uneven corners from cutting each side separately. Fix only the longer side, a sliver at a time, and check from the front after every snip, because chasing both sides back and forth is how bangs end up too short.
- Using kitchen or craft scissors. Their thicker, duller blades fold and chew hair instead of slicing it, leaving a ragged line and frayed ends, so use real hair-cutting shears kept only for hair.
- Cutting bangs wet. Wet hair stretches, so the fringe dries shorter than you cut it. Always cut on clean hair that’s completely dry and styled the way you wear it.
Pro tip On the final pass, let the bangs fall naturally and cut with almost no tension, especially over a cowlick. Tension stretches the hair and pulls it flat against the cowlick, so a line cut under tension springs up shorter than you cut it.
The Bottom Line
Done slowly, a home bang cut gives you a fringe that sits right on clean, dry hair, with a soft point-cut edge and corners that match from every angle. The real secret is restraint: cut long, check, and only then take the next sliver.
Keep the shape with small trims on the schedule that fits your bang type, removing only what has grown since last time. If the line keeps going crooked, a cowlick fights every cut, or you want a new shape altogether, book a stylist to reset it. Then go back to maintaining it at home between appointments.
Frequently Asked Questions
Should I wash and blow-dry my bangs before cutting them?
Yes. Wash first, because oil and leftover product make bangs clump, then dry them completely: wet hair stretches, so bangs cut wet dry shorter than you intended. Mist straight or wavy bangs with a heat protectant and blow-dry them while damp, aiming the air down and moving them side to side to relax any cowlick. Let curly or coily bangs air-dry in their natural pattern.
How often should I trim my bangs?
Blunt bangs usually need a trim every 2-3 weeks, wispy bangs every 3-4 weeks and side-swept bangs every 4-6 weeks. Hair grows at a steady half inch a month whatever the cut. A blunt line just shows it soonest by dropping into your lashes, while a soft or angled fringe loses its shape more gradually. Each time, take off only what has grown, a sliver at a time.
Can I cut my own bangs if I have a cowlick?
Yes, as long as you work with it. Side-swept bangs that follow the cowlick's direction are the easiest choice, and leaving any fringe a little longer often lets its weight help it lie flat. Cut the final pass with almost no tension so the hair doesn't spring up shorter than your line. A strong cowlick at the center of the hairline is worth a stylist's first cut.
What should I do if I cut my bangs too short?
Don't trim the sides to match, because that only makes the whole fringe shorter. Sweep the bangs to one side or push them back while they grow, at about half an inch a month, and ask a stylist to soften a harsh line with point-cutting if it bothers you. Once they reach your brows again, you can reshape them.
When should I see a stylist instead of cutting my own bangs?
Book a stylist if any of these apply: it's your first-ever fringe and you want it blunt, a strong cowlick sits at the center of your hairline, your hair is curly or coily and you've never worn curly bangs, or you're fixing bangs that are already too short or crooked. A pro sets the shape once, and keeping it trimmed at home afterward is far easier.
Keep Reading
Sources
- Trim bangs marieclaire.com
- How to trim your own bangs at home step by step fashionmagazine.com