Quick answer To do a bantu knot out, part clean, damp hair into sections with a rattail comb, apply a leave-in and a medium-hold styler, two-strand twist each section, coil it into a tucked, pinned knot, let it dry completely, then unwind from the root and separate. Smaller sections give tighter curls.
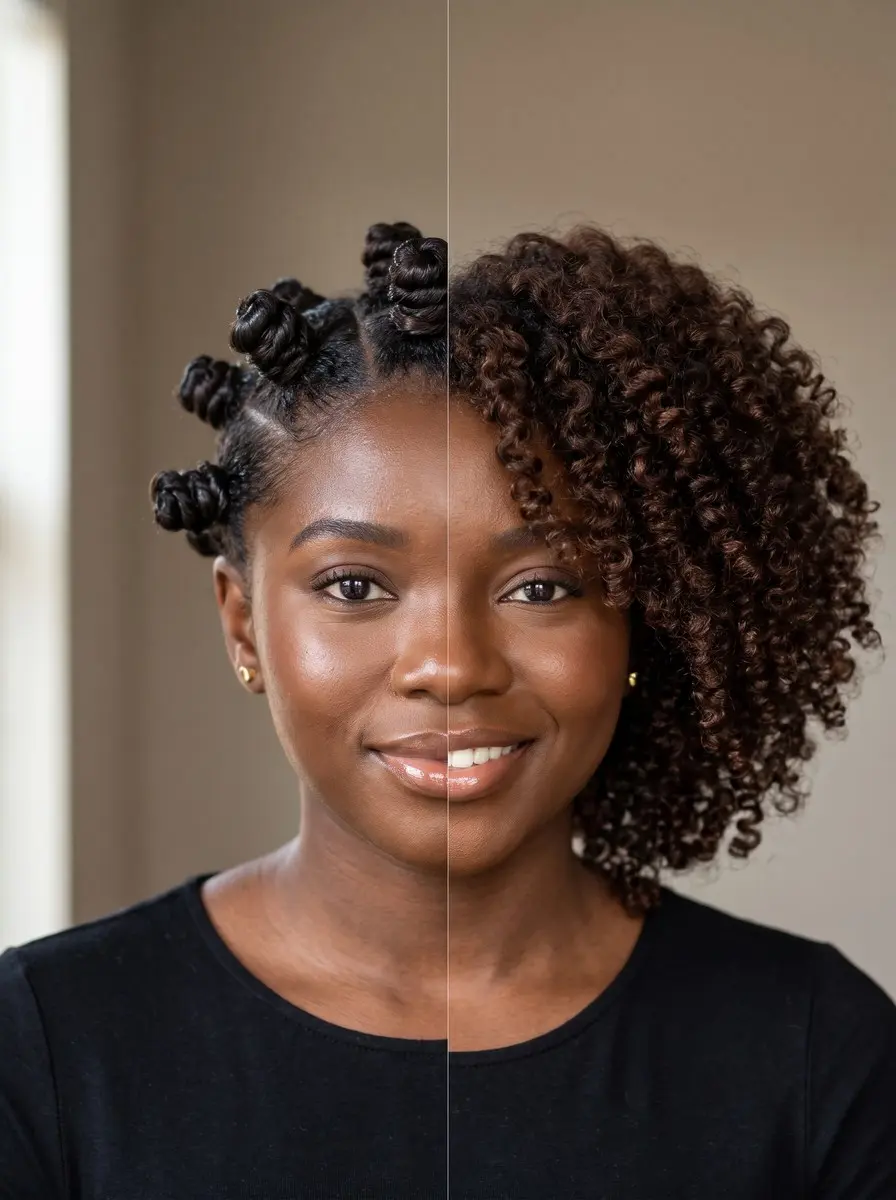
Bantu knots pull double duty. Worn as they are, the neat coiled knots are a protective style that keeps your ends tucked away. Taken down, they open into a bantu knot out: a full head of springy, defined curls with no curling iron involved. The style is also called Zulu or Nubian knots and takes its name from the Bantu-speaking peoples of southern Africa. It works on any hair long enough to twist.
A defined knot out and a frizzy one differ in three things: how big you make your sections, how much product goes in, and whether every knot is truly dry before you touch it. This guide covers all three.
Then it shows you how to unravel without frizz, refresh the curls for days, and take the knots down before they strain your edges. You need a rattail comb, a few pins and some patience, not a salon chair.
Time 1-2 hours to install, plus overnight dryingDifficulty BeginnerSteps 9
Bantu Knot Section Size and the Curl It Gives
| Section size | Hair length | Result |
|---|---|---|
| About 1/2 inch | Short hair | Tight, springy curls |
| 1 to 2 inches | Shoulder-length hair | Bouncy, medium curls |
| 3 to 4 inches | Long hair | Looser waves |
What You’ll Need
As an Amazon Associate, HairAide earns from qualifying purchases. Product links in this guide are affiliate links: they cost you nothing extra and help keep these tutorials free.
- Rattail comb Its fine tail makes clean, even parts, and part size is how you control the knot size and the final curl.
- Leave-in conditioner It softens and detangles damp hair so each twist goes in smooth and the knot out doesn’t feel dry or brittle.
- Medium-hold curl cream or setting foam It gives the set enough hold to last several days without the crunchy cast of a strong gel.
- Silk scarf or satin bonnet It lets you dry the knots overnight and protects the knot out from pillow friction on the nights after.
- Lightweight hair oil A drop on your fingertips stops frizz while you unravel, and a light layer on the lengths adds shine.
Step-by-Step
Step 1 Start on clean, damp hair
Wash and condition as usual. Detangle thoroughly with a wide-tooth comb or your fingers, then work a leave-in conditioner through hair that is damp rather than dripping. Damp hair takes the shape you set and holds it as it dries. Soaking-wet knots can take a day or more to dry through, and fully dry hair gives a softer, less defined set.
Detangle now because any tangle left in a section gets locked into the twist and shows up as a frizzy patch later. You are ready when a comb glides from root to tip and the hair feels damp but no longer drips.
Step 2 Part sections to match your curl
Use the tail of a rattail comb to part hair into squares or triangles. Clip the rest out of the way so you work one section at a time. Section size is the main way you control the result: small knots give tight, springy curls, and fewer, larger knots give looser waves.
As a guide, make sections about 1/2 inch across for short hair, roughly 1 to 2 inches for shoulder-length hair and 3 to 4 inches for long hair. Keep the sizes the same across your head, because mixed sizes unravel into a mix of curl patterns.
Step 3 Smooth on a medium-hold styler
Just before you twist each section, rake a medium-hold curl cream or setting foam through it from root to ends. Smooth it down with your fingers so every strand is coated. A medium hold lets the curl last several days without the hard, crunchy cast a strong gel leaves behind.
Start with a pea-sized amount for small sections and up to a fingertip’s worth for large ones. Add more only if the ends still feel rough, because too much product weighs the curl down, flakes and slows drying. If a section has dried out while you worked, mist it with water first so the styler spreads evenly.
Step 4 Two-strand twist each section
Split the section into two equal halves and twist them around each other from the root to the ends, keeping an even grip. Twisting first builds a defined pattern into each knot, so when you unravel later you get a spiral curl rather than a loose bend.
Hold firmly enough for a smooth twist, but ease off right at the root. Pulling there is what makes the scalp sore and strains the hairline. Finish by smoothing the last inch between your fingers so the ends lie flat instead of fraying.
Step 5 Coil and tuck into a knot
Wrap the twist around its own base in the same direction you twisted it. Keep coiling until the whole length sits in a flat, compact knot against the scalp. Tuck the ends underneath, then secure the knot with a bobby pin or a small snag-free elastic so it can’t unwind as it dries.
Coiling in the same direction tightens the twist instead of loosening it, which keeps the knot firm and the finished curl even. The knot should feel snug but never tight. If it pulls at the scalp or puckers the skin around the base, undo it and coil a little more loosely, especially along your edges.
Step 6 Dry every knot completely
Leave the knots alone until they are dry all the way through. You can air dry, sit under a hooded dryer, or sleep on them under a silk scarf and take them down in the morning.
The inside of each coil dries last. If you unravel while it is still damp, the curl comes out soft and undefined, then turns frizzy within hours. Air drying can take overnight or longer for thick hair or large sections, so set your knots the evening before you want to wear the knot out.
To check, press into the center of your largest knot, usually at the crown or nape. If it feels cool or slightly damp, give it more time.
Step 7 Unravel from the root and separate
Rub a drop of light oil between your fingertips and remove the pin. Starting at the base of the knot, slowly unwind it in the opposite direction to how you coiled it. Once the knot is open, untwist the two strands to reveal the curl.
For more fullness, gently split each twist into two or three pieces. Oiled fingertips glide over the curl instead of catching on it, which keeps the pattern intact and stops frizz before it starts. Work slowly and don’t pull the curls straight, because stretching them now loosens the definition the set just built.
Step 8 Fluff the roots and finish
Lift the roots with your fingers or a wide-tooth pick, gently shaking the hair to fill in the parts and hide the section lines. Keep the pick at the roots only, because combing through the lengths breaks the curls apart into frizz.
Finish with a light oil or shine spray on the lengths. Use just enough to take away any dryness, because a heavy layer weighs the curl down and flattens the volume. For a defined look, stop separating early. For maximum volume, keep separating and fluffing until no parts show.
Step 9 Protect and refresh the knot out
At night, gather your hair into a loose pineapple on top of your head or re-twist it into four to six large knots. Cover it with a silk scarf or satin bonnet so the curls aren’t crushed against the pillow.
In the morning, mist lightly with water, smooth a little styler over any flat or frizzy spots and fluff the roots again.
Re-knotting dry hair in bigger sections revives the curl without a full reset, because the hair is just being guided back into the shape it already holds. When a refresh no longer brings the curl back, usually after several days, it is time for wash day and a fresh set.
Common Mistakes to Avoid
- Unraveling before every knot is completely dry, which leaves the curl limp, then frizzy within hours
- Using a strong-hold gel or piling on product, which makes the knot out crunchy and flaky and slows drying
- Coiling the knots tight at the root or along the hairline, which strains the edges and makes the scalp sore
- Combing or brushing through the finished curls instead of fluffing only at the roots
- Separating the curls with dry fingers, which catch on the pattern and cause frizz
Pro tip Unravel from the back of your head toward the front, and leave the hairline for last. The back is where you learn how much to separate your curl, so by the time you reach the front, the part everyone sees, your fingers know when to stop.
The Bottom Line
Once you have the rhythm, a bantu knot set takes an evening and pays you back twice: a protective style for as long as you wear the knots, then days of springy, defined curls once you take them down. The two habits that matter most are the simplest: size your sections for the curl you want, and never unravel a knot that isn’t completely dry.
At night, keep the set going with a pineapple or a few big knots under a silk scarf, and start fresh on wash day once the pattern stops bouncing back. If your scalp stays sore, your edges look thinner, or your ends snap as you twist, take a break from tension styles. See a stylist or dermatologist experienced with textured hair.
Frequently Asked Questions
How long can you keep bantu knots in?
L'Oréal says bantu knots can stay in for up to two weeks when you wear them as a protective style, though many people set them overnight and take them down the next morning. Take them out sooner if your scalp itches or feels sore, if small bumps appear along the hairline, or if the knots tug at the roots. Constant tension can damage the edges over time.
How long does a bantu knot out last?
A bantu knot out usually holds for several days. It lasts longer if you protect it at night under a silk scarf or satin bonnet and refresh it with a light mist of water and a little styler. Humidity, sweat and too much touching make the pattern drop fastest. When a refresh no longer brings the curl back, wash and set again.
Can you do bantu knots on straight or fine hair?
Yes. Bantu knots work as a heatless curl method on straight, wavy and fine hair as well as coily hair. The result is usually a soft bend or loose wave rather than a tight spiral. Use smaller sections and a setting foam with a little more hold, because straight hair has less natural texture to keep the shape. Make sure it's completely dry before unraveling.
Can I use a dryer to make bantu knots dry faster?
Yes. A hooded dryer, bonnet dryer or diffuser on low-to-medium heat dries damp knots faster and reliably reaches the centers of large ones. Apply a heat protectant with your styler and let the knots cool before you unravel. If you later touch up a curl with a curling iron, use it on completely dry hair only, at up to 150°C/300°F for fine or bleached hair or 180-200°C/355-390°F for coarse hair.
Why is my bantu knot out frizzy or crunchy?
Frizz usually means the knots came down before they were fully dry, the hair wasn't fully detangled, or the curls were separated with dry fingers. Crunchiness comes from too much product or a strong-hold gel. Next time, use a medium-hold styler in small amounts, let the centers dry fully, and unravel with lightly oiled fingertips.
Keep Reading
Sources
- 135495495 how to create bantu knots bantu knot outs perfectlocks.com
- Natural hair must try bantu knot out 888 ebony.com
- Bantu knots how to lorealparisusa.com