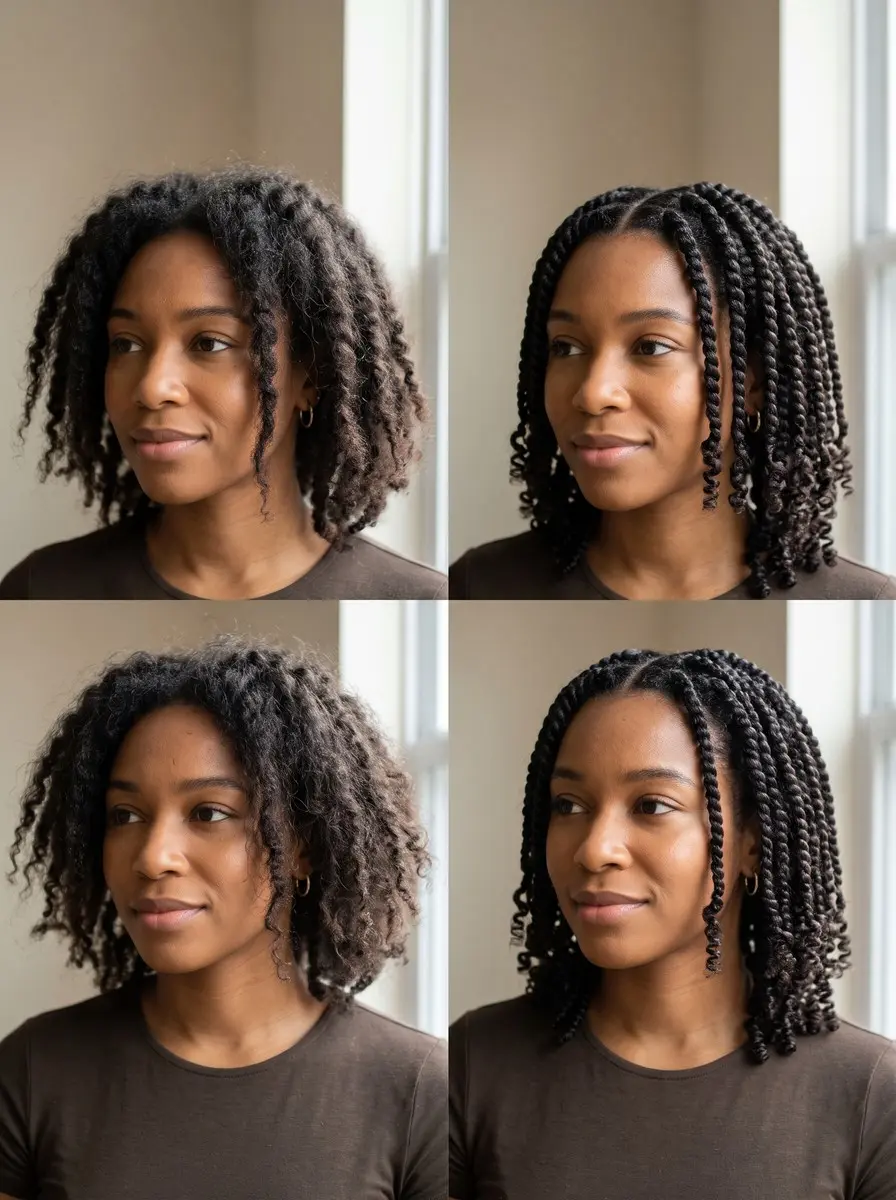
Quick answer To keep twists from unraveling, twist on damp hair in small sections, layer a leave-in or cream under a small amount of strong-hold gel, twist each strand one way and wrap the pair the other, then coil the ends and sleep in a satin bonnet.
If you’ve ever wondered how to keep twists from unraveling, you know the pattern: you spend an afternoon on a fresh set of two-strand twists, and by day three the ends have puffed open, the middles have gone slack and half your head looks like it needs redoing.
It’s one of the most common frustrations with twists, and it’s rarely bad luck. Twists come undone for a handful of specific reasons: hair that was too wet or too dry, too little hold, sections that are too big, slippery ends, or strands wrapped in the wrong direction.
The good news is that each cause leaves a clue, and each has a fix you can do at home with a spray bottle, a leave-in, a gel and some patience. Below, you’ll learn to read where your twists give way first, then install a set that stays neat for one to three weeks.
Time 2-5 hours for a full head, depending on length, density and twist sizeDifficulty BeginnerSteps 7
Why Twists Unravel and the Fix
| Where it fails | Likely cause | Fix |
|---|---|---|
| Ends puff open | Slippery, unsealed ends | Coil or rod the ends |
| Mid-lengths go slack | Too little hold | Leave-in, then gel |
| Big twists loosen | Sections too large | Smaller sections |
| Springs loose on release | Twisted and wrapped same way | Twist one way, wrap the other |
| Fuzzy all over | Hair too dry when twisted | Damp hair, more moisture |
| Frays overnight | Pillow friction | Pin up, satin bonnet |
What You’ll Need
As an Amazon Associate, HairAide earns from qualifying purchases. Product links in this guide are affiliate links: they cost you nothing extra and help keep these tutorials free.
- Leave-in conditioner or twisting cream Softens and moisturizes each section so the strands wrap smoothly and coarse hair doesn’t frizz apart.
- Strong-hold styling gel Grips the strands in place as they dry, the main fix for twists that go slack, especially on fine or slippery hair.
- Continuous-mist spray bottle Keeps every section evenly damp as you work, so hair that dries mid-install doesn’t fuzz or resist product.
- Flexi-rods or perm rods Hold each end in a closed coil while it dries, a common way to seal ends that keep slipping.
- Satin bonnet Cuts pillow friction overnight so twists keep their shape and the ends stay coiled.
Step-by-Step
Step 1 Diagnose your twists and your hair
Before you change anything, look at your last set and note where each twist opened first, because that spot points to the cause: puffed-open ends mean slippery, unsealed ends, slack mid-lengths mean too little hold, big twists loosening all over mean the sections were too large, and twists that spring loose on release were twisted and wrapped in the same direction.
Fuzz all over usually means the hair was too dry when you twisted, while fraying that only shows up after a night’s sleep comes down to pillow friction.
Next, roll a single shed strand between your fingers: if you can barely feel it, your hair is fine and needs more hold from a firmer gel, smaller sections and extra care at the ends, because fine or slippery strands have little natural grip.
If it feels thick and wiry, your hair is coarse and needs more moisture from a richer leave-in or cream before the gel goes on, since dry, stiff strands frizz and push apart. Match your symptom and your texture to the steps below so you fix the real problem instead of just adding more product.
Step 2 Start on damp, not soaked, hair
Twist on hair that’s evenly damp, wet enough to feel cool and pliable but not dripping. Soaked hair dilutes your products and takes hours to dry, so the hold sets weakly, while bone-dry hair won’t take product evenly and its strands snag and fuzz instead of lying smoothly against each other.
Detangle thoroughly in a few large sections first, since a tangle trapped mid-twist makes the two strands uneven and leaves a weak spot where the twist can open. If you’re twisting a day or two after washing, or your hair dries while you work, mist each section with water as you go until it feels uniformly damp again.
Step 3 Work in smaller sections
Part your hair into smaller sections than you think you need, especially if your hair is fine or slippery. Smaller twists hold better and give more definition than large, loose ones, because a thin twist packs more wraps into every inch, and each wrap is another point of friction holding the strands together.
Big chunky twists are faster to install, but their few wide wraps slacken quickly and tend to open at the ends.
Keep your parts clean and roughly even so every twist carries a similar amount of hair and you won’t have a few heavy twists unraveling ahead of the rest. Unclip one small section at a time and carry it through the next three steps, so it stays damp and gets its product just before you twist it.
Step 4 Layer leave-in first, then gel
Smooth a leave-in conditioner or twisting cream through each section from roots to ends, so the strands are soft, moisturized and easy to wrap. Then add a strong-hold gel from about an inch above the roots down through the lengths, using only a small amount.
The cream gives moisture and slip, while the gel coats the strands and grips them in place as they dry, which is what stops a twist from loosening.
Keeping gel off the scalp and using it sparingly prevents the white flakes that show up when too much product sits at the roots; the section is ready when it feels smooth and lightly tacky, not crunchy or dripping.
Step 5 Twist one way, wrap the other
Split each section into two equal strands and twist each one on its own in the same direction, for example clockwise. Then wrap the two strands around each other in the opposite direction, counterclockwise, all the way down. It’s the same principle that holds rope together: each strand wants to unwind, and because the wrap runs the opposite way, that pull tightens the wrap instead of undoing it.
If you twist and wrap in the same direction, the strands tend to spring loose as soon as you let go, so the cue that you’ve done it right is a twist that stays wound when you release the end.
Step 6 Seal the ends
Ends are the thinnest, oldest part of each strand, so they have the least grip and are usually where twists unravel first. When you reach the bottom, coil the last inch or two around your finger, or wrap the end around a flexi-rod or perm rod and leave it until it’s completely dry.
The coil gives the end a curl that sits against itself instead of a loose tail that can slip apart. Sealing ends this way is common practice rather than a guarantee, and fine or slippery hair may still need a touch more gel on the last inch to stay closed.
Step 7 Protect them at night
Before bed, pin longer twists up or gather them loosely so the ends aren’t rubbing against the pillow, then cover everything with a satin bonnet. A cotton pillowcase creates friction that frizzes twists and catches the ends, while satin lets them glide, so the set keeps its shape and the ends stay coiled.
In the morning, mist any twist that has loosened with water and a little leave-in and rewrap it before it unwinds further. If you’ve already taken your twists down into a twist-out, re-twist it into six to eight large twists along your natural part lines before the bonnet goes on.
With this routine a set should look neat for one to three weeks, but take it down by six to eight weeks at most, because trapped shed hair and product buildup raise the odds of matting.
Common Mistakes to Avoid
- Twisting soaking-wet hair, which dilutes your products and takes hours to dry, or bone-dry hair, which snags and fuzzes.
- Piling gel onto the roots or using a big handful instead of a small amount starting about an inch above the scalp, which leads to white flakes.
- Twisting each strand and wrapping the pair in the same direction, so the twist springs loose the moment you let go.
- Making large, chunky sections on fine or slippery hair to save time, then redoing half of them by day three.
- Sleeping without pinning the twists up or covering them with a satin bonnet, so a cotton pillowcase frizzes the set overnight.
- Leaving a set in longer than six to eight weeks, which invites matting and tangles at takedown.
Pro tip Split every section into two truly equal halves and keep the same tension on both as you wrap. When one strand is thicker or held tighter, the other just spirals around it like a ribbon on a pole and slides loose at the end, and that’s behind a lot of twists that unravel from one side.
The Bottom Line
Twists that stay put come down to a few consistent habits: start on damp hair, keep sections small, layer a leave-in under a small amount of gel, twist each strand one way and wrap them the other, seal the ends and protect the set at night. Fix whichever step your old twists pointed to and you should get one to three weeks of neat wear.
Take the set down by six to eight weeks at most: unravel each twist gently, detangle with plenty of slip, then wash and deep condition before you reinstall. See a stylist if your twists still unravel after these fixes, if takedown keeps leaving mats, or if you notice soreness, bumps or thinning at your edges, which can mean they were installed too tightly.
Frequently Asked Questions
How long do two-strand twists last before they unravel?
A well-installed set of two-strand twists usually looks neat for one to three weeks, with some frizz at the roots and ends showing as the days go on. You can refresh single twists that slip, but don't leave a set in longer than six to eight weeks, because trapped shed hair and product buildup raise the risk of matting at takedown.
Why do my twists keep unraveling at the ends?
Ends are the thinnest, oldest and often driest part of each strand, so they have the least grip and slip apart first. Coiling the last inch around your finger, or setting it on a flexi-rod or perm rod until it dries, is common practice for sealing them, though it isn't a guarantee. Fine or slippery hair often needs a little extra gel there too.
Should I twist my hair wet or dry?
Twist on damp hair, not soaking wet and not bone-dry. Soaked hair dilutes your products and dries slowly, which weakens the hold, while dry hair won't take product evenly and tends to snag and frizz. If you're twisting a day or two after washing, or your hair dries partway through, mist each section with water as you go.
Can I fix a few unraveled twists without redoing my whole head?
Yes. Undo only the twists that have loosened, mist each one with water until it's damp, smooth on a little leave-in and a small amount of gel, then re-twist with each strand twisted one way and the pair wrapped the other. Seal the end with a finger coil or a rod and let it dry fully before you sleep on it.
Why do my twists flake, and how do I stop it?
Flaking usually comes from using too much gel or applying it right at the scalp. Put your leave-in or cream on first, then add a small amount of gel starting about an inch above the roots and working through the lengths. If old product has built up, wash or clarify before your next install rather than layering more on top.
Keep Reading
Sources
- How to your twist out last long lorealparisusa.com