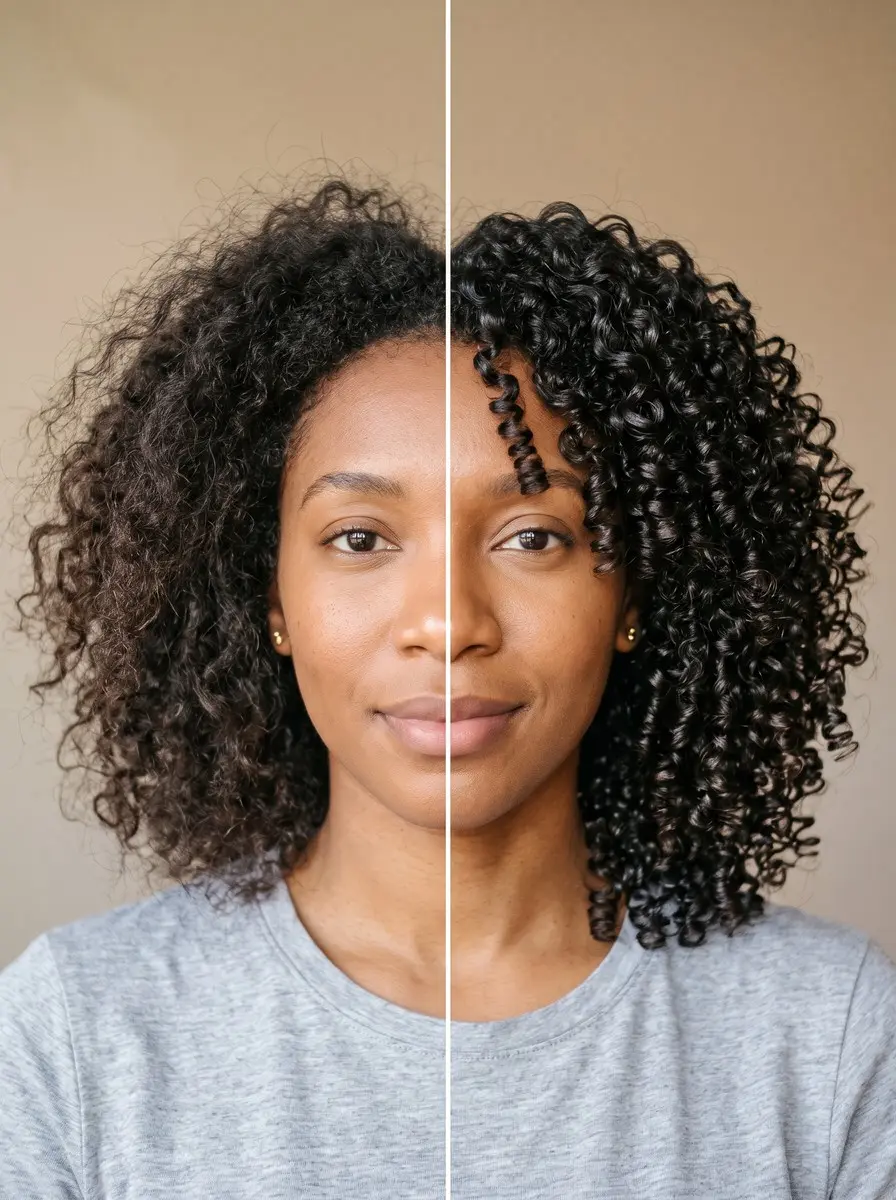
Quick answer To squish to condish, coat soaking-wet hair in conditioner until it feels slippery, detangle, then cup water into each section and scrunch upward up to about three times until curls clump. Leave the conditioner in or rinse lightly, apply gel to dripping-wet hair, and don't touch until dry.
If your curls look defined in the shower and then dry into a frizzy, separated halo, the problem often starts at the conditioning step.
Squish to condish, a technique developed by Melissa Stites, adds water and scrunching to the moment you condition: instead of rinsing conditioner straight out, you cup water into your hair and squish it upward until the strands feel like slippery seaweed and gather into thick clumps. Bigger clumps mean fewer stray strands left to frizz.
This guide covers the details most tutorials skip: how much conditioner to use for your density, what slippery actually feels like, how many squishes each section needs, how much to rinse, and how to apply gel so the clumps hold as they dry. You need only a conditioner, a gel and your shower, and the technique adds roughly five to ten minutes to a normal wash day.
Time 15-25 minutes, plus drying timeDifficulty BeginnerSteps 9
Squish to Condish Conditioner Amount and Rinse by Hair Type
| Hair type | Conditioner | After squishing |
|---|---|---|
| Fine or low-porosity | Quarter-size, lightweight | Rinse most of it out |
| Medium-density waves or curls | About a palmful | Quick partial rinse |
| Thick or high-porosity | Generous palmful or more | Leave most of it in |
| Coily or very dry | Generous palmful or more | Leave it in, add a leave-in |
What You’ll Need
As an Amazon Associate, HairAide earns from qualifying purchases. Product links in this guide are affiliate links: they cost you nothing extra and help keep these tutorials free.
- High-slip rinse-out conditioner Gives the slip that lets you detangle and squish curls into clumps; choose a lightweight formula for fine or low-porosity hair.
- Wide-tooth comb Works knots out of thick, long or coily hair while the conditioner is in, without snapping strands.
- Curl-defining gel Coats the clumps on soaking-wet hair and holds them in place as they dry.
- Curl leave-in conditioner Adds an extra layer of moisture under gel for coily, high-porosity or very dry hair.
- Microfiber hair towel Presses out excess water after gel without the friction of a terry towel, which breaks up clumps.
Step-by-Step
Step 1 Start with soaking-wet, clean hair
Shampoo or co-wash as you normally would, rinse, and keep your hair dripping wet — don’t towel, wring or squeeze it out. Squish to condish depends on water as much as conditioner, so hair that is merely damp gives you nothing to squish and the clumps never form.
If your curls have felt coated, limp or straw-like lately, clarify on this wash day first, because conditioner layered over buildup won’t spread evenly or clump well. You’re ready when every section is fully saturated and water runs freely off the ends.
Step 2 Apply conditioner until hair feels slippery
Smooth a rinse-out conditioner from mid-lengths to ends, adding more in stages until every section feels slippery: your fingers glide down a section without catching, and the hair feels like wet seaweed rather than squeaky or rough.
For shoulder-length hair, start with a quarter-size dollop of a lightweight formula on fine or low-porosity hair, about a palmful on medium-density waves and curls, and a generous palmful or more on thick, high-porosity, coily or very dry hair; scale up for longer lengths.
Slip matters because it cuts the friction between strands, which lets you detangle without snapping hair and lets neighbouring curls slide together into clumps later. Keep conditioner off the first inch at the scalp if your roots get greasy easily.
Step 3 Detangle while the conditioner is in
With the conditioner still in, work through each section using your fingers or a wide-tooth comb, starting at the ends and moving up toward the roots in short strokes. This is the point in the routine when your hair has the most slip, so knots release instead of tearing, and you won’t need to rake through your hair later, when combing would break up the clumps you’re about to build.
Fingers keep looser wave patterns intact, while a wide-tooth comb is faster on thick, long or coily hair. You’re done when your fingers or the comb pass from root to tip in every section without snagging.
Step 4 Flip your head and section the hair
Tip your head forward or to one side so your hair hangs away from your scalp, then divide it loosely into three or four sections; left side, right side and back is enough for most lengths.
Gravity lets you squish upward toward the scalp, which compresses the curl pattern instead of stretching it, and working one section at a time means the water reaches the inner layers rather than just the outside.
Very thick or long hair may need five or six smaller sections, while short or fine hair can often be done in two. You don’t need clips — a rough division you can hold in one hand is enough.
Step 5 Cup water and squish upward
Cup a handful of water from the shower stream or a bowl, bring it to the ends of one section, and scrunch the hair upward toward your scalp, gently compressing it into a soft bundle and then releasing.
You should hear a wet, squelching sound — that’s water and conditioner being worked together around each strand into a slick, milky mix that coaxes neighbouring hairs into clumps.
Add fresh water and repeat, up to about three times per section, pressing rather than wringing or rubbing so the clumps aren’t torn apart. The section is done when the water dripping off the ends looks cloudy and the hair has gathered into thick, ropey clumps.
Step 6 Decide how much conditioner to rinse
The original method, developed by Melissa Stites, has no separate rinse: the squished-in conditioner stays put and works as a leave-in. Many curly educators now rinse partly, and the right call depends on your density, porosity and how heavy your conditioner is.
Fine or low-porosity hair usually does best rinsing most of it out, because product tends to sit on the surface and weigh curls down; medium-density waves and curls do well with a quick partial rinse; thick or high-porosity hair can leave most of it in; and coily or very dry hair can leave it all in and add a leave-in conditioner on top.
For a partial rinse, let a gentle stream run over your clumped hair for a few seconds and stop while it still feels slippery, not squeaky; rinse heavy butter- or oil-rich formulas more than lightweight ones.
Step 7 Apply gel to soaking-wet hair
Without towelling first, smooth gel over each section with flat palms, then scrunch upward lightly to press it into the clumps; start with a quarter-size amount per section on fine hair and use more on thick hair. Gel spreads evenly on dripping-wet hair and coats the clumps while they’re still formed, and the film it leaves as it dries holds them in place.
On towel-dried hair the clumps have already started separating, so the same gel gives you frizz and patchy hold. Once the gel is in, press out excess water by scrunching a cotton T-shirt or microfiber towel upward against your hair, never rubbing, until it stops dripping.
Step 8 Dry hands-off, then scrunch out the crunch
Let your hair air-dry, or diffuse it on low heat and low airflow, hovering the diffuser around your head for the first few minutes so the gel sets before you cup any curls into it.
Don’t touch, finger through or re-scrunch your hair until it is completely dry; wet gel is still pliable, so every touch can split a clump into frizzy strands. Fully dry hair will feel stiff and crunchy, which is the gel cast doing its job.
Check the roots and the thickest sections for cool, damp spots first, then scrunch upward gently with dry hands, or a drop of hair oil on your palms, until the cast breaks and your curls feel soft.
Step 9 Adjust based on how your curls dry
Judge the result once your hair is dry, then change one variable at a time on your next wash day so you know what made the difference. Frizz usually means too little water while squishing, rough scrunching, a terry towel or touching while drying, so use more water and a lighter hand.
Flat or weighed-down curls point to too much conditioner or a formula too heavy for your hair: use less, switch to a lighter one or rinse more. Greasy roots mean conditioner is reaching the scalp, so keep it to mid-lengths and ends.
White residue or flakes usually come from too much product or a conditioner and gel that don’t mix well, so cut back, apply gel to wetter hair or try a different gel, and clarify if buildup persists.
Common Mistakes to Avoid
- Using too little water, so the conditioner never turns into a slick, milky mix and curls dry separated and frizzy
- Scrunching roughly — wringing, rubbing or squeezing hard — which tears apart the clumps you’re trying to build
- Raking fingers or a brush through your hair once the gel is in, or detangling it dry, which splits clumps into frizz
- Towel-drying before gel, so the gel lands on damp hair whose clumps have already separated
- Leaving a heavy conditioner fully in on fine or low-porosity hair, which weighs curls flat and makes roots look greasy
- Scrunching out the crunch before your hair is completely dry, which brings the frizz straight back
Pro tip Keep a cup or small bowl of water in the shower and squish with that instead of the shower stream, so you control how much water each section gets without rinsing out conditioner you meant to keep. If a section stops making that wet squelching sound, it needs more water, not more conditioner.
The Bottom Line
Squish to condish comes down to four habits: enough conditioner that your hair feels slippery, more water than seems necessary, gentle upward squishes, and gel on dripping-wet hair that you leave alone until it’s dry. Make it your normal conditioning step every wash day rather than an extra treatment, and expect to fine-tune the amount and the rinse over your first few washes as you learn how your curls respond.
Between washes, a mist of water and a little leave-in can revive the clumps without starting over. If your curls stay frizzy or limp whatever you adjust, or your ends keep tangling and snapping despite plenty of slip, the cause may be damage or a cut that isn’t working with your pattern, and a curl-specialist stylist is worth a visit.
Frequently Asked Questions
Do you rinse out conditioner after squish to condish?
You don't have to. The original method, developed by Melissa Stites, leaves the squished-in conditioner in as a leave-in, but many people rinse partly. Fine or low-porosity hair usually rinses most of it out, medium-density curls rinse briefly, and thick, high-porosity or coily hair can leave most or all of it in. Rinse heavy formulas more than lightweight ones.
Does squish to condish work on wavy and coily hair?
Yes, the technique works from loose waves to tight coils; you adjust the amounts rather than the method. Waves often weigh down easily, so they usually do better with a lightweight conditioner, a smaller amount and a fuller rinse. Coily hair typically wants a generous amount, little or no rinse and a leave-in conditioner under the gel.
Why are my curls frizzy or flat after squish to condish?
Frizz usually comes from too little water while squishing, scrunching too hard, towelling before gel or touching hair before it's fully dry. Flat curls usually mean too much conditioner or one that's too heavy, especially on fine or low-porosity hair. Change one thing at a time: more water and gentler hands for frizz, less or lighter conditioner and a fuller rinse for flatness.
Why is there white residue in my hair after squish to condish?
White residue or flakes usually mean too much product, or a conditioner and gel that don't mix well together. Use less of each, apply gel while your hair is still dripping wet so it spreads thinly, and try a different gel if the flakes keep appearing. If your hair also feels coated or dull, clarify on your next wash day to clear buildup.
Can you diffuse after squish to condish?
Yes. Diffusing speeds up drying and can add volume at the roots. Use it on damp hair at low heat and low airflow, apply a heat protectant before the dryer goes near your hair, and keep cupping and touching to a minimum until your hair is completely dry, then scrunch out the crunch.
Keep Reading
Sources
- Squish to condish curlcentric.com
- Over rinsing might be causing frizz try this instead naturallycurly.com
- How to squish to condish eu.onlycurls.com