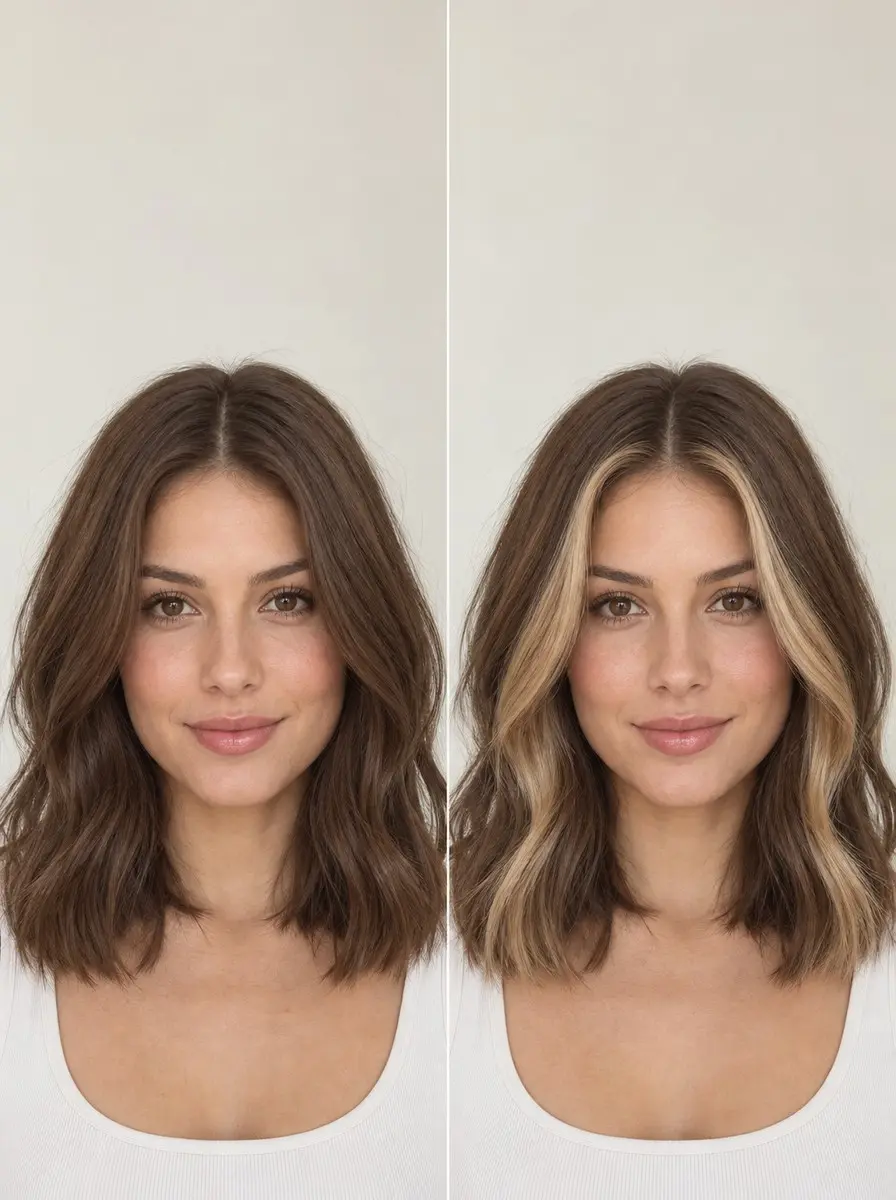
Quick answer To do a money piece at home, strand-test first, then section about an inch either side of your part at the front hairline, lighten that strip with powder lightener, 20 volume developer and a bond builder, and tone the leftover warmth with a gloss that suits your base.
A money piece is the quickest way to look as if you’ve had color done without committing to a full head of highlights: two bright, face-framing sections at the front hairline that catch the light every time you move. Because only a narrow strip of hair is processed, it’s the most forgiving lightening job to try at home, and the easiest to correct if it doesn’t land perfectly.
The catch is that lightener and toner behave differently on every starting shade, and the toning stage is where a lot of DIY money pieces go wrong.
This guide tells you up front whether your hair is a good candidate or a salon job, then walks you through a patch and strand test, sectioning, mixing with a bond builder, timing, toning to suit your base and fixing a harsh or brassy result. Read every step before you open a bottle.
Time 1.5-2.5 hours, plus a patch and strand test 48 hours aheadDifficulty IntermediateSteps 9
What a Home Money Piece Usually Reaches by Starting Shade
| Starting shade | Usual result after one session | Tone it with |
|---|---|---|
| Dark blonde | Pale yellow | Violet gloss |
| Light brown | Yellow-gold | Blue-violet gloss |
| Medium brown | Orange | Blue gloss, or a warm honey finish |
| Dark brown to black | Red-orange | Book a salon, or a caramel gloss |
What You’ll Need
As an Amazon Associate, HairAide earns from qualifying purchases. Product links in this guide are affiliate links: they cost you nothing extra and help keep these tutorials free.
- Hair color tool set Covers sectioning, foiling and mixing from the strand test onward, and a plastic bowl avoids metal reacting with the lightener.
- Barrier cream Keeps lightener and gloss off the skin along your hairline, temples and ears.
- Lightener powder and 20 volume cream developer Lifts the two sections slowly enough to check and stop, and is gentler on hairline skin than higher volumes.
- Bond-building lightener additive Mixed into the lightener to reduce breakage while the sections lift; skip it only if your lightener already contains one.
- Gentle sulfate-free shampoo Removes every trace of lightener after rinsing without stripping the freshly lightened strands.
- Ready-to-use toning gloss Neutralizes leftover warmth or sets a warm finish, and a shade between your natural color and the piece softens a harsh root.
- Bond-repair hair mask Conditions the processed sections after toning and between any spot-lightening for patches.
- Purple or blue toning shampoo Keeps brass in check once a week between glosses: purple for yellow, blue for orange.
Step-by-Step
Step 1 Check whether your hair suits DIY
Look at your natural color at the front hairline in daylight and find its level: a home money piece lifts most predictably on light brown to dark blonde hair, while medium brown can reach a warm honey or caramel but rarely a clean pale blonde in one session.
Book a salon instead if your hair is dark brown or black, box-dyed, hennaed, relaxed or chemically straightened, or already breaks easily.
Artificial color doesn’t lift evenly, henna and metallic-salt dyes can react unpredictably with lightener, and chemically weakened hair has little margin for another process. Decide your target now, a soft honey glow or a bright blonde ribbon, because it sets how far you lift and which toning gloss you buy.
Step 2 Run a patch test and strand test
Forty-eight hours before, do the skin allergy test described on your lightener and toning gloss packaging, and skip the job entirely if you get itching, redness or swelling.
At the same time, mix a small amount of lightener exactly as you will on the day, bond builder included, paint it onto a few strands at the nape where nothing shows, and wrap them in foil. Check every 10 minutes and note how long the strands take to reach your target shade, then tone them so you can preview the finished color.
Stretch the strands while they’re still damp from rinsing: hair that springs back is ready, but hair that turns gummy or snaps means stop and see a colorist.
Step 3 Map your money piece sections
Part your hair exactly where you wear it, then use the tail comb to measure roughly one inch on either side of the part at the front hairline and take a section about half an inch deep from the hairline back.
Clip everything else away so no stray strands get painted, and take a finer slice rather than a chunky block if you want a subtler look. On a side part, many stylists make the section on the fuller side slightly wider so the frame looks balanced.
Face shape is a rule of thumb rather than a law, but a narrow piece keeps the brightness in a long vertical line, which some colorists suggest for round faces. If you wear curtain bangs, lightening them keeps the frame continuous, while leaving them dark makes the piece start below the fringe.
Step 4 Protect your skin and set the foils
Work on dry hair that hasn’t been washed for a day or two, since the scalp’s natural oils make stinging less likely. Smooth barrier cream along the hairline, temples and ears, keeping it off the hair in your sections, because cream on the strands blocks the lightener and leaves dark patches.
Put on gloves, then slide a foil under the first section close to the roots so lightener can’t bleed onto the brown hair beneath, and clip the second section out of the way. Lay out everything within reach before you mix, because lightener starts working the moment it’s combined.
Step 5 Mix lightener with a bond builder
In the plastic tint bowl, combine lightener powder and 20 volume developer at the ratio on the powder’s label (often 1 part powder to 2 parts developer) and stir until smooth and yogurt-thick, then add the bond-building additive at its own label dose.
Twenty volume lifts more slowly than 30 or 40, which gives you time to check and stop, and it’s kinder to the skin at the hairline, where a money piece sits; leave higher volumes to a salon.
The bond builder reduces breakage while the sections lift, but it can’t make over-processing safe, so your strand-test timing still rules. Mix only enough for two sections, use it straight away and never store leftovers in a closed container.
Step 6 Apply lengths first, roots last
Brush lightener from about half an inch below the roots down to the ends, saturating both sides of the section until every strand is coated, then fold the foil closed and repeat on the other side.
Scalp warmth makes the root area lift faster than the lengths, so starting at the part leaves a bright band there known as hot roots. Once the lengths have lifted a level or two, often 10 to 20 minutes in, open each foil and apply lightener to that root half-inch.
Check every 10 minutes by wiping the lightener off one strand, and rinse when both sections reach your strand-test shade or the maximum time on the label, whichever comes first.
Step 7 Rinse and read your lift
Rinse the lightener out with lukewarm water until the hair no longer feels slippery or gritty, shampoo once with a gentle sulfate-free shampoo and towel-dry until damp. Then judge the raw color near a window: pale yellow like the inside of a banana peel, yellow-gold, orange or red-orange.
That shade decides your toning gloss, because a gloss only neutralizes warmth and deposits color; it can’t lift any further. If a section came out patchy, leave it for now and fix it in the last step rather than re-lightening freshly processed hair.
Step 8 Tone to suit your base shade
Match the gloss to what you see: violet cancels pale yellow, blue-violet cancels yellow-gold and blue cancels orange, as the table shows. Neutralizing orange gives a soft dark blonde, not an icy one, and forcing an icy ash gloss onto hair that only reached gold or orange turns it murky rather than blonde.
If you landed on red-orange, warm it into caramel instead, since cancelling it with a blue-green gloss only pulls it back toward light brown, and see a colorist if you want it blonder.
Choose a finish that suits the brown around it too: honey or golden beige reads as intentional against warm brunette, while a cool, ashy base can carry beige or soft ash. Apply the gloss as its label directs, check every couple of minutes, rinse as soon as the brass looks neutral and before any lilac or gray cast appears, then smooth on a bond-repair mask.
Step 9 Fix a harsh, brassy or patchy piece
If the piece looks too harsh or stripy, apply a gloss in a shade between your natural color and the piece to the root inch of each section, which blurs the line where bright meets brown.
If brass creeps back, use purple shampoo on yellow and blue shampoo on orange once a week rather than re-toning after every wash. For patchy spots, wait at least a week with a bond-repair mask in between, then lighten only the darker gaps, never overlapping lightener onto hair that’s already light.
Breakage, gummy strands or patches wider than a few strands are a colorist’s job, since they can be corrected without another full lightening session.
Common Mistakes to Avoid
- Applying lightener at the part first, which leaves a bright band at the roots while the lengths stay darker.
- Reaching for 30 or 40 volume developer to speed things up, which irritates the hairline skin and overshoots before you can check it.
- Forcing an icy ash gloss onto hair that only lifted to gold or orange, which turns it murky instead of blonde.
- Getting barrier cream on the hair inside the section, which blocks the lightener and leaves a dark patch at the hairline.
- Overlapping fresh lightener onto already-lightened lengths at a touch-up, which is where breakage usually starts.
Pro tip Leave the finest baby hairs at the very edge of the hairline out of your sections: they break easily under lightener, and a few natural-colored wisps in front make the piece look softer and grow out more gracefully.
The Bottom Line
Done carefully, a home money piece gives you two bright, face-framing ribbons that suit your base instead of fighting it, and because only a narrow strip is processed, it’s easy to keep healthy.
Expect the gloss to fade over a few weeks and the regrowth to show at your part after two to three months. Keep brass at bay with a weekly purple or blue shampoo, and touch up the new growth only.
See a colorist if you’re starting from dark brown or black, from box dye or henna, or if your test strand turned gummy. The same goes for patches wider than a few strands or breakage at the hairline: those are corrections a pro can make without putting your hair through another full lightening session.
Frequently Asked Questions
Can I do a money piece on dark brown or black hair at home?
It isn't a good DIY job. One home session with 20 volume developer usually stops at red-orange on dark brown or black hair, and neutralizing that only pulls it back toward light brown. A colorist can lift it gradually over more than one appointment, with less breakage and a cleaner blonde result.
How often do I need to touch up a money piece?
Hair grows about half an inch a month, so after roughly two to three months the dark regrowth at the part makes the piece look disconnected from your face. Touch up by lightening only that new growth, never the lengths already lightened. The gloss fades sooner, usually within a few weeks, so re-gloss or use a weekly purple or blue shampoo in between.
What should I do if my money piece turns purple or gray after toning?
A lilac or gray cast means the gloss overshot the yellow. It usually softens over a few washes with your gentle shampoo, so don't layer more product on top. Next time, check the gloss every couple of minutes and rinse the moment the brass looks neutral rather than waiting for the full label time.
Is a money piece bad for your hair?
Any lightening weakens the strands it touches, but a money piece only processes two small sections, so the risk stays contained. Using 20 volume developer, a bond-building additive, your strand-test timing and a bond-repair mask afterwards keeps breakage down. The biggest risk is overlapping lightener onto hair that is already light at your next touch-up.
Keep Reading
Sources
- Balayage with money piece lorealparisusa.com
- How to make money piece highlight at home unice.com
- Money pieces johnfrieda.com