Quick answer To do Old Hollywood waves, curl completely dry hair prepped with mousse and heat protectant in one direction using a 1- to 1.5-inch iron, pin each curl until it cools, then brush the curls into one continuous wave and set it with clips and strong-hold hairspray.
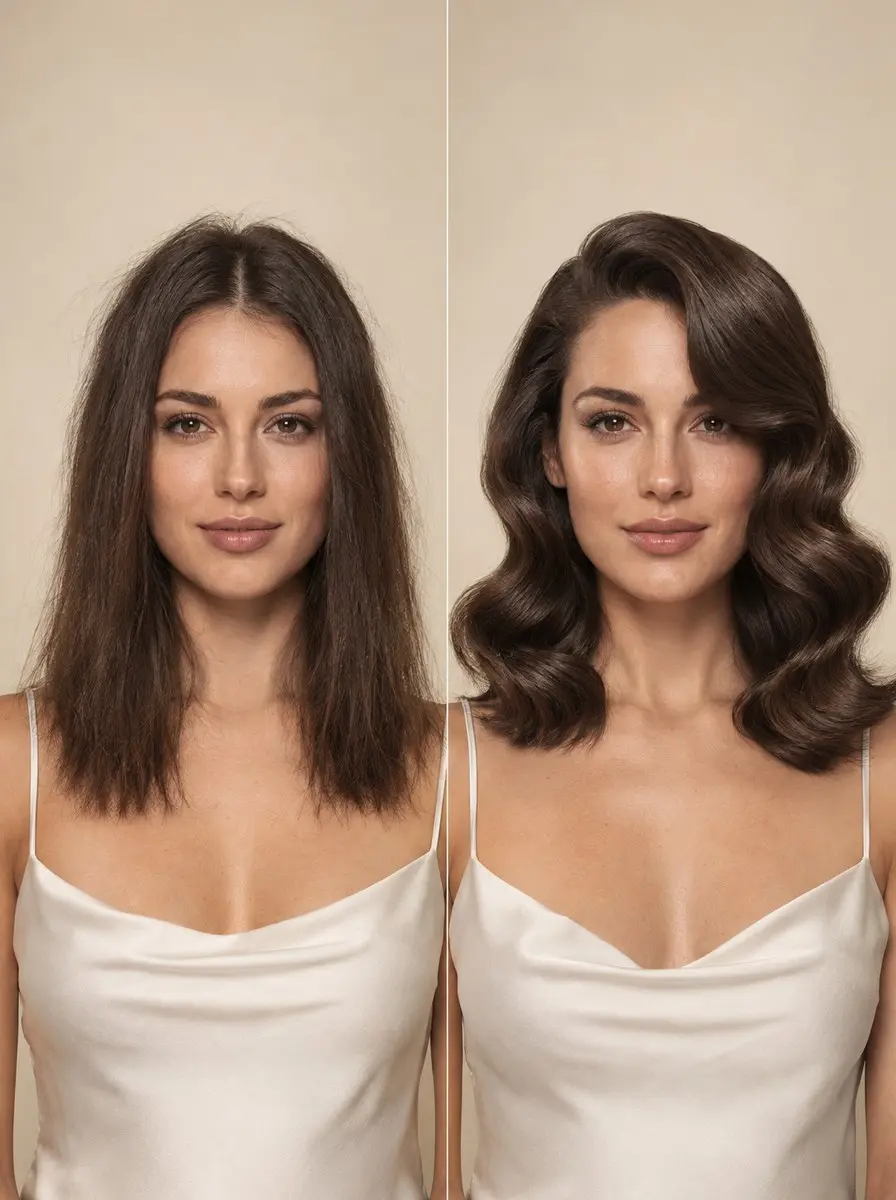
Old Hollywood waves are classic film-star glamour: a deep side part, a glossy wave sweeping over one brow, and smooth S-shaped ridges rippling to the ends. They’re the natural pick for New Year’s Eve, holiday parties and winter weddings, and they’re also one of the easiest glam looks to get almost right. Most at-home attempts end up crimped, frizzy or simply curly, because the tutorial stopped at the curling iron.
The curl is only half the job. What turns curls into a sculpted wave is the part most guides skip: curling every section the same way, pinning each curl until it cools, then brushing out with confidence and setting the shape with clips.
This guide covers each step, from choosing a barrel to the final mist of hairspray, with adjustments for fine, thick, wavy and short hair. Allow an unhurried hour the first time; once you know the rhythm, it gets much faster.
Time 45-90 minutes, including cooling timeDifficulty IntermediateSteps 8
Curling Iron Barrel Size by Hair Length
| Hair length | Barrel size | Finished wave |
|---|---|---|
| Chin to shoulder | 1 inch | One or two S-bends |
| Shoulder to collarbone | 1 to 1.25 inch | Classic red-carpet wave |
| Below the collarbone | 1.25 to 1.5 inch | Long, sweeping waves |
What You’ll Need
As an Amazon Associate, HairAide earns from qualifying purchases. Product links in this guide are affiliate links: they cost you nothing extra and help keep these tutorials free.
- Light volumizing mousse Gives each strand grip so the curl holds without gel-like stiffness, and it is also the base for the heatless set.
- Heat protectant spray Shields the lengths through blow-drying and curling, since every section meets the iron.
- Blow-dryer Dries the mousse in completely and smooths the surface, because the iron needs fully dry hair.
- Boar-bristle brush, tail comb and wide-tooth comb The brush smooths the blow-dry and merges curls into one wave, the tail comb carves the deep part and sections, and the wide-tooth comb softens any stiff curl.
- 1- to 1.5-inch clamp curling iron The barrel sets the width of the wave and the clamp keeps the ends smooth as each section wraps.
- No-crease styling clips They hold sections out of the way, keep each curl coiled flat while it cools, and sculpt the finished waves without leaving dents.
- Strong-hold hairspray Locks the cooled curls and sculpted waves in place, and a travel size handles touch-ups through a long night.
- Foam rollers or flexi rods Optional: for the heatless set, they hold mousse-set sections in shape while the hair dries completely.
Step-by-Step
Step 1 Prep a smooth, dry base
Work a golf-ball-sized amount of light mousse through clean, damp hair from roots to ends (a little more for long, thick hair), then mist heat protectant over the lengths. Mousse gives each strand grip so the curl has something to hold, and a light formula keeps the finished wave soft rather than crunchy.
Blow-dry until every section is completely dry, including the nape and behind the ears, brushing down the lengths with the boar-bristle brush for a sleek surface. You’re ready when your hair feels smooth and fully dry from roots to ends, since a smooth base is what lets the finished wave catch the light.
Step 2 Match the barrel to your length
Barrel size sets the width of the finished wave, so choose it by length: a 1-inch iron for chin-to-shoulder hair, 1 to 1.25 inch for shoulder-to-collarbone hair, and 1.25 to 1.5 inch for hair below the collarbone.
Short hair needs a narrow barrel to wrap around at least once, giving one or two S-bends, while long hair wraps several times, so a wider barrel creates long, sweeping waves instead of tight ringlets that brush out into frizzy volume.
The middle range gives the classic red-carpet wave. If your fine hair drops curl quickly, use the smaller end of your range; if your hair is thick and dense, keep your barrel and take thinner sections instead.
Step 3 Carve a deep side part
Use the tail of your comb to draw a deep side part that starts roughly above the arch of one eyebrow and runs straight back toward the crown. Setting the part first matters because it pushes most of the hair to one side, creating the sweeping front wave that defines the look, and every curl is placed in relation to it.
Divide the hair into horizontal sections about an inch deep, starting at the nape and clipping the upper layers out of the way. A section is the right size when it wraps around the barrel in one smooth layer without stacking, so thick hair needs thinner slices.
Step 4 Curl every section one way
Wrap each section around the iron in the same direction, all toward the face for a more vintage finish or all away from it for a more modern one, holding the iron at the same angle every time.
Matching direction lets neighboring curls nest into each other and brush out as a single continuous wave instead of separate, beachy pieces. Start the curl an inch or two below the root, keep the ends smooth under the clamp, and hold for roughly 5 to 10 seconds, until the section feels warm all the way through.
Curl one section at a time, pinning each before you move to the next, and work upward from the nape toward the part.
Step 5 Pin each curl while it cools
As each curl slides off the iron, keep it in its coil, lay it flat against the head and secure it with a no-crease clip placed along the line of the curl rather than across it.
Heat loosens the hydrogen bonds that hold hair’s shape and they re-form as the strand cools, so a curl that cools in its coil holds far longer than one left to hang.
Celebrity stylist Jenny Cho’s red-carpet walkthrough does exactly this, with a 1-inch iron and every curl pinned until it cools. Once the last curl is in, mist lightly with strong-hold hairspray and wait until every coil feels completely cold, usually 10 to 15 minutes.
Step 6 Brush the curls into one wave
When every curl is cold, remove the clips from the nape upward and let the coils drop without pulling them apart with your fingers. Brush through slowly with the soft boar-bristle brush, starting at the ends and working up to the roots, until the separate curls merge into one smooth, continuous S-shaped wave.
It will look big and fluffy at first; keep brushing, because the bristles are what align the curls into the glossy ridge-and-dip pattern. If any curl still feels stiff after release, work through it gently with the wide-tooth comb to soften it, then brush again.
Step 7 Sculpt and set the waves
Smooth the hair toward the heavy side of your deep part, then press each wave gently forward with your palm so the ridge lifts and the dip beneath it deepens. Place a no-crease clip into each dip, following the line of the wave, and give the front wave that sweeps over the brow the most attention, since that wave is what reads as Old Hollywood.
Mist the whole head with strong-hold hairspray and leave the clips in for at least 10 minutes so the spray dries into the shape. Remove the clips slowly; the waves should keep their defined ridges with a soft, touchable finish.
Step 8 Tailor it to your hair type
Fine hair drops a curl fastest, so use the smaller barrel in your range, work the mousse right through the lengths and leave the curls clipped a few minutes longer than feels necessary.
Thick, dense hair needs thinner sections and a few extra seconds on the iron so heat reaches the middle of each one, plus more clips when you sculpt. Wavy or curly hair should be blow-dried completely smooth before you start, because a natural pattern left in the hair breaks up the wave line; then curl and pin as usual.
On chin-to-shoulder hair, a 1-inch barrel gives one or two S-bends, so put your sculpting effort into the front wave over the brow.
Common Mistakes to Avoid
- Brushing out while the curls are still warm: the shape hasn’t set yet, so the waves collapse within the hour.
- Curling sections in alternating directions, which gives loose beachy texture instead of one continuous wave.
- Clipping across a curl or wave instead of along its line, which leaves dents that read as crimps.
- Taking sections too thick for the barrel to heat through, so the middle of each stays straight and the wave looks lumpy.
- Stopping the brush-out at the fluffy stage; the smooth, sculpted wave only appears if you keep brushing.
Pro tip Before your final pass over the front wave, mist your boar-bristle brush lightly with hairspray and brush with that. It lays down a thin, even layer of hold and tames flyaways, so the wave over the brow stays crisp without looking sprayed stiff.
The Bottom Line
Old Hollywood waves come down to four habits: one curl direction, curls cooled in place, a patient brush-out and clips that follow the wave line. The first attempt takes the longest, and the brush-out is the skill that improves fastest with practice, so try a run-through a few days before the event.
A well-set wave usually lasts the night and relaxes into softer, looser waves by the next day; to refresh it, re-clip the front wave for a few minutes and mist with hairspray.
For a wedding, an event where hold has to be guaranteed, hair shorter than the chin, or heavily bleached hair that struggles with heat, book a stylist for the set and bring a photo of the exact wave you want.
Frequently Asked Questions
What temperature should my curling iron be for Old Hollywood waves?
Always mist on a heat protectant first and curl only completely dry hair; an iron on damp hair is the one genuinely damaging mistake here. For fine or bleached hair, stay at or below about 150°C (300°F); coarse hair can go to 180-200°C (355-390°F). Start at the low end and turn it up only if curls drop before they cool.
How do I make Old Hollywood waves last all night?
Build hold in layers: mousse at the prep stage, curls pinned until completely cold, then strong-hold hairspray over the sculpted waves while the clips are still in. Pack a couple of no-crease clips and a travel-size hairspray; if the front wave relaxes, press it back into shape, clip it for five minutes and mist. A well-set wave usually lasts the evening and softens by morning.
Can I do Old Hollywood waves without heat?
Yes. Work light mousse through damp hair, make your deep side part, and wind each section the same direction around foam rollers or flexi rods about the diameter of the barrel you'd use, then leave them until the hair is completely dry, often overnight. Brushing out even slightly damp hair breaks the set into frizz, so check the roots first, then brush out and sculpt as usual.
Why do my Old Hollywood waves look crimped or frizzy instead of smooth?
Crimped or frizzy waves usually trace back to one of three slips: brushing out before the curls were completely cold, curling sections in mixed directions, or clipping across the wave instead of along it. Re-curl the worst sections, pin them until cold, and keep brushing past the fluffy stage, which is when the curls finally merge into a smooth wave.
Can you do Old Hollywood waves on short hair?
Yes, if your hair reaches at least your chin. Use a 1-inch barrel, curl every section the same way and pin each curl to cool; you'll get one or two S-bends rather than a cascade, so the drama comes from the deep side part and a sculpted front wave. Hair shorter than the chin rarely wraps fully around the barrel, so a stylist's finger-wave set is the better route.
Keep Reading
Sources
- Old hollywood waves lorealparisusa.com
- Olivia garden inc howto greta lees old hollywood hair look at the golden globes cosmeticsandtoiletries.com
- Step by step hollywood waves lookfantastic.com