Quick answer To do a flexi rod set on natural hair, coat damp or stretched hair with leave-in and mousse, wrap one-inch strands ends-first around the rods, roll to the root and bend each rod into a U to lock it. Dry completely, then unwind and separate.
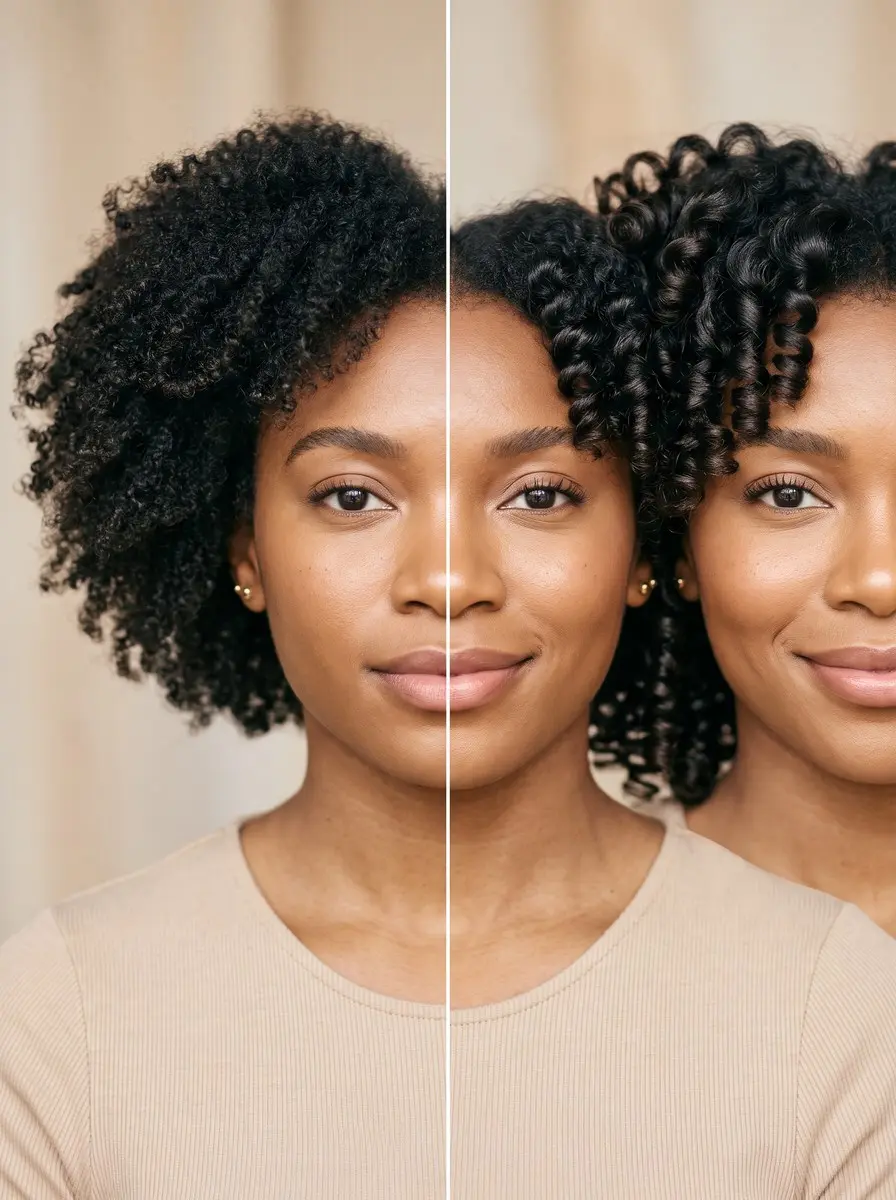
A flexi rod set gives natural hair something that wash-and-gos and twist-outs can’t: rows of uniform, bouncy spiral curls that look salon-set without any heat on the lengths. It’s also one of the easiest sets to get wrong.
Take it down an hour too early and the curls puff into frizz. Choose the wrong rod size and you’ll get ringlets when you wanted big curls. Soak your hair first and it may still be damp at bedtime.
The good news is that every one of those problems has a simple fix, and the technique itself is very doable at home. This guide settles the damp-versus-stretched question by curl type, matches each rod size to the curl it gives, and walks you through sectioning, the ends-first wrap, the bend that locks each rod, drying, and a careful takedown. You’ll also learn how to make the set last.
Time 1-2 hours to set, plus 45 minutes to overnight to dryDifficulty IntermediateSteps 9
Flexi Rod Size Chart: The Curl Each Size Gives
| Rod size | Curl you get | Good for |
|---|---|---|
| 1/4 inch | Tight, springy spirals | Short hair |
| 3/8 inch | Small, defined curls | Short hair |
| 1/2 inch | Medium spirals | Most lengths |
| 5/8 to 3/4 inch | Looser, bouncier curls | Shoulder length and longer |
| 7/8 inch | Big, soft curls, most volume | Long or stretched hair |
What You’ll Need
As an Amazon Associate, HairAide earns from qualifying purchases. Product links in this guide are affiliate links: they cost you nothing extra and help keep these tutorials free.
- Flexi rods in mixed sizes The rod’s diameter sets the size of every curl, and the bendable core locks each rod without pins.
- Curl-defining mousse or setting lotion Coats each strand with a light film that holds the curl shape as the hair dries.
- Leave-in conditioner Gives the slip to wrap smoothly and keeps the finished curls soft rather than stiff.
- Hooded or soft-bonnet hair dryer Dries a full rod set in 45 minutes to an hour instead of several hours.
- Satin bonnet or satin scarf Cuts friction overnight so the curls stay defined for days.
Step-by-Step
Step 1 Choose a damp or stretched set
Decide first whether you’ll set on damp hair or on hair you’ve already stretched, because that choice shapes the whole result. A damp set, with hair misted rather than soaked, gives the crispest, most uniform spirals. It suits looser curls (roughly type 3) that don’t shrink dramatically.
A stretched set is done on hair that’s been blow-dried or banded. It gives softer, fuller curls with much less shrinkage, so it’s the better pick for tightly coiled (type 4) hair when you want to show length. For maximum definition on coily hair, set damp and accept some shrinkage. If length matters more, stretch first.
Step 2 Match the rod size to your curl
Flexi rods run from about 1/4 inch to 7/8 inch across, and the smaller the rod, the tighter the curl. 1/4-inch rods give tight, springy spirals, and 3/8-inch rods give small, defined curls. 1/2-inch rods give medium spirals that work at most lengths.
Rods of 5/8 to 3/4 inch give looser, bouncier curls on shoulder-length and longer hair, and 7/8-inch rods give big, soft curls with the most volume on long or stretched hair. Hair needs to wrap around the rod at least twice, so short hair suits the smaller sizes.
Use plain foam rods for a damp set, because satin-wrapped rods don’t hold up to wet, product-coated hair. Save the satin rods for stretched hair. A full head usually takes 20 or more rods.
Step 3 Start clean and mist to damp
Set on freshly washed, conditioned and detangled hair, because buildup and knots stop each strand from lying smooth around the rod. For a damp set, blot hair with a T-shirt until it’s damp rather than dripping, and keep a spray bottle nearby to re-mist any section that dries before you get to it.
Design Essentials recommends misting rather than soaking. Saturated hair takes hours longer to dry under the rods, and the roots dry last, which is exactly where frizz starts. For a stretched set, begin with hair you’ve already blow-dried or banded, and only lightly mist each strand as you wrap.
Step 4 Section and apply your leave-in
Split the hair into about five sections: one at the front, one on each side and two at the back. Clip each one away so you only handle one at a time. Smooth a leave-in conditioner through the first section from root to ends for slip and moisture, then comb it through so every strand is coated.
The leave-in keeps the finished curls soft and flexible. The hold product comes next, strand by strand, so it doesn’t dry out before you wrap. Skip oils and heavy butters at this stage. They weigh the set down and stop it drying firm, so oil waits until takedown.
Step 5 Wrap ends first toward the root
Take a strand about an inch wide, or narrower for tight curls on small rods, and comb it smooth. Coat it with a walnut-sized puff of mousse or a few sprays of setting lotion.
Hold the rod horizontally under the ends, fold the tips smoothly around the middle of the rod and roll up toward the scalp. Keep the tension even so the hair lies flat without pulling at the root. If your ends are fragile or tend to frizz, an end paper helps.
Roll every rod in a section the same way, wrapping away from the face at the front so the curls frame it. Wrapping ends first is what keeps the tips curled instead of straight or bent at the end.
Step 6 Bend the rod to lock it
When the rod reaches the root, fold both of its ends up toward the scalp into a U shape so it clamps the wrapped hair in place. That bend is the whole locking mechanism, so you don’t need pins or clips, and it holds the curl at the angle it will dry in.
Check that each rod sits snug against the scalp instead of dangling, because a loose rod gives a flat, kinked root. Work row by row from the nape up, keep the rows close so no gap dries straight, and re-mist any strand that has dried before you wrap it.
Step 7 Dry the set completely
Sit under a hooded dryer for 45 minutes to an hour, or air dry with the rods in for two to three hours or overnight. The set works because the bonds that give hair its shape re-form in the curled position as the water leaves the strand.
If you take a rod out while the hair is still damp, the curl relaxes and puffs into frizz. Test before you commit: unroll one rod at the nape or crown, where hair dries last. If it feels cool or slightly damp, roll it back up and keep drying. Stretched sets dry much faster because the hair holds less water.
Step 8 Unwind, separate and finger-coil
Unbend each rod and unroll the curl in the opposite direction from the wrap. Slide the rod out instead of pulling it, so the spiral keeps its shape. Leave every curl alone until all the rods are out.
Then rub a drop of light oil between your fingertips. This is the first time oil touches the set, and it softens the mousse’s light crunch without loosening the curl.
Split each spiral into two or three, twirl any fuzzy ones around a finger to smooth them, and lift the roots with a pick instead of fluffing the lengths. Stop as soon as you like the volume, because every extra pass adds frizz.
Step 9 Protect it overnight in satin
To make the set last, gather the curls loosely on top of your head in a pineapple, or pin a few curls in place on shorter hair, and cover with a satin bonnet or scarf. Cotton fibres catch and drag on the curls, and that friction flattens and frizzes a set overnight.
Satin lets them slide instead. In the morning, shake the curls loose and re-coil any that have dropped around a finger with a little mousse. A fully dried, well-protected set can last several days to about a week, depending on humidity.
Common Mistakes to Avoid
- Soaking the hair before setting: it can still be damp at the roots hours later, and taking it down then gives frizz.
- Taking the rods out before every strand is fully dry, especially at the nape and crown, where hair dries last.
- Putting oil or heavy butter on the hair before wrapping, which weighs the set down and stops it drying firm.
- Using strands too wide for the rod, which gives loose, uneven curls with straight bits in the middle.
- Using satin-wrapped rods on wet, product-heavy hair: the satin slips and doesn’t hold up to the moisture.
- Separating and fluffing the curls too much at takedown. Two or three splits per spiral is plenty.
Pro tip Mix two neighbouring rod sizes, smaller around the face and one size up at the crown and back. The curls then look more lived-in and blend at the edges instead of sitting in stiff, identical rows.
The Bottom Line
Done carefully, a flexi rod set gives you uniform, bouncy spirals that hold for days, and it all comes down to a few choices.
Pick a damp or stretched set for your curl type, match the rod size to the curl you want, wrap ends first, and don’t touch the rods until every strand is dry. Protect the curls in satin each night and re-coil the few that drop, then wash and reset once they’ve gone limp all over.
If your hair snaps or tangles badly at takedown, or your ends stay straight however carefully you wrap them, see a stylist who specialises in natural hair. Breakage or damaged ends need a trim and a moisture plan before any set will hold. A salon roller set is also worth booking before a big event, when you want a guaranteed result.
Frequently Asked Questions
Should I do a flexi rod set on wet or dry hair?
Use damp, misted hair rather than soaking wet hair if you want the most defined, uniform spirals. That suits looser curls best. Tightly coiled hair that shrinks a lot often looks better set on stretched, blow-dried or banded hair, which gives softer curls and shows more length. Never set on hair that's dripping.
Why are my flexi rod curls frizzy, flat at the root or crunchy?
Frizz usually means the set came down while still damp, so test one rod at the nape first next time. Flat roots come from rods sitting loose away from the scalp. Wrap all the way down and lift the roots with a pick afterwards. Crunchy curls mean too much mousse or setting lotion: rub a drop of oil between your palms and scrunch to soften them.
How long does a flexi rod set last on natural hair?
A fully dried set can last several days to about a week. Humidity and how you sleep make the biggest difference. Pineapple the curls under a satin bonnet or scarf each night, and re-coil any that have dropped around a finger with a little mousse in the morning. When the curls go limp all over, it's time to wash and reset.
Can I blow-dry natural hair before a flexi rod set?
Yes, and it's the best way to cut shrinkage on tightly coiled hair. Blow-dry damp hair on medium heat with a heat protectant, using a comb attachment, then set on satin-wrapped rods with just a light mist of setting lotion. A stretched set holds less water, so it dries much faster than a damp set.
Can I sleep in flexi rods?
Yes. Sleeping in the rods is one of the easiest ways to air dry a damp set, since it needs about two to three hours or overnight to dry fully. Tie a satin scarf or bonnet over the rods to keep them in place and reduce friction. Check the nape in the morning before taking the set down.
Keep Reading
Sources
- Use these 9 steps to achieve your best flexi rod set ever designessentials.com
- Best flexi rods natural hair sizes curlynikki.com
- How to use flexi rods on natural hair carolsdaughter.com
- Flexi rods on natural hair thezoereport.com