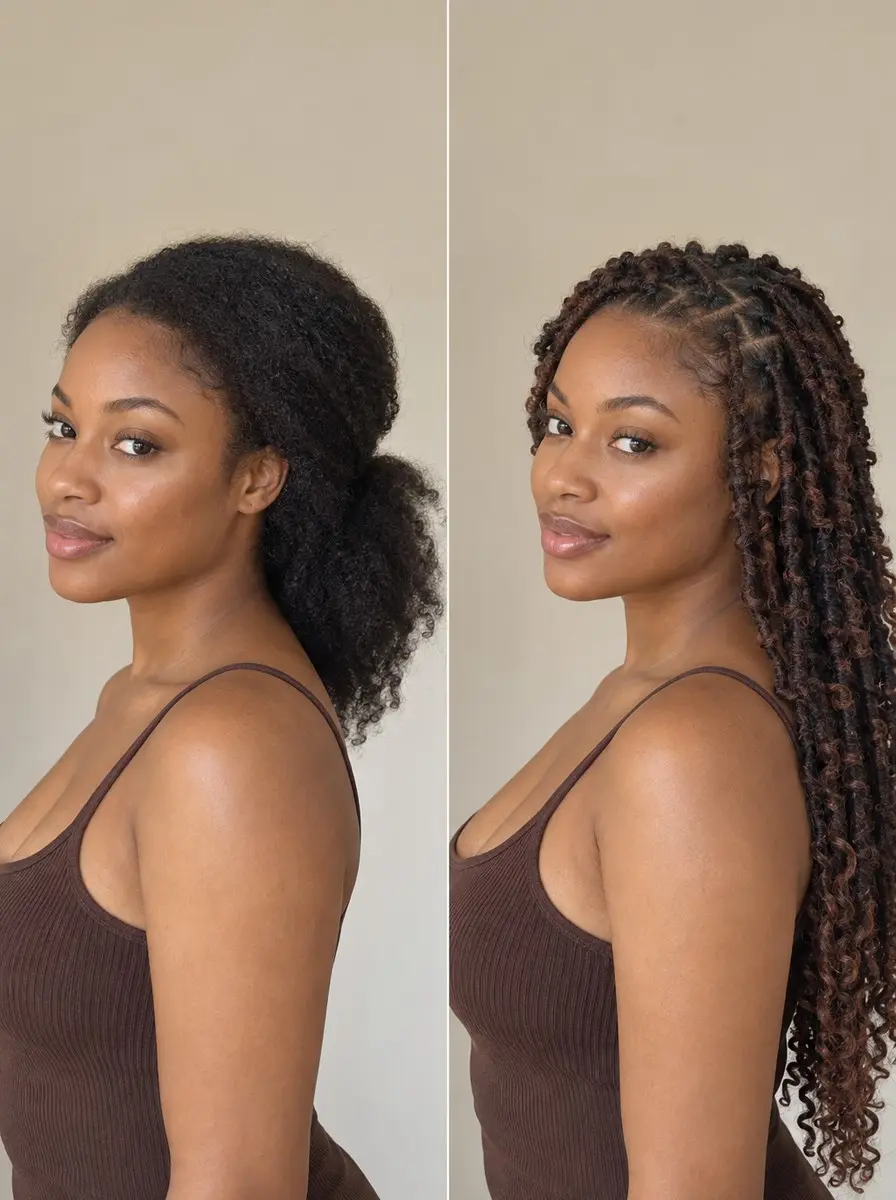
Quick answer To install butterfly locs, part clean, stretched hair into 40-50 sections and braid each loosely, then wrap the braids with vinegar-soaked, fully dried water wave hair, pulling out small loops as you go. For a faster 1-1.5 hour install, crochet premade butterfly locs onto a loose base instead.
Before you install butterfly locs, know what sets them apart from other faux locs: instead of a smooth, sealed wrap, water wave hair is wound loosely around each braid so small loops pop out along its length, giving that soft, lived-in, slightly distressed look. Getting them right at home comes down to two decisions you make before you pick up a comb: which install method suits you, and how long you’ll realistically keep them in.
This guide covers both methods, how much hair to buy and how to prep the synthetic hair so it’s less likely to itch, then how to part, braid and wrap so the roots stay comfortable. It also settles the wear-time question honestly and ends with a takedown that protects your length. Clear an afternoon: the technique is repetitive, not difficult.
Time 1-1.5 hours (crochet) or 3-6 hours (braid-and-wrap), plus a 2-hour hair soakDifficulty IntermediateSteps 9
Crochet vs Braid-and-Wrap Butterfly Locs
| Factor | Crochet | Braid-and-wrap |
|---|---|---|
| Install time | About 1-1.5 hours | About 3-6 hours |
| Hair to buy | Premade butterfly locs | 6-8 packs water wave, 22-28 in |
| Base | Loose braids or cornrows | One loose braid per loc |
| Root look | Less natural at the parts | Most natural |
| Suits | First-timers, short on time | Custom length and loops |
What You’ll Need
As an Amazon Associate, HairAide earns from qualifying purchases. Product links in this guide are affiliate links: they cost you nothing extra and help keep these tutorials free.
- Water wave braiding hair, 22-28 inch (or premade butterfly crochet locs), plus Marley braiding hair About 6-8 packs of water wave hair cover a braid-and-wrap install, premade locs replace them for crochet, and Marley hair is only needed as filler when your locs will be longer than your own hair.
- Apple cider vinegar Mixed at about 1 part to 2 parts water, it rinses off the factory coating on synthetic hair that many wearers blame for an itchy scalp.
- Moisturizing shampoo and deep conditioner Your own hair needs a thorough wash and condition before the install and again at takedown, since it gets no full wash in between.
- Rat-tail comb, wide-tooth comb and sectioning clips The rat-tail comb parts 40-50 even sections, the clips hold the rest of the hair out of the way, and the wide-tooth comb detangles before the install and after takedown.
- Latch hook crochet needle and sharp hair scissors The hook tucks loc ends securely and loops premade locs onto the base, and the scissors trim stray fibers and cut the locs at takedown.
- Scalp cleansing water and dry shampoo Together they keep the scalp clean and less oily while a full wash isn’t possible.
- Lightweight scalp oil and a spray bottle The oil soothes dry, itchy parts during wear and, with water misted from the bottle, helps the synthetic hair slide off the base braids at takedown.
- Silk scarf or silk pillowcase It cuts overnight friction so the loops stay defined and the roots don’t frizz.
Step-by-Step
Step 1 Choose crochet or braid-and-wrap
Decide on the method first, because it sets your shopping list and how long you’ll sit. Braid-and-wrap takes about 3-6 hours: you box-braid each section, then wrap water wave hair around it, so every loc sits on its own braid, the roots look the most natural and you control the length and loop size.
Crochet takes about 1 to 1.5 hours with premade butterfly locs hooked onto a base of loose braids or cornrows, which suits first-timers and anyone short on time, though the roots tend to look less natural at the parts.
Neither method is gentler by default: tension comes from how tightly the base is braided, so whichever you pick, the roots must stay loose.
Step 2 Buy enough hair and soak it
For braid-and-wrap, buy about 6-8 packs of water wave hair, 22-28 inches long; for crochet, check the strand count on premade butterfly loc packs against the 40-50 locs you’re planning.
If you want locs longer than your own hair, add Marley hair as filler: it gets braided into the base so the wrap has a full-length core to hold onto. Soak the loose synthetic hair, filler included, in an apple cider vinegar rinse of about 1 part vinegar to 2 parts water for a couple of hours, which rinses off the factory coating many wearers blame for an itchy scalp.
Rinse it in plain water and hang it until it’s bone dry, because damp fiber wrapped onto your braids dries slowly and can leave the style smelling musty.
Step 3 Start with clean, stretched hair
Shampoo and deep condition your own hair the day before or the morning of the install, because it won’t get a full wash again until takedown. Detangle thoroughly with a wide-tooth comb while it’s damp and still conditioned, working from the ends up, so no knots get sealed inside a braid for weeks.
To stretch it without heat, put the damp hair into four to six big braids or twists and let it air-dry completely. Stretched, dry hair parts cleanly and braids smoothly with less pulling at the root; it’s ready when it’s dry right down to the scalp and the comb glides through.
Step 4 Part 40 to 50 sections
Part your hair into about 40-50 sections with a rat-tail comb, the count stylists typically use, and clip everything you’re not working on out of the way. Smaller sections make thinner locs, and thinner locs reduce the weight on each root and the tension across your scalp, which is what keeps the style comfortable for weeks.
Make the hairline and nape sections slightly smaller again, since that’s usually where hair is finest and where tension shows first. Square parts look the most loc-like, while offsetting each row like bricks hides more scalp as the locs fall; you’re done when no section is noticeably bigger than its neighbors.
Step 5 Braid a loose base
Box-braid each section from root to end, feeding in a slim piece of Marley filler a short way down the braid if you’re extending length. Adding it there rather than knotting it at the scalp keeps bulk and pull off the root.
For crochet, braid the same loose individual braids or flat cornrows to hook the premade locs onto. Each braid should be firm enough to hold but loose at the base: you should be able to wiggle it without the scalp lifting, and the skin at the part should never look shiny or stretched.
If anything stings while you braid, redo it now, because tension that hurts on day one only gets worse once the wrap adds weight.
Step 6 Wrap in the butterfly loops
Lay the end of a strand of dried water wave hair against the root of a braid and wrap it down the braid, covering the base completely. Every few turns, leave the hair slack so it pops out into a small loop before you carry on.
Those loops plus the fiber’s wave create the distressed butterfly texture, so vary their size and spacing rather than making them uniform. At the end of the braid, use the latch hook to tuck the tail up under the last couple of wraps so the loc can’t unravel, leaving a short curly end out if you like.
For crochet, hook each premade loc through the base at the root, wrap its tail around to hide the braid and tuck it the same way, then trim stray fibers with sharp scissors once every loc is in.
Step 7 Clean your scalp without a full wash
Because the locs cover the scalp and hold water, you can’t give your hair a full wash while they’re in, so clean the scalp directly instead. Once or twice a week, apply cleansing water along each part, massage it in with your fingertips (not your nails) and let the scalp air-dry; dry shampoo at the roots soaks up oil between those days.
If the locs get soaked by rain, a swim or a rinse, squeeze them gently and let them dry all the way through before you cover them or sleep, because damp synthetic hair packed around braids is what turns a style musty.
Finish with a few drops of lightweight scalp oil on dry or itchy parts, and sleep in a silk scarf or on a silk pillowcase so friction doesn’t frizz the loops or rough up the roots.
Step 8 Set your wear time and refresh
Wear-time advice genuinely conflicts: makeup.com allows 8-12 weeks with proper care, while un-ruly treats 4 weeks as the general rule because you can’t reach the scalp for a full wash. Our rule is based on what actually limits the style, which is scalp access, tension and weight.
Plan on four weeks, refresh the hairline and any frayed locs at about two weeks, and stretch toward eight only if your locs are thin, your scalp is calm and the roots look clean.
Hair grows about half an inch a month, so the longer you wait, the more new growth and trapped shed hair gather at the base, which is where matting starts. Take them down early at the first sign of scalp pain, tension bumps along the parts or hairline, or matting at the roots.
Step 9 Take them down slowly
Cut each loc well below where your own hair ends. Hold a stretched section of your hair against a loc first to find that point, and when in doubt, cut lower.
Unravel the wrap (or the crochet loc’s tail) from the bottom up and slip the synthetic hair out of the base braid, misting with water from a spray bottle and working a little oil along the braid so nothing snags. Then unbraid your own hair, letting any Marley filler fall away, and pull out shed hair with your fingers: weeks of normal shedding come out at once and look alarming, but it isn’t breakage.
Detangle with a wide-tooth comb from the ends up, then shampoo and deep condition before your next style, because your hair has gone weeks without a full wash.
Common Mistakes to Avoid
- Braiding the base tight so the install will ‘last’. Tension at the root, not neatness, is what causes tension bumps and edge loss.
- Wrapping with synthetic hair that’s still damp from the vinegar soak, or covering wet locs at night, which traps moisture and leaves the style smelling musty.
- Making too few chunky locs, so each root carries more weight and pulls harder on the scalp.
- Keeping the style in past what your scalp tolerates because the locs still look good on the outside.
- Cutting too close at takedown and snipping your own ends instead of cutting well below where your hair stops.
Pro tip Wrap the hairline and nape locs with noticeably less water wave hair than the rest, not just smaller parts. Those roots are usually the finest and show tension first, and they’re the locs you’ll redo at the two-week refresh, so lighter ones come out cleanly and keep your edges intact.
The Bottom Line
Done well, butterfly locs give you weeks of soft, undone texture with almost no daily styling. A loose base, 40-50 slim locs, a clean scalp and a silk scarf at night do most of the work. Refresh the hairline at about two weeks, plan your takedown for around four, and only stretch toward eight when your scalp is clearly comfortable.
Give your hair a break between installs to wash, deep condition and check your edges before the next protective style. Book a professional braider if you want very long locs or a perfectly even root, and see a dermatologist if thinning edges, persistent bumps or scalp pain don’t settle after takedown.
Frequently Asked Questions
How long can you keep butterfly locs in?
Sources disagree. Some allow 8-12 weeks with proper care, while others say about 4 weeks because the scalp can't get a full wash. A practical rule is four weeks with a refresh at two, stretching toward eight only if the locs are thin, the scalp is calm and the roots aren't matting.
How many packs of hair do I need for butterfly locs?
For a braid-and-wrap install, stylists use about 6-8 packs of water wave hair, 22-28 inches long, to make 40-50 locs. If you want locs longer than your own hair, you'll also need Marley hair braided into the base as filler. For crochet, match the strand count on premade loc packs to the number of locs you want.
Can you wash your hair with butterfly locs in?
Not fully. The locs cover the scalp and hold water, so a proper shampoo isn't practical. Clean the scalp with cleansing water along the parts and use dry shampoo between cleanses. If the locs get wet, squeeze them and let them dry completely before you cover them or sleep, to avoid a musty smell.
Do butterfly locs damage your natural hair?
They protect your hair when the base is loose and the wear time is reasonable, but tension and weight can stress the hairline. Thinner locs, loose roots and taking them down at the first sign of scalp pain, tension bumps or matting all lower the risk. If your edges are already thinning, get the cause checked before adding extension weight.
Is crochet or braid-and-wrap better for butterfly locs?
Crochet with premade locs is faster, taking about 1 to 1.5 hours, and suits first-timers. Braid-and-wrap takes about 3-6 hours but gives the most natural roots and lets you choose the length and loop size. Neither is automatically gentler: comfort depends on how loosely the base is braided.
Keep Reading
Sources
- Butterfly locs everything you need to know un-ruly.com
- Butterfly locs how to makeup.com