Quick answer To use a hair straightening brush, start on completely dry, detangled hair with heat protectant, set the lowest temperature that suits your hair type, then glide slowly through small sections from root to tip while holding the ends taut. Tension, not extra heat, does the straightening.
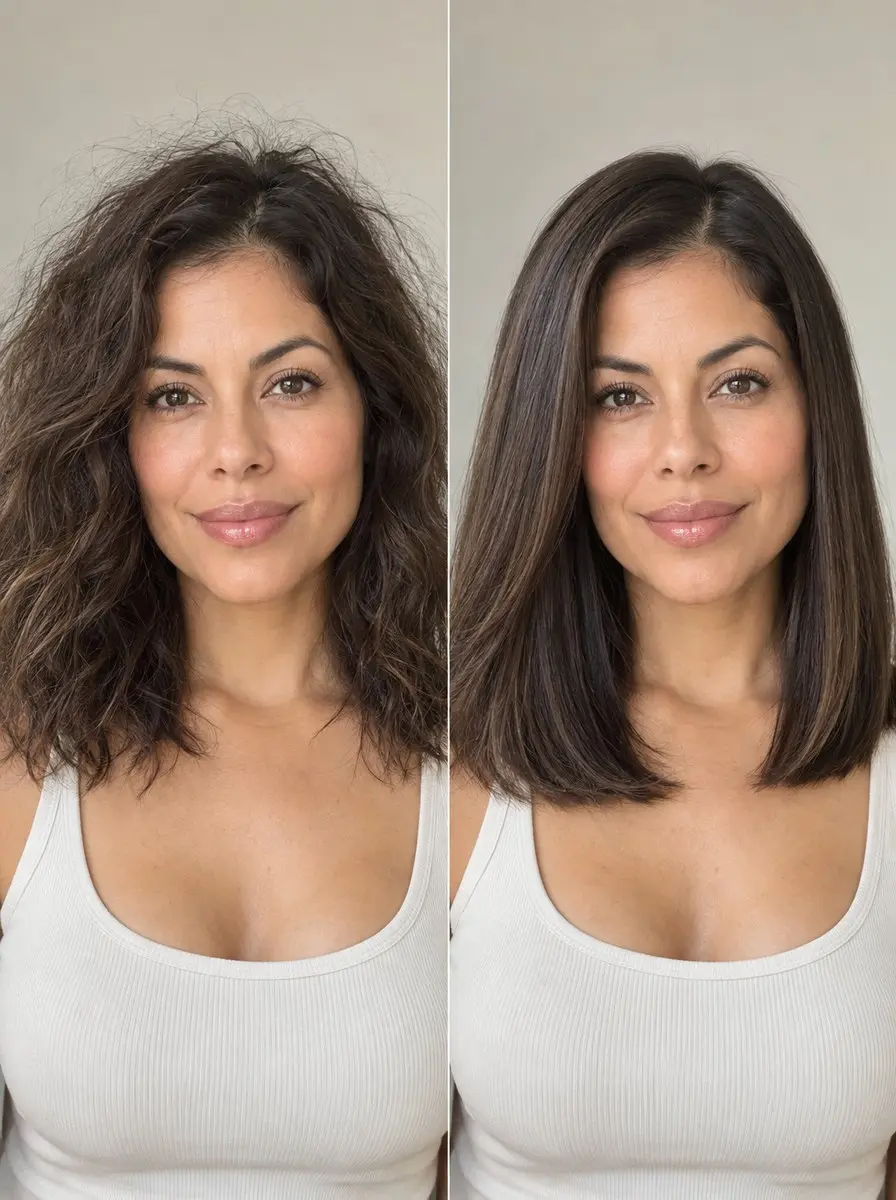
A hair straightening brush promises flat-iron smoothness with the ease of brushing your hair, and on the right hair it delivers: a few slow passes relax waves and frizz into soft, swingy straightness. But plenty of people unbox one, rush it through on the highest setting and end up with hair that’s half-straight, puffy at the ends and crackling with static.
The fix is technique, not more heat. This isn’t a hot air brush, which dries damp hair with airflow; it’s a heated-bristle brush that works on dry hair, much like a flat iron, so it has its own rules.
Below you’ll find who it suits, how to prep, the right temperature for your hair type, section size, glide speed and tension, plus fixes for flyaways, static and a dirty brush. On fine to medium, wavy to slightly curly hair, it’s an easy 20-to-40-minute routine at home.
Time 20-40 minutesDifficulty BeginnerSteps 9
Straightening Brush Temperature by Hair Type
| Hair type | Start at | Upper limit |
|---|---|---|
| Fine, bleached or damaged | 130°C (265°F) | 150°C (300°F) |
| Medium or wavy | 150°C (300°F) | 180°C (355°F) |
| Thick or coarse | 170°C (340°F) | 200°C (390°F) |
| Very coarse or tightly coiled | Use a flat iron instead | — |
What You’ll Need
As an Amazon Associate, HairAide earns from qualifying purchases. Product links in this guide are affiliate links: they cost you nothing extra and help keep these tutorials free.
- Heated straightening brush The tool itself; an adjustable temperature setting lets you start low for your hair type and raise heat one step at a time.
- Flat iron Optional: the better pick if you want a pin-straight finish or your hair is very coarse or tightly coiled.
- Wide-tooth comb Removes knots while hair is damp and spreads the protectant evenly so the bristles glide later instead of snagging.
- Heat protectant spray Goes on damp hair before drying, plus a light top-up once it’s dry, to help limit heat damage from the blow-dryer and the brush.
- Blow-dryer Optional: dries damp, protectant-coated hair completely before you brush; skip it if you let your hair air-dry.
- Sectioning clips Hold back the hair you aren’t working on so each section stays thin enough to straighten in one or two passes.
- Lightweight anti-frizz hair serum Smooths flyaways and calms static after styling without weighing hair down.
- Microfiber cloth Wipes product residue off the cooled plate and bristles without soaking the tool.
Step-by-Step
Step 1 Decide whether the brush suits your hair
A straightening brush suits fine to medium hair that is wavy to slightly curly, when you want quick, natural-looking smoothing rather than a glass-flat finish.
Its heated plate and bristles hold hair more loosely than a flat iron’s plates clamp it, so the result keeps soft movement and some body but won’t turn out pin-straight. If you want that pin-straight finish, or your hair is very coarse or tightly coiled, a flat iron straightens each section more effectively in fewer passes.
If you want lift at the root and a bend at the ends, a blowout on damp hair creates that shape and this tool doesn’t; if your hair matches the first description, read on.
Step 2 Detangle and protect damp hair
Straight after washing, while your hair is still damp, comb through it with a wide-tooth comb, starting at the ends and working up to the roots, so knots come out now instead of catching on the bristles and snapping mid-glide later.
Then mist a heat protectant spray over each area, concentrating on the mid-lengths and ends, and comb it through so it coats every strand evenly.
Putting it on damp hair means it is already in place if you blow-dry, and it forms a thin film on the hair that helps limit the moisture loss and roughness heat styling causes over time. You’re done when the comb slides from root to tip without catching and the lengths feel lightly, evenly misted rather than soaked.
Step 3 Dry your hair completely
With the protectant already on, let your hair air-dry or blow-dry it until it is completely dry. A straightening brush is designed for dry hair only: on damp strands the water inside the hair heats quickly and can cause serious heat damage, and wet patches straighten unevenly.
Check the spots that dry last, the nape, the crown and the roots behind your ears, because they can stay cool and damp after the lengths feel done.
Just before your first pass, mist a light top-up of protectant over the lengths and give it a minute or two to dry, since the spray puts a little moisture back into the hair; you’re ready when every part feels dry and room temperature, and a hiss or puff of steam on the first glide means it isn’t dry yet.
Step 4 Set the lowest temperature that works
Choose a starting heat for your hair type rather than the maximum: about 130°C (265°F) for fine, bleached or damaged hair, staying at or under 150°C (300°F); about 150°C (300°F) for medium or wavy hair, going no higher than 180°C (355°F); and about 170°C (340°F) for thick or coarse hair, up to 200°C (390°F).
Turning the dial to the top to finish faster is one of the most common straightening mistakes, because extra heat adds damage on every pass without fixing the usual causes of a half-straight result, which are section size, speed and tension.
If your brush shows levels rather than degrees, check the manual to see what each one means. Let the brush reach its set temperature before you start, and raise it one step at a time only when a thin, slow, taut pass still leaves a bend.
Step 5 Work in small, clipped sections
Divide your hair into four quadrants with sectioning clips, leaving only a thin bottom layer at the nape loose, then work in sections about 1 to 2 inches (2.5 to 5 cm) wide and thin enough for the bristles to pass right through.
A thin section lets every strand reach the heated plate, so one or two passes straighten it, while a thick one leaves its middle untouched, which is the most common reason hair comes out half-straight.
Work from the nape upward and from back to front, letting down the next layer from the clips once the one below it is smooth. A section is the right size when the bristles come out the other side of it as you slide the brush in.
Step 6 Glide slowly with tension
Slide the brush into the section close to the roots, without touching your scalp, so the hair sits down against the heated plate at the base of the bristles; on many models the bristle tips stay cooler and the plate does the work.
Hold the end of the section taut with your free hand and glide the brush down to the ends at about 1 to 2 inches (2.5 to 5 cm) per second, never pausing in one spot.
Tension is what does the straightening: it pulls the hair straight while the heat sets it, so a slow, taut pass achieves more than a hotter setting. One or two passes should leave the section smooth; if it still bends after that, stop and troubleshoot rather than going over it again and again.
Step 7 Fix sections that won’t straighten
When a section stays wavy or frizzy after two passes, work through the usual causes before you touch the temperature: make the section thinner, slow your glide, pull the ends tighter and check that the hair is truly dry.
Raising the heat skips those fixes and adds damage, while a thinner, tauter section usually straightens at the same setting. Look at the bristles too, because trapped hair or a coating of product residue holds strands away from the heated plate.
Only if a thin, slow, taut pass on fully dry hair still leaves a bend should you raise the heat one step, staying within the upper limit for your hair type.
Step 8 Tame flyaways and static
Let your hair cool for a minute or two before you touch it, because hair holds its new shape as it cools and handling it while hot lets the bend creep back in.
Warm one or two drops of a lightweight serum between your palms and smooth it over the mid-lengths and ends first, then skim what’s left over the surface and along the hairline, where short flyaways stand up.
Static builds when dry hair rubs against the bristles, especially in dry indoor or winter air, and a thin film of serum calms it by adding slip so strands stop lifting away from each other. Stop when the surface lies flat and the ends look glossy rather than greasy; on fine hair, start with a single drop.
Step 9 Clean the brush and pace your heat
When you finish, unplug the brush and let it cool completely, then pull trapped hairs out from between the bristles with your fingers.
Wipe the plate and bristles with a slightly damp microfiber cloth to lift product residue, keeping water away from the controls and cord and never submerging the tool; cleaning instructions vary by model, so check your manual first. Remove hair after every use and do the wipe-down about once a week if you use styling products, because baked-on residue snags strands and stops them sitting flat against the heated plate.
To limit the heat your lengths add up over time, stick with the lowest setting that works and, where you can, leave a few heat-free days between sessions.
Common Mistakes to Avoid
- Starting while the roots or nape are still damp, which causes heat damage and patchy, uneven straightening.
- Turning the brush to its highest setting to finish faster instead of starting at the low end for your hair type.
- Taking thick sections and racing through them, so the middle of each section never reaches the heated plate.
- Going over the same section again and again instead of thinning the section and holding the ends taut.
- Smoothing serum or oil on before heat styling, which coats the bristles and can leave hair limp and greasy.
- Never cleaning the brush, so trapped hair and baked-on residue snag strands and keep them off the plate.
Pro tip On the crown, lift each section straight up from your scalp for the first inch of the glide before bringing the brush down and back; that small over-direction at the root keeps the top from lying flat against your head, which is what happens when every pass starts parallel to the scalp.
The Bottom Line
Done well, a straightening brush gives smooth, soft-moving hair with less fuss than a flat iron: dry, detangled hair, the lowest heat that works, thin sections and a slow, taut glide.
When results disappoint, the cause is usually one of those, so adjust section size, speed and tension before the dial. Restyle when your natural texture returns after washing or a humid day, and keep the bristles clean so every pass stays even.
See a stylist if your ends feel rough, snap easily or look see-through after heat styling; they can tell you whether a trim or a break from heat will help most. And if you want a pin-straight finish or your hair is tightly coiled, a flat iron will serve you better than turning this brush hotter.
Frequently Asked Questions
Can you use a hair straightening brush on damp hair?
No. Straightening brushes are made for completely dry hair, and heating damp strands can cause serious heat damage and patchy results. Apply a heat protectant and let it dry first, then keep fine or bleached hair at or below about 150°C (300°F); coarse hair can go up to 180-200°C (355-390°F), raising heat only if needed.
Is a straightening brush as good as a flat iron?
It does a different job. A straightening brush gives quick, soft smoothing with natural movement on fine to medium, wavy to slightly curly hair, but it won't leave hair pin-straight. A flat iron clamps each section between two plates, so it handles very coarse or tightly coiled hair better and gives the sleekest finish.
Why is my hair still frizzy or wavy after using a straightening brush?
Usually the sections are too thick, the glide is too fast or there's no tension on the ends, so part of each section never sits against the heated plate. Take sections 1 to 2 inches wide, glide at about 1 to 2 inches per second and hold the ends taut. Hair that isn't fully dry, or bristles coated in product, cause it too.
How often can I use a hair straightening brush?
You can use it daily on healthy hair if you keep to the lowest setting that works and one or two passes per section, but heat damage adds up over time. On fine, bleached or dry hair, aim for a few heat-free days between sessions and stretch each style for a day or two before restyling.
How long do straightening brush results last?
In dry weather the smoothness usually lasts a day or two, or until your next wash. Humidity, sweat and rain bring the wave back sooner, because moisture lets hair return to its natural shape. A drop of serum on the surface helps it resist frizz, and a quick pass on the front sections refreshes it without restyling everything.
Keep Reading
Sources
- How to use hair straightening brush tymo.pages.dev
- 9 mistakes everyone makes with hair straighteners t3.com
- Brad mondo how to fix hair mistakes refinery29.com