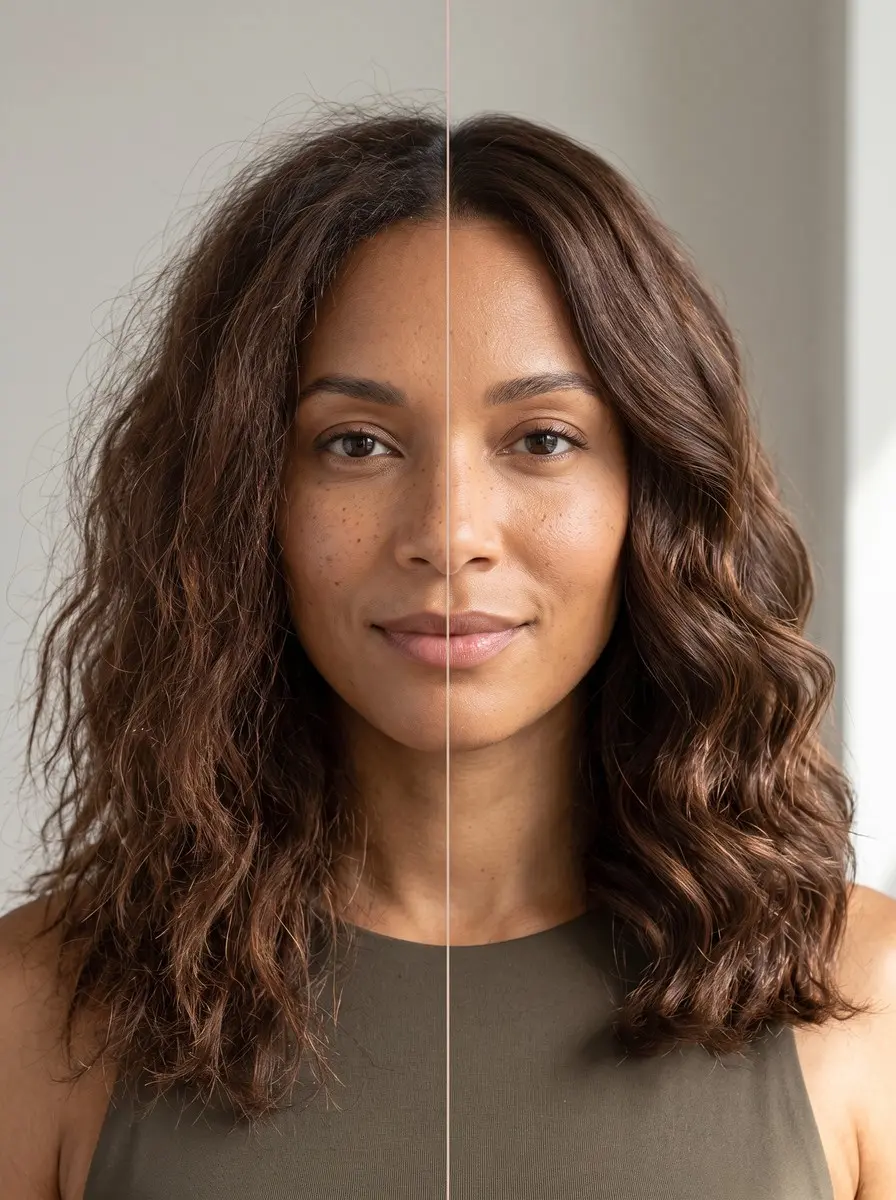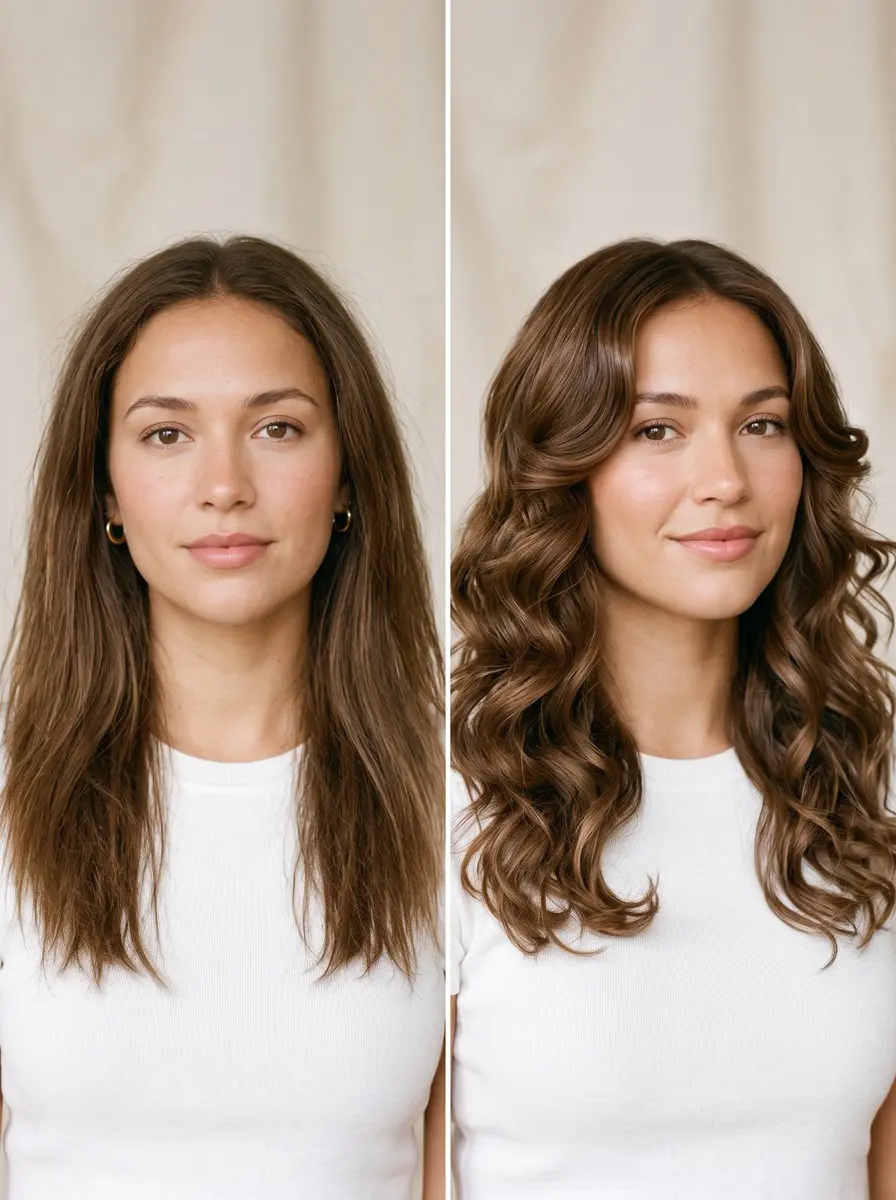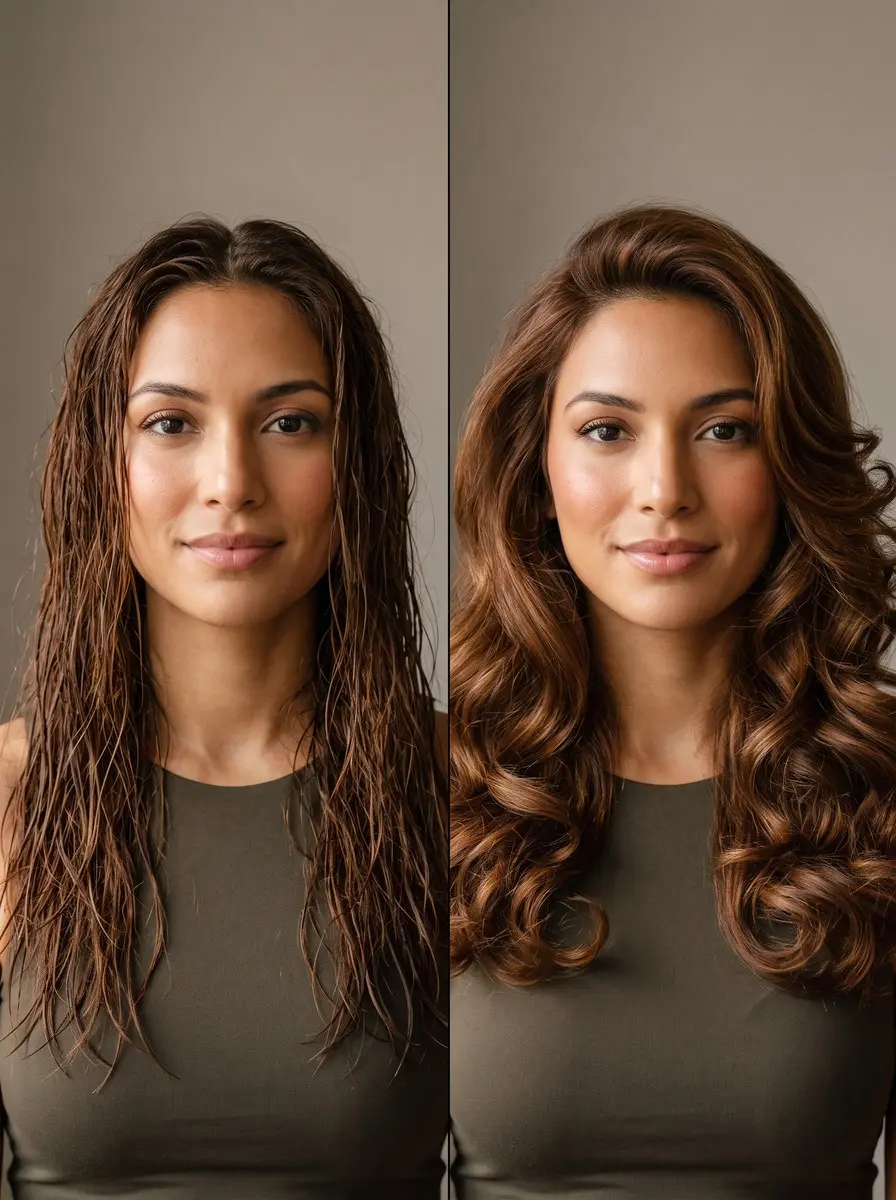
Quick answer To use a Dyson Airwrap, dry hair to damp with the dryer attachment, then curl small sections with the barrel's arrow pointing to the side you're styling: left on the left, right on the right. Hold about 15 seconds, cool-shot 5-10 seconds, switch off and pull down to release.
The Dyson Airwrap tends to deliver one of two experiences: bouncy, salon-smooth curls that last all day, or soft waves that drop before you’ve left the house. The difference is rarely the tool itself.
Learning how to use the Dyson Airwrap well comes down to details the box doesn’t spell out: how damp your hair is when you start, which barrel goes on which side of your head, how small each section is, and whether you actually use the cool shot.
The good news is that every one of those is easy to fix at home. This guide follows the current Airwrap multi-styler and the Airwrap i.d., with notes where the original model differs. You’ll get one start-to-finish curl routine, with the adjustments for short, fine, thick and curly hair built into the steps where they matter, plus a smoothing-brush blowout in the FAQs.
Time 30-50 minutesDifficulty BeginnerSteps 7
Airwrap Barrel Sizes
| Barrel | Result |
|---|---|
| 40mm | Loose waves |
| 30mm | Classic curls |
| 20mm | Tighter curls |
What You’ll Need
As an Amazon Associate, HairAide earns from qualifying purchases. Product links in this guide are affiliate links: they cost you nothing extra and help keep these tutorials free.
- Dyson Airwrap multi-styler The tool this guide covers: it dries, curls and smooths damp hair with airflow and swappable attachments.
- Lightweight heat protectant spray Coats damp strands at prep so every pass of the dryer, barrel and brushes hits protected hair.
- Lightweight volumizing mousse Gives fine or slippery hair the grip it needs to hold an Airwrap curl.
- Duckbill sectioning clips Keep the top layer out of the way for small, even sections, and pin curls while they cool.
- Flexible-hold hairspray A light mist over fully cooled curls helps them hold without stiffness or crunch.
- Wide-tooth comb Combs heat protectant through so every strand is coated.
- Lightweight hair oil Optional: smoothed over dry tips at the finish.
- 20mm curling barrel Optional: gives tighter, longer-lasting curls on fine hair.
Step-by-Step
Step 1 Choose your barrel and dryer
Choose your barrel and dryer attachment for your hair type and length, because barrel size decides the result: the 40mm barrel gives loose waves, the 30mm gives classic curls and the 20mm, often sold separately, gives tighter curls.
If your hair is short, such as a bob or lob, or fine or thick and prone to dropping curls, pick the 20mm or 30mm: a section has to make at least one full turn around the barrel to curl rather than just bend, and a tighter curl has more shape to lose before it falls flat.
If your hair falls well past your shoulders, Dyson’s long barrels leave room to wrap the extra length. For drying, newer models use the Coanda smoothing dryer and the original Airwrap uses the pre-styling dryer. You’re ready when the dryer attachment is clipped on, your barrel is within reach and you can see the arrow on it.
Step 2 Prep damp hair with protection
Wash and condition, then squeeze hair with a microfiber towel or cotton T-shirt until it stops dripping; rubbing creates friction that starts frizz before you’ve begun. Mist a heat protectant evenly through the mid-lengths and ends and comb it through so every strand is coated.
If your hair is fine or slippery, also work a golf-ball-sized amount of lightweight mousse from roots to ends, because it gives the strands the grip a curl needs to hold.
Product goes in now because the Airwrap sets hair’s shape as it dries, and heavy oils or creams added at this stage weigh the wrap down and slow drying, so save those for the finish. You’re done when hair no longer drips and a wide-tooth comb glides through with no sticky or dry patches.
Step 3 Rough-dry to about 80% dry
Rough-dry with the pre-styling dryer or Coanda smoothing dryer on high airflow and medium heat, starting at the roots, since they take longest. Stop at about 80% dry, because this is the step that decides whether curls last: water breaks the hydrogen bonds that hold hair’s shape, and they re-form in whatever position hair dries in.
Too wet, and the barrel can’t finish drying a section before you release it; fully dry, and the air has little left to set. On the Coanda smoothing dryer, switch to the smoothing setting for the final pass to lay down flyaways.
If your hair is curly or coily and you want smooth barrel curls, use the smoothing setting for the whole pass, moving down the lengths with the airflow, so the lengths dry stretched and lie flat against the barrel later.
If your hair is thick, pinch a few pieces from the underside at the nape and behind the ears before you put the dryer down: if they feel wet rather than cool-damp, give that layer another pass, because dense hair holds water underneath long after the top feels ready. You’re done when hair feels damp and slightly cool all over, with no dark, wet patches at the nape or crown.
Step 4 Section hair and check arrows
Clip the top half of your hair up and out of the way, then take sections about an inch (2-3 cm) wide and thin enough that the barrel shows through the hair once it wraps.
Small sections matter because the air has to wrap and dry the whole piece in about 15 seconds; a thick one won’t spin on neatly and stays damp in the middle, so it drops. If your hair is thick, divide each layer into twice as many sections as feels natural, since a dense section holds more water at its core than the barrel can dry in one hold.
Check the arrow on the barrel before each side: a barrel pointing left goes on the left side of your head and one pointing right goes on the right, which gives symmetrical curls that turn away from your face.
On the current multi-styler and Airwrap i.d., switch direction with the control at the barrel’s tip when you change sides; on the original Airwrap, swap to the matching barrel. You’re ready when the top is clipped away, your first section is no wider than the barrel and the arrow points toward the side you’re working on.
Step 5 Wrap each section on the barrel
Swap to your barrel, set the styler to high heat and high airflow, which is Dyson’s recommended setting for curls, and switch it on before it touches your hair.
Hold the barrel about 10 cm (4 in) from the ends of a section and let the airflow pull the hair around it on its own, then move the barrel up toward your head without twisting it and hold for about 15 seconds. It works because of the Coanda effect: air follows the curved barrel surface, drawing the hair in and wrapping it for you, so twisting by hand only fights that airflow and causes tangles.
If your hair is thick, give each section the full 15 seconds or a little longer; if it is fine or bleached, use medium heat and add a few seconds instead.
If your hair is short and a piece won’t make a full turn, use the round volumizing brush on it: hold it under the root for a few seconds, then draw it to the ends and turn them under. A section is done when the outside of the wrap feels dry and warm, with no cool, damp spots when you press it lightly.
Step 6 Cool shot and release curls
While the hair is still wrapped, press the cool shot for 5-10 seconds. Hair holds a new shape once it cools, so a warm curl released straight off the barrel stretches out under its own weight; the cool shot sets it first. Then switch off the airflow and pull the barrel down so the curl slides off intact.
If your hair is fine or slippery, use the full 10 seconds and pin each curl as it comes off, as described in the pro tip below. On the Airwrap i.d., the i.d.curl button runs this wrap, curl and cool-shot sequence automatically once you’ve set up a hair profile in the MyDyson app.
You’re done with a section when the curl slides off in one coil, feels cool to the touch and keeps its shape as it drops; repeat steps 4 through 6 layer by layer, switching barrel direction when you change sides.
Step 7 Finish and style the curls
Leave every curl alone until your whole head is done and all of them feel completely cool, because touching or brushing curls while they’re warm is the fastest way to stretch them out. Then rake your fingers through from underneath to break the curls into softer, fuller waves; a brush would pull them straight.
Mist a flexible-hold hairspray from about 30 cm (12 in) away so it lands as a light veil rather than wet patches, and if your ends feel dry, smooth a single drop of hair oil over just the tips.
If your hair is fine, skip the oil and keep to one light mist of hairspray, since extra product weighs fine curls down. You’re done when the curls bounce back after you shake your head and nothing feels crunchy or sticky.
Common Mistakes to Avoid
- Starting with dripping-wet or bone-dry hair: the barrel can’t finish drying a wet section before you release it, and fully dry hair takes a weak curl, so aim for about 80% dry.
- Taking sections too big, so hair won’t wrap neatly, stays damp in the middle and the curl drops soon after.
- Twisting the barrel by hand or pulling it out with the air still running, which fights the airflow and causes tangles.
- Using one barrel direction on both sides, so the two sides don’t mirror each other. Follow the arrow: left-pointing barrel on the left, right-pointing on the right.
- Skipping the cool shot, or brushing and touching curls while they’re still warm, which stretches them out before they’ve set.
- Treating frizz with more heat. Frizz usually means hair was over-dried or rubbed with a towel before styling, so finish on the Coanda dryer’s smoothing setting or with a smoothing brush instead.
- Ignoring a clogged filter: built-up lint weakens the airflow that wraps the hair and can make the styler overheat and cut out.
Pro tip For curls that last on fine or slippery hair, coil each curl back up as it comes off the barrel and pin it to your head with a duckbill clip until your whole head is done and cool. Then remove the clips and break the curls apart with your fingers, never a brush.
The Bottom Line
Once the routine clicks, an Airwrap session is simple: damp hair, small sections, the right barrel direction for each side, about 15 seconds on the barrel and a full cool shot before release. To refresh on day two, lightly mist just the front pieces with water and re-curl them rather than restyling your whole head.
Because the Airwrap styles damp hair with heated air, use a heat protectant every session. If you reach for a curling iron for tighter or longer-lasting curls, use it on completely dry hair only, at up to about 150C/300F for fine or bleached hair and 180-200C/355-390F for coarse hair. If your hair snaps or feels gummy when wet, see a stylist before using any heat.
Frequently Asked Questions
Why do my Dyson Airwrap curls fall out so fast?
Curls usually drop for one of four reasons: hair was too wet or too dry when you started, sections were too big to dry through, you skipped the cool shot, or you touched curls while still warm. Start about 80% dry, use smaller sections and a full 5-10 second cool shot, and on fine hair try the 20mm barrel with mousse.
Why won't my hair wrap around the Airwrap barrel, and why does it tangle?
Hair that won't catch is usually in a section that's too thick, too dry, or held too far from the ends, so start about 10 cm from the tips. Tangling comes from twisting the barrel or pulling it out with the air still on. If wrapping suddenly gets weaker, unplug the styler and clean the filter, then keep cleaning it at least monthly.
How do I use a Dyson Airwrap for a smooth blowout instead of curls?
Rough-dry to about 80% with the pre-styling or Coanda smoothing dryer, then brush small sections from root to tip with the firm smoothing brush (thick or coarse hair) or soft smoothing brush (fine hair) until each is dry and flat. For root lift, hold the round volumizing brush under the roots for a few seconds, draw it through to the ends, then use the cool shot to set the shape.
Which Airwrap attachment should I buy first?
If you have fine hair or want tighter, longer-lasting curls, the 20mm barrel is the most useful add-on. For hair well past the shoulders, Dyson's long barrels leave room to wrap more length. Original Airwrap owners should check Dyson's compatibility list before buying, since not every newer attachment fits every model.
Is a Dyson Airwrap worth it compared with a curling iron?
A Dyson Airwrap dries, smooths and curls damp hair with heated airflow, so it suits anyone who wants one tool and one session from wet to styled. A curling iron works only on completely dry hair, costs far less and gives tighter, longer-lasting curls on thick or coarse hair. The trade-off is convenience versus price and hold, and cheaper air-wrap multi-stylers offer the same dry-and-curl routine for less.
Keep Reading
Sources
- How to use dyson airwrap bustle.com
- Dyson airwrap multi styler how to curl your hair 1345 community.dyson.com
- Dyson airwrap styler how to use dyson.ie