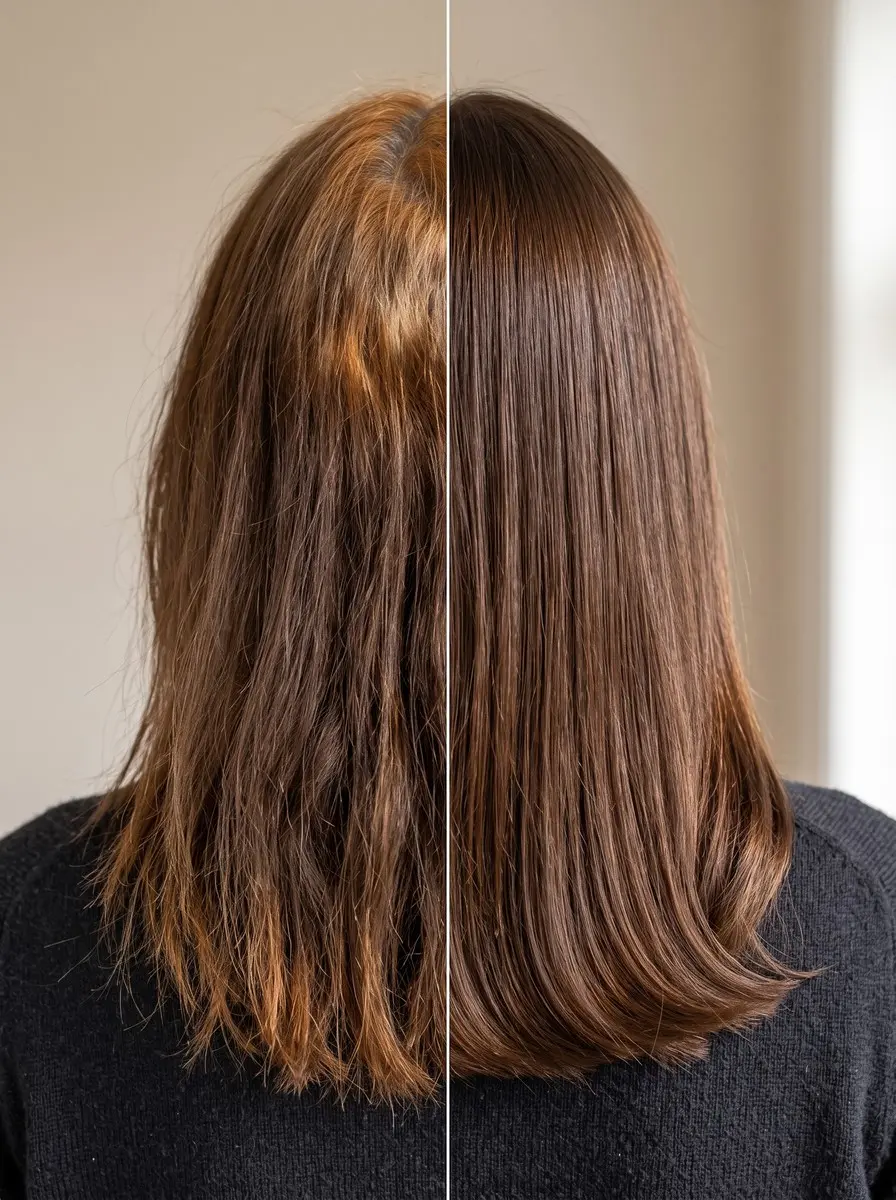
Quick answer To fix patchy hair dye, wait 48 hours, then check dry hair in daylight to read the pattern. Use a toning gloss for uneven tone, a semi-permanent dye matched to your darkest shade for light patches, and a color remover or full re-dye for severe patches.
You followed the box, waited out the timer and rinsed. Now the crown is a shade lighter than the sides, the roots are glowing, or the ends have gone darker than everything else. Patchy dye is one of the most common home-color mishaps. The urge to grab another box and do it all again is exactly what turns a fixable patch into a permanent dark band.
The better route is to work out what went wrong first. Light patches, dark patches, banding between roots and ends, and uneven tone each have a different cause, so each needs a different fix: a gentle gloss, a semi-permanent fill or a full reset.
This guide shows you how to fix patchy hair dye at home: read the pattern, pick the correction that matches it, and spot the point where a colorist is the smarter call. Most patchy results can be evened out with patience and the right product.
Time 45 minutes to 2 hours hands-on, plus about 4 days of waiting (about 2 weeks before a permanent re-dye)Difficulty IntermediateSteps 8
Patchy Hair Dye: Pattern, Cause and Fix
| What you see | Likely cause | Fix |
|---|---|---|
| Brassy or uneven tone | Uneven lift exposing warm pigment | Toning gloss or color-depositing mask |
| Lighter patches | Thick sections, missed spots | Semi-permanent matched to darkest area |
| Hot roots | Scalp heat, undyed regrowth | Demi gloss on the roots only |
| Darker ends or spots | Porous ends, overlapped dye | Clarifying washes (max four) or remover |
| Severe, all-over patches | Unevenly mixed dye or developer | Color remover, full re-dye, or both |
What You’ll Need
As an Amazon Associate, HairAide earns from qualifying purchases. Product links in this guide are affiliate links: they cost you nothing extra and help keep these tutorials free.
- Color Reviving Gloss Lays an even, color-only film of tone over brassy or uneven patches without lightening anything.
- Custom-matched permanent color kit A shade matched to your current hair and your goal takes the guesswork out of correcting the whole head.
- Semi-permanent hair color in your darkest shade Shows mostly on lighter patches, so they catch up with the rest of your hair.
- Tinting brush, mixing bowl and sectioning clips Thin, clipped sections and a brush coat every strand, which stops new patches forming.
- Hair color remover Shrinks permanent dye molecules so they rinse out when patches are too severe to blend.
Step-by-Step
Step 1 Let it settle, then read the pattern
Give fresh color 48 hours before you put anything else on it. Wet hair looks darker than dry hair, fresh dye often softens once its first shampoo rinses out loose surface pigment, and your scalp needs a break before it meets another chemical.
In the meantime, braids, twists or a sleek bun break up patches, and a tinted dry shampoo or root spray blurs bright spots for a day. When the 48 hours are up and your hair is fully dry and unstyled, stand by a window in daylight with a hand mirror behind your head, because warm bathroom bulbs hide brass and exaggerate dark spots.
Part your hair at the crown, the sides and behind the ears, and sort each area into one of four patterns: lighter patches, darker patches, banding between roots and ends, or uneven tone such as brassy streaks. You’re done when every area has a pattern and a phone photo, which becomes your before shot for every check that follows.
Step 2 Match the pattern to its cause
The cause tells you which fix to use and keeps you from repeating the mistake. Lighter patches usually mean the dye didn’t saturate every strand, because sections were too thick for it to reach the middle or a spot at the back was missed.
Ends darker than the roots happen because older lengths are more porous and absorb color faster, while dark spots elsewhere usually mark dye that overlapped onto already colored hair.
Hot roots, where regrowth came out brighter than the lengths, happen because scalp heat speeds up processing and undyed regrowth lifts more easily than previously colored hair. Brassy streaks on otherwise even depth mean some areas lifted more and exposed more warm pigment, and blotchiness everywhere usually traces back to dye and developer that weren’t measured or mixed evenly.
Hold the shade chart from the box against each area in daylight: if patches sit more than two shades apart or cover most of your head, treat it as severe and plan on a color remover, a full re-dye or both.
Step 3 Patch and strand test your fix
Whichever fix you’ve picked, from a gloss to a full re-dye, test it right before it goes on your head. Start with the patch test: dab a little behind your ear or inside your elbow and leave it for 48 hours, or follow the product’s own test directions, because you can develop a dye allergy even to a product you’ve used before without trouble.
If the skin turns red, itchy or swollen, don’t use that product.
Then strand test: apply the product to two hidden strands from the underneath layer, ideally ones that include part of a problem patch, and rinse one at the label’s minimum time and the other at its maximum. Let both dry and compare them in daylight with your target, which is your darkest section for a fill or the evenly toned hair around a streak for a gloss.
Use the shortest time that matches; if neither strand is deep enough, choose a shade one step deeper rather than leaving the product on past the label’s maximum. For a color remover, the strand simply shows you the lighter base you’ll be working with.
Step 4 Even out patchy tone with a gloss
If the depth is roughly even but the tone is patchy, such as brassy streaks, a warm crown or cooler ends, a toning gloss or color-depositing mask is the gentlest fix. These products only add color, so they can’t lighten anything, and they lay a sheer, even film of pigment over every strand that blurs small differences in tone.
Pick the shade with the color wheel: violet cancels yellow, blue cancels orange, and a gold or copper gloss warms flat, ashy patches. Apply it as the label directs, usually to clean, towel-dried hair, saturating each section until no dry strands show, and process for your strand-test time; most glosses and masks list 5 to 20 minutes.
Rinse until the water runs clear, let your hair dry, and compare it with your before photos in daylight: you’re done when the streaks no longer stand out from the hair beside them.
Step 5 Fill light patches and hot roots
Light spots and hot roots both mean some hair holds less color than the rest, so each gets a targeted fill rather than another coat all over.
For light patches on an otherwise even head, choose a semi-permanent dye that matches the darkest part of your hair, not the patches: semi-permanent color only adds pigment, so it shows strongly on lighter areas and barely changes hair that is already that dark, which is exactly what evens things out.
Clip your hair into small sections and use a tinting brush to paint the light patches first, working the dye in until every strand is coated, then brush the rest over the surrounding hair so no edge shows, and process for your strand-test time, often 20 to 30 minutes.
For hot roots, brush a demi-permanent gloss in the shade of your lengths onto the bright regrowth only, stopping where the color changes, so the roots deepen to match while lengths that already hold plenty of color don’t get any darker; process within the 5 to 20 minutes most demi glosses list.
Rinse until the water runs nearly clear, let your hair dry, and part it in three places in daylight: you’re done when the old patches match your darkest section and you can’t see a line between the first inch of root and the hair a few inches down.
Step 6 Fade darker ends and patches
For ends or spots that came out darker than the rest, don’t add more color: dye can’t lighten dye, and another layer only deepens the band. If you used semi- or demi-permanent color, wash the dark areas with a clarifying shampoo, which fades deposit-only color faster than a regular shampoo, and condition the ends after every wash because clarifying is drying.
After each wash, let your hair dry and compare the dark area with the roots and mid-lengths in daylight, next to your before photo.
Stop as soon as they match, and cap it at four clarifying washes spread over about a week. If the dark area is still clearly deeper after that, or the dye was permanent and barely shifts with washing, move on to a color remover on those sections only.
Step 7 Strip severe patches with a color remover
If severe patches include areas darker than your goal, take the color out before re-dyeing, because no dye can lighten them; if every patch is lighter than your goal, skip straight to the next step. A color remover shrinks permanent and demi-permanent dye molecules so they rinse out.
It leaves your natural pigment alone and does little to semi-permanent dye or henna. Apply it as the box directs, to the whole head or only to the dark lengths from the previous step, and process for the box time, often around 20 minutes.
Then rinse for the full time the instructions give, because shrunken dye left behind can oxidize and darken again. You’re done when the remover’s own darkening check, or a dab of 10-volume developer on one strand for 10 minutes, no longer turns the hair darker. Expect a lighter, warmer base underneath that may need a blue or violet toner.
Step 8 Re-dye the whole head evenly
A full re-dye with permanent color needs its own, longer wait: leave about two weeks after the patchy dye job, whether or not you used a remover in between. That gap is separate from the 48-hour wait in the first step, which only covers deposit-only glosses and semi-permanent color.
If you used a remover, choose a shade one lighter than your goal, because stripped hair soaks up color fast.
Measure dye and developer exactly as the box says and mix until the bowl shows no streaks, then work in thin quarter- to half-inch sections: roots and regrowth first, then pull the color through the mid-lengths and ends for only the last 5 to 10 minutes of the box time, which is around 30 minutes for most kits.
With semi-permanent dye you can stretch the last of the bowl with an equal amount of white conditioner for porous ends, but never dilute permanent dye, because that throws off its developer ratio. Rinse until the water runs clear, then once dry, check root, mid-length and end at the crown, sides and nape in daylight: one continuous shade means you’re done.
Common Mistakes to Avoid
- Putting permanent dye over the whole head to cover a few light spots, which darkens ends that already hold plenty of color into a visible band.
- Judging the result on wet hair or under warm bathroom lighting instead of on dry hair in daylight.
- Trying to lift dark patches with a lighter box shade. Dye can’t lighten dye, so the patch stays dark and the hair around it gets darker.
- Skipping the 48-hour patch test because the same dye was fine last time. You can develop an allergy even after using a dye with no reaction before.
- Expecting a color remover to strip semi-permanent dye or henna. It’s made for permanent and demi-permanent dye and does little to the others.
Pro tip Going darker over light patches that were once bleached or highlighted? Colorists first fill those sections with a warm copper or gold semi-permanent, because lightening removed the warm pigment brown shades rely on. Skip that step and the patches can come out muddy, flat or faintly green.
The Bottom Line
Even color comes from matching the fix to the pattern: a gloss for patchy tone, a semi-permanent in your darkest shade for light spots, a roots-only gloss for hot roots, clarifying washes or a remover for dark ends, and a full reset for severe patches. Once it’s even, a gloss every four to six weeks keeps the tone consistent, and our even-dyeing guide helps you avoid a repeat.
Don’t stack permanent dye to chase a match: each coat darkens and dries lengths that already hold color. If a fix involves bleach, a bond-building treatment reduces breakage but can’t reverse damage already done. See a colorist if hair feels gummy or stretchy when wet, your scalp stings, dark patches survive a remover, or two home fixes have failed.
Frequently Asked Questions
How long should I wait before fixing patchy hair dye?
Wait at least 48 hours, then patch-test the product you'll use for another 48 hours before it goes on. The first wait lets a wash soften harsh spots and gives your scalp a rest. After that, a gloss or semi-permanent fix is fine. Another permanent dye job needs longer: leave about two weeks after the patchy one.
Will patchy hair dye even out on its own after a few washes?
Partly, depending on the dye. Semi-permanent and demi-permanent color fade a little with every shampoo, so harsh patches soften over a few weeks, and a clarifying shampoo speeds that up. Permanent dye barely changes with washing, so lighter patches stay lighter and dark spots stay dark until you correct them with more pigment or a color remover.
Can you fix dark patches in hair dye by dyeing over them with a lighter shade?
No. Hair dye can't lighten earlier dye, so painting a lighter box shade over a dark spot leaves it dark and darkens the hair around it. Fade semi- and demi-permanent color with clarifying washes, or use a color remover on permanent dye, then do a strand test before you re-dye. If a dark patch needs real lightening, see a colorist.
How do I hide patchy hair dye until I can fix it?
Braids, twists, a sleek bun or a deep side part break up patches and draw the eye away from the worst areas. A tinted dry shampoo or root touch-up spray in your darkest shade blurs bright roots and light spots for a day, then washes out. Both only hide the problem, so follow them with a real fix once your hair has settled and your patch test is clear.
When should I see a colorist instead of fixing patchy dye at home?
Book a colorist if dark patches survive a color remover, any fix would involve bleach, or two home corrections haven't worked, rather than stacking more permanent dye on the same lengths. Stop right away if your hair feels gummy or stretchy when wet, or your scalp stings, burns or itches. An early professional fix is much easier than repairing hair worn down by repeated attempts.
Keep Reading
Sources
- What to do if your hair dyed unevenly coloredhaircare.com
- How to fix a hair dye job gone wrong cliphair.com
- Fix bad dye job home news.yahoo.com