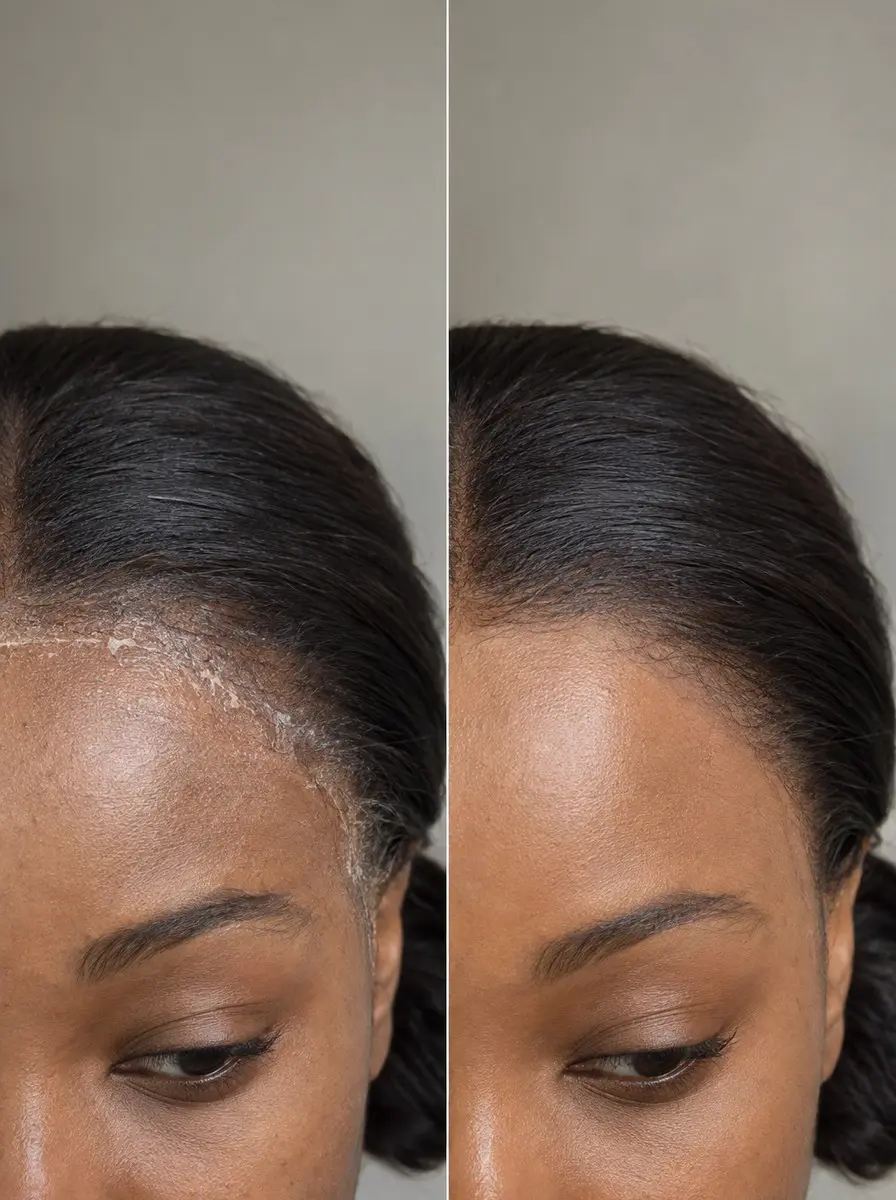
Quick answer To remove lace wig glue safely, patch-test your remover first, then dab lace adhesive remover along the glue line, wait for it to soften, and peel the lace back slowly from the edges. Clear skin residue with oil and a gentle cleanser, and clean the lace before rewearing.
A glued lace front can look flawless for weeks, but most of the damage happens at takedown. If you tug the lace off before the adhesive lets go, you can tear the delicate mesh and leave the skin along your hairline raw and sore.
Rushing or forcing it off, not the glue itself, is the main cause of damage to the hair and skin underneath. Here is how to remove lace wig glue without tearing the lace or irritating your hairline.
The fix is patience, in the right order: soften the bond, wait, lift from the edge, then wash. This guide works in two tracks, first your skin and hairline and then the lace, so you finish with a calm hairline and a unit clean enough to reinstall. You need a remover, an oil and some time, and all of it can be done at home.
Time 30-45 minutes (plus a 24-hour patch test the day before)Difficulty BeginnerSteps 8
What to Use on Each Surface
| Surface | Use | Avoid |
|---|---|---|
| Glue line, wig still on | Lace remover, dabbed and left to sit | Pulling before it releases |
| Sensitive skin | Oil alone, several rounds | Any product that stung in testing |
| Skin and hairline residue | Oil or petroleum jelly, then gentle cleanser | Nail polish remover, strong alcohol |
| Standard lace | Remover on a pad, soft spoolie | Scrubbing, acetone |
| HD lace | Remover dabbed, longer wait | Brushing or rubbing |
What You’ll Need
As an Amazon Associate, HairAide earns from qualifying purchases. Product links in this guide are affiliate links: they cost you nothing extra and help keep these tutorials free.
- Lace wig adhesive remover Breaks down the adhesive at the glue line and on the lace so the bond releases instead of tearing.
- Cotton pads or cotton balls Used to apply remover and oil by dabbing and holding, without rubbing the lace or the skin.
- Baby oil, coconut oil, olive oil or petroleum jelly Loosens leftover adhesive on the skin and hairline, and is the gentler option for sensitive skin.
- Duckbill or sectioning clips Hold the wig hair back so remover and oil stay off the fibers and the whole lace edge stays visible.
- Gentle fragrance-free facial cleanser Removes the oil and remover from the hairline without stripping or irritating freshly uncovered skin.
- Mannequin head or wig stand Holds the wig steady while you clean the lace and lets it air-dry in shape after washing.
- Soft spoolie or soft toothbrush Gently lifts softened glue off standard lace; skip it on HD lace.
- Sulfate-free wig shampoo Removes the last of the remover, oil and glue specks from the lace so the next install bonds cleanly.
Step-by-Step
Step 1 Patch-test your remover the day before
Use a cotton pad to dab a small amount of lace adhesive remover on the inside of your forearm, then do the same with the oil or petroleum jelly you plan to use, on a separate spot. Leave both for 24 hours without washing them off.
The skin of the inner arm is thin and sensitive like the skin at your hairline, so a reaction there warns you about a reaction on your face without putting your face at risk. If either spot turns red, itchy or bumpy, or burns, keep that product away from your hairline and test an alternative.
Step 2 Clip the wig hair away from the hairline
Smooth the front of the wig back off your face with your fingers and pin it with duckbill or sectioning clips so the whole lace edge is exposed from ear to ear.
Keeping the hair out of the way stops remover and oil from soaking into the fibers, where they leave a greasy film, and it lets you see exactly where the adhesive sits. Look for a shiny or cloudy line, which shows where the glue is still holding. You’re ready when the whole perimeter is visible and no strands fall across it.
Step 3 Saturate the glue line and wait
Soak a cotton pad in lace adhesive remover and press it along the lace edge one short section at a time, so the liquid wicks through the mesh into the glue underneath.
Dab and hold rather than rubbing, because rubbing can fray the lace and irritate the skin. Leave it for the sit time on the label, usually a few minutes. The solvent needs that time to break down the adhesive so the bond releases instead of tearing.
If your skin is sensitive, use oil alone at this step: it works more slowly and may take several rounds, but it is gentler. The glue is ready when the lace edge looks wet and starts to lift slightly on its own.
Step 4 Lift the lace from the edges inward
Start at one ear or temple, where the lace is easiest to reach, and peel the edge back slowly, keeping it low and close to the skin instead of yanking it upward. Work along the hairline toward the center a little at a time. Wherever you feel resistance, add more remover and wait again before going on.
Never pull through a spot that is still stuck, because forcing it tears the lace and damages the hair and skin underneath. HD lace is thinner and more fragile than standard lace, so give it extra remover and more time. You’re done when the whole unit comes away with no tension.
Step 5 Dissolve the residue on your skin
Once the wig is off, massage baby oil, coconut oil, olive oil or petroleum jelly into any adhesive left on your forehead and hairline, and leave it for a few minutes. The oil gets between the leftover film and your skin and loosens its grip, so the residue wipes away instead of having to be scraped off.
Wipe gently with a fresh cotton pad, and repeat the massage-and-wipe cycle until no tacky spots remain. Don’t pick at stubborn flakes with your nails. Another round of oil is gentler on the skin and on the fine hairs at your hairline.
Step 6 Cleanse your hairline gently
Wash the area with a gentle, fragrance-free cleanser and lukewarm water to remove the oil and any remover left on the skin. Leftover solvent keeps irritating ingredients on your skin for longer, and leftover oil weakens the grip of the adhesive on your next install.
Keep nail polish remover and high-strength isopropyl alcohol off your skin. Acetone is too harsh, and strong alcohol strips moisture from skin that has just had adhesive lifted off it. If your skin is still red, itchy, burning or broken after cleansing, stop using adhesive there and see a dermatologist before your next glued install.
Step 7 Clean the residue off the lace
Set the wig on a mannequin head or wig stand and fold the lace front back so the underside, where the glue sits, faces you. Lay a cotton pad soaked in remover over each patch of glue for the time the label suggests.
When the residue turns soft or gummy, sweep it off with a soft spoolie or a clean, soft toothbrush, using light strokes in one direction, and re-wet any patch that resists.
Do this now, before the glue hardens again: residue left on the lace builds up in layers that stiffen and discolor the mesh and make it visible the next time you wear the wig. On HD lace, skip the brush and dab with the pad only, because the finer mesh snags and tears more easily.
Step 8 Wash the wig to clear the last film
Finish by washing the wig with a sulfate-free wig shampoo and lukewarm water, pressing the lather through the lace with your fingertips rather than rubbing it. This removes the remover, the oil and any small glue specks the pad missed.
If they stay in the lace, they attract dirt and leave a film that stops the next application from bonding. Rinse until the water runs clear and the lace no longer feels slippery or tacky. Put the wig back on the stand to air-dry completely before you store or reinstall it.
Common Mistakes to Avoid
- Peeling the lace before the remover has softened the glue, which tears the mesh and damages the skin and hair at the hairline.
- Using nail polish remover or high-strength rubbing alcohol on the skin. Acetone is too harsh, and strong alcohol leaves the hairline dry and stinging.
- Scrubbing HD lace with a brush or rough pad instead of dabbing, which snags and tears its fine mesh.
- Storing the wig with glue still on the lace, so the residue builds up and hardens into stiff, visible patches.
- Skipping the patch test because a remover says it is gentle. That label tells you nothing about how your own skin will react.
Pro tip Work in sections an inch or two wide and finish each one before you move on. If you soak the whole hairline at once, the first sections start drying out before you reach them and you end up applying remover twice.
The Bottom Line
Removing lace wig glue safely comes down to order and patience: patch-test, soften the bond, wait, lift from the edges, then clean your skin and the lace before the unit goes back on its stand. Done this way, the lace stays intact for your next install and your hairline stays calm instead of raw.
Repeat the full routine every time you take off a glued unit, and give your hairline a break between installs if it starts to feel tender. If your skin is red, burning or broken, or the lace still won’t release after several rounds of remover, stop and see a dermatologist or a professional wig stylist instead of forcing it.
Frequently Asked Questions
Can I use nail polish remover to take off lace wig glue?
No. Nail polish remover is usually acetone, which is too harsh for this job: it dries and irritates the skin at your hairline and can stiffen or weaken delicate lace. Use a lace-specific adhesive remover on the lace and an oil or petroleum jelly on your skin, and patch-test each one on your inner arm first.
Is rubbing alcohol safe for removing wig glue from skin?
Keep high-strength isopropyl alcohol off your skin. It strips moisture and can sting a hairline that has just had adhesive lifted from it, and repeated use leaves the skin dry and flaky. A lace adhesive remover or a plain oil does the job more gently. If a remover you like contains alcohol, patch-test it and wash it off with a gentle cleanser soon afterward.
How long should lace glue remover sit before I lift the lace?
Follow the sit time on the label, which is usually a few minutes. The lace is ready when the edge looks wet and starts to lift without tension. If it still grips anywhere, add more remover and wait again. HD lace and thick glue lines usually need extra time and more than one application.
What should I do if my skin is irritated after removing a glued wig?
Stop using adhesive and remover on that area, wash it with a gentle fragrance-free cleanser and lukewarm water, and leave it uncovered so it can settle. If redness, burning, itching, bumps or broken skin last more than a couple of days or get worse, see a dermatologist before your next glued install.
How often should I clean the glue off my wig lace?
Clean the lace every time you take the wig off, before the residue hardens. Glue left on the lace builds up in layers that stiffen and discolor the mesh and stop the next install from lying flat. A quick clean with remover and a pad after each takedown, plus a full wash when the unit needs one, keeps the lace wearable for longer.
Keep Reading
Sources
- How to Properly Remove Glue From Lace Wigs alipearlhair.com
- How to remove wig glue unice.com
- How to remove glue from lace wig iseehair.com