The most reliable claw clip hairstyles are the vertical French twist, the half-up twist and the curly puff, but the clip has to match your hair: small or mini clips for fine hair, a large sturdy clip for thick or coily hair, and texturizing spray first on silky strands.
A claw clip is the fastest updo there is: twist, clamp, done. It is also easy to give up on by lunchtime, once it has slid down the back of your neck, sprung open under thick hair or started pressing into your crown. Nearly every one of those failures comes from a mismatch between the clip and the hair, not from the style itself.
Claw clips keep filling Pinterest boards because they work differently from an elastic. A clip spreads hair along its length instead of cinching it at one point, so fine hair can look fuller and there is no elastic crease when you take it out. The 20 claw clip hairstyles below are grouped by placement: French twists, low folds, half-ups, mini-clip twists, short-hair options and curly puffs. Each one comes with the clip size, the hair density it suits and the step that keeps it secure.
1. Classic Vertical French Twist

Hover on images and discover how pinning can transform your collection of favorites!
This is the everyday claw clip look: hair twisted up the back of the head into a vertical roll, with the clip’s teeth biting along the seam. It suits medium to thick hair that reaches past the shoulders and looks polished enough for the office. Gather everything at the nape, twist it upward once, tuck the ends into the roll and clamp a large clip vertically over the twist. If the clip sags by lunch, it is too small for your density, so size up rather than tightening the twist.
2. Messy Twist With Fanned-Out Ends

Hover on images and discover how pinning can transform your collection of favorites!
This is the same twist done more loosely: the ends spill over the top of the clip like a fan, which hides an uneven twist and adds height. It works on thick, layered or wavy hair that resists a sleek roll. Twist the lengths upward, leave the last few inches sticking out above the clip and pull a few pieces loose at the temples. Use a large clip with a strong spring. On second-day hair, dry shampoo at the crown keeps the lift from collapsing into the twist.
3. Sleek Low Twist for Silky Straight Hair

Hover on images and discover how pinning can transform your collection of favorites!
A low, smooth twist sits just above the nape. It is built for silky, straight hair that slides out of looser styles, so the prep matters as much as the clip. Mist texturizing spray at the roots and through the mid-lengths and lightly backcomb the section the clip will hold. Then twist and clamp a medium matte clip with interlocking teeth, because glossy acetate clips tend to glide on slippery strands. If it still creeps down your neck, cross two bobby pins in an X under the clip.
4. Teased Crown Twist for Fine Hair

Hover on images and discover how pinning can transform your collection of favorites!
This full updo is built to add volume to fine hair. Dust dry shampoo into the crown, backcomb a few strokes under the top layer, then make a smooth vertical twist and clamp it with a small-to-medium clip. A clip spreads hair along its jaws instead of cinching it at one point like an elastic, so the twist can look fuller than a bun. It suits fine, straight or slightly wavy hair of shoulder length or longer. If it creeps, push two bobby pins into the twist toward the scalp, then clip over them.
5. Polished Twist With Bent Tendrils

Hover on images and discover how pinning can transform your collection of favorites!
This polished twist leaves two tendrils out at the front with a soft bend, a dressier version of the everyday clip for dinners and nights out. It suits straight to wavy hair with long face-framing layers. Twist the hair and clamp a large clip vertically. Pull the tendrils from just in front of each ear and bend them away from the face with a flat iron or small curling wand. Let each bend cool before raking it apart with your fingers, and mist flexible hairspray so the tendrils don’t drop flat by evening.
6. Wet-Look Slicked-Back Twist

Hover on images and discover how pinning can transform your collection of favorites!
Gel-slicked roots and a clipped twist give a sharp, editorial finish that also rescues third-day hair. It suits straight, wavy or curly hair of any density, and the gel gives slippery strands the grip a clip needs. Comb a strong-hold gel from hairline to crown with a fine-tooth comb, then twist the lengths up and clamp a large clip vertically. Keep the gel to the roots and leave the lengths dry. Otherwise the twist turns stiff and the clip struggles to close.
7. Side Twist Tucked Behind One Ear

Hover on images and discover how pinning can transform your collection of favorites!
Twist everything toward one side and clip it just behind the ear, leaving the ends to fall over one shoulder. The asymmetry can soften a strong jaw, and it makes a medium clip look deliberate rather than purely practical. It suits long, medium-density hair, straight or wavy. Brush the hair to one side, twist it from the opposite ear across the nape and clamp the clip vertically behind the ear. If fine hair starts to sag, slide a bobby pin across the nape under the twist.
8. Clipped Low Chignon

Hover on images and discover how pinning can transform your collection of favorites!
This chignon needs no pins on most hair. Coil the lengths into a low bun, then clamp a medium-to-large clip horizontally over the coil so the teeth grip both the bun and the hair beneath it. It suits medium to thick hair that holds a coil, and it looks polished enough for weddings and dinners. Twist the lengths tightly before coiling so the bun is compact enough for the clip to close. On very fine hair, anchor the coil with two bobby pins first and let the clip finish the look.
9. Elastic-Anchored Fold-Up

Hover on images and discover how pinning can transform your collection of favorites!
This is the fix for hair that slides out of every clip. Tie a low ponytail with a soft elastic first, fold the tail up against the back of the head and clamp a medium or large clip over the fold. The elastic does the anchoring and the clip only holds the shape, so it holds on silky, straight or very fine hair. It suits mid-length to long hair. Use a snag-free coil or fabric elastic, and fold the tail rather than twisting it so it lies flat.
10. Braided Fold-Up

Hover on images and discover how pinning can transform your collection of favorites!
Braid the lengths into a simple three-strand plait, fold it up against the back of the head and clamp a large clip across the fold. The braid compacts thick hair so a clip can close over it, and it tends to hold through a busy day better than a loose twist. It suits long, thick or high-density hair, straight to curly. Tie the end of the braid with a small elastic and tuck it under the fold. Pancake the plait slightly with your fingers if you want more visible texture.
11. Fine-Hair Half-Up With a Small Clip

Hover on images and discover how pinning can transform your collection of favorites!
This is the gentlest option for fine hair. Only the top section goes into the clip, so a small clip carries a light load while the rest of the hair stays down. Take a section from temple to temple, backcomb it lightly at the root for grip, twist it once and clamp a mini or small clip at the crown. It suits fine straight or wavy hair of any length past the chin. If the clip slides, mist texturizing spray onto the section and slip a bobby pin under the clip.
12. Double Half-Up Crown Twists

Hover on images and discover how pinning can transform your collection of favorites!
Two small twists, one on each side of the crown and each held by a small clip, give a playful take on space buns without elastics. This look suits shoulder-length or longer hair of fine to medium density, straight to curly. Part down the middle, take a triangle section above each ear, twist each one up toward the crown and clamp it with a small clip. Check that both clips sit at the same height. On fine hair, a dusting of dry shampoo at each root gives the clip something to hold.
13. Mini-Clip Twisted Half-Up

Hover on images and discover how pinning can transform your collection of favorites!
Instead of one clip, two to four mini clips each hold a small twisted section along the part. It is a playful look that suits fine hair because no single clip carries much weight. Take a 1-inch section near the hairline, twist it back and secure it with a mini clip, then repeat along each side. It works on lengths from bob to long and on straight, wavy or curly textures. On slippery hair, mist texturizing spray onto each section before twisting so the tiny teeth have something to grip.
14. Pinned-Back Front Pieces

Hover on images and discover how pinning can transform your collection of favorites!
This is the lowest-effort clip look: just the face-framing layers or a growing-out fringe, twisted back and caught with a mini clip on each side. It suits anyone whose front pieces fall in their eyes, and it is the easiest way through the awkward stage of growing out bangs. Twist each front section away from your face. Then close a mini clip over the twist just behind the temple so its teeth also catch hair underneath. On silky hair, a matte clip tends to slip less than a glossy one.
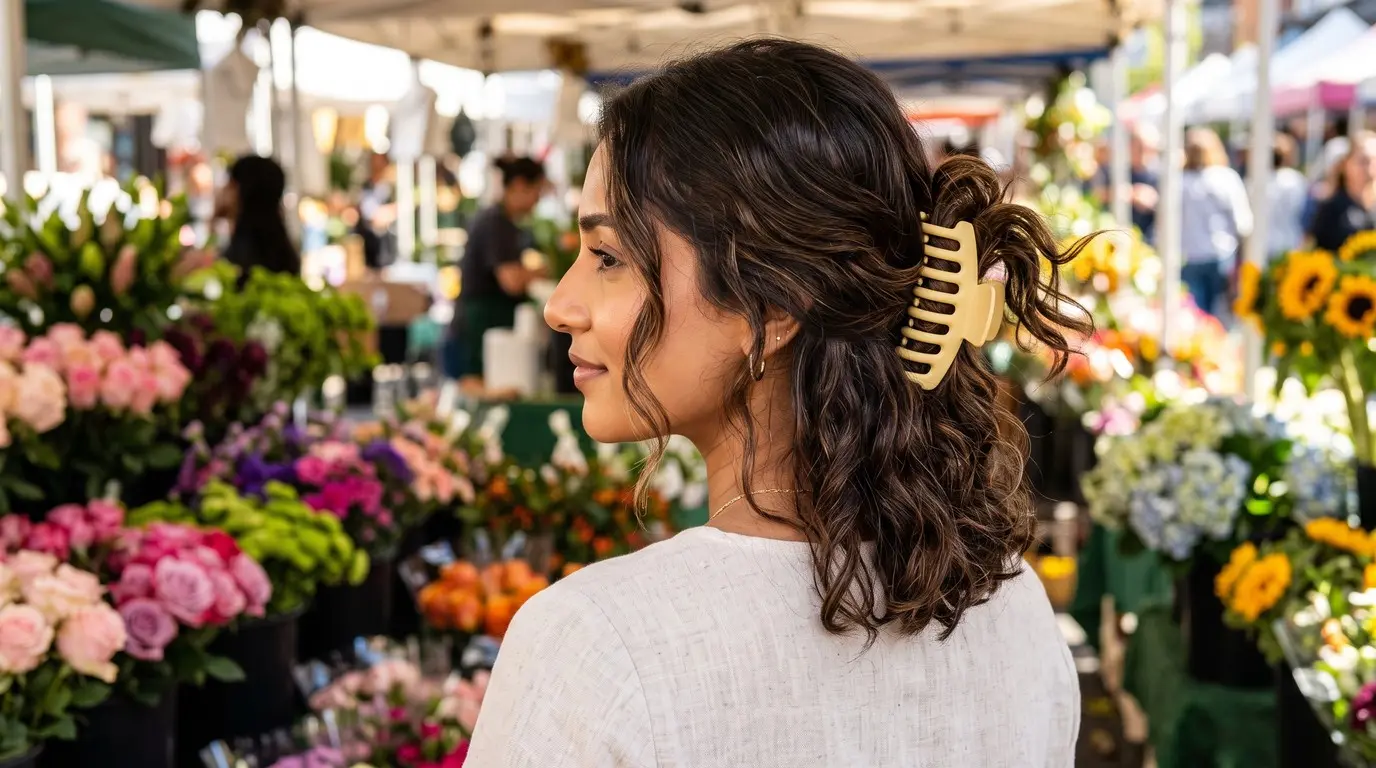
15. Half-Up Bob Twist

Hover on images and discover how pinning can transform your collection of favorites!
This proves a claw clip works on a bob. Gather the top third of a chin-to-shoulder-length cut, twist it once and clamp a small or medium clip at the crown, leaving the lower hair free. It suits blunt bobs and lobs on fine to medium hair. Shorter hair gives the clip less to hold, so spray texturizer at the roots of the section first and backcomb lightly under the clip. If the section is too short to twist, flip it back flat and clip it instead.
16. Choppy Half-Up for Layered Cuts

Hover on images and discover how pinning can transform your collection of favorites!
Shaggy, choppy and wolf-style layers are hard to clip because short pieces spring loose, and this version makes that a feature. Gather the top layers loosely, twist them toward the back of the head and clamp a medium clip. Then tug out a few shorter pieces around the face so the loose strands look intentional. It suits wavy or textured hair with lots of layers. Rough dry shampoo into the crown first so the lift lasts, and catch stray short layers at the sides with mini clips.
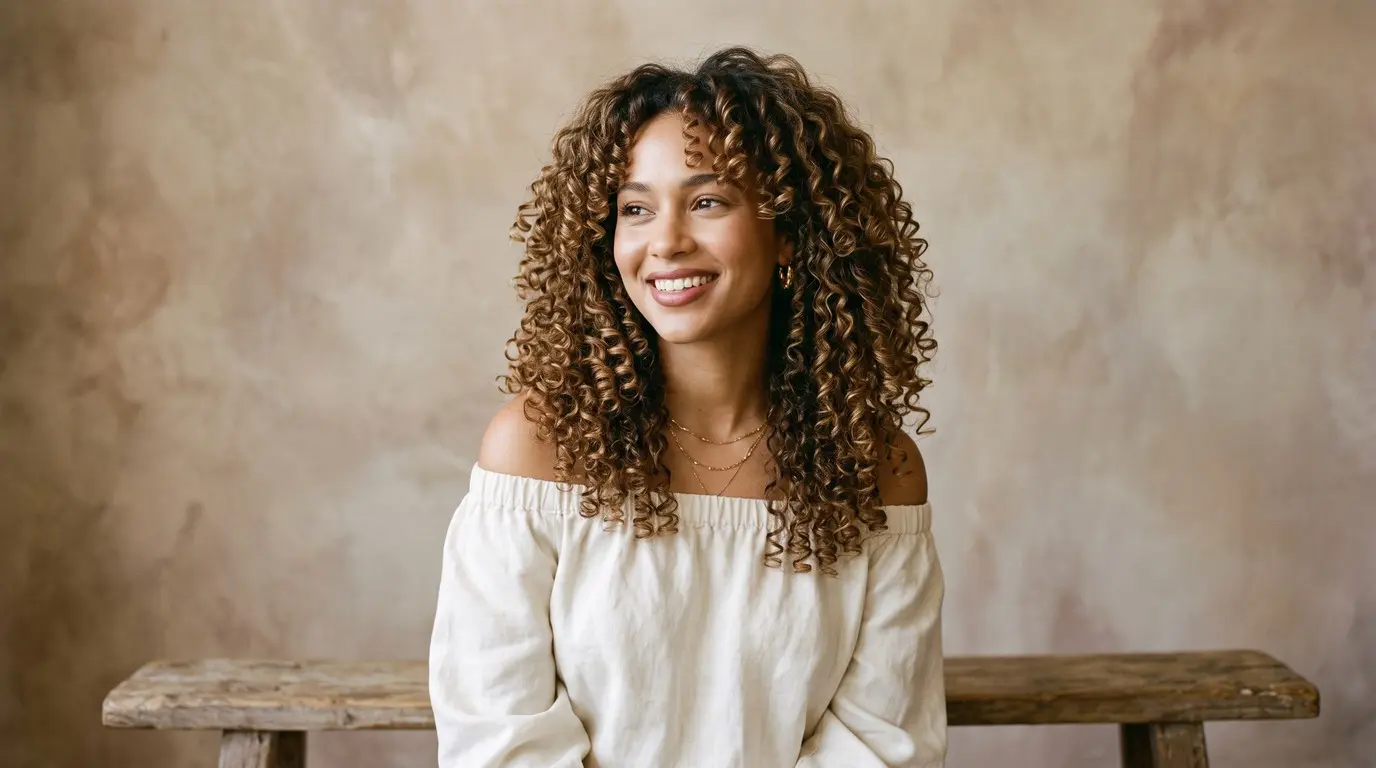
17. Curly Half-Up Twist

Hover on images and discover how pinning can transform your collection of favorites!
For curls from loose ringlets to tight coils, a half-up twist keeps definition intact because nothing gets brushed out. Section the top half with your fingers and smooth a little gel or styling cream over it. Twist it backward once and secure it with a medium clip whose long teeth reach through the curl volume. Tight coils may need a large clip or a stronger-hold product so the clip has something compact to grab. Refresh second-day curls with a water mist before re-clipping.
18. Low Curly Puff at the Nape

Hover on images and discover how pinning can transform your collection of favorites!
A low puff sits at the nape and fits under hats and hoods. It also doesn’t need hair dragged tight at the hairline the way an elastic puff often does. It suits curly and coily hair of shoulder length or longer. Gather the curls loosely toward the nape with your palms, twist the base once to compact it, then clamp a large clip horizontally so the curls bloom around it. If the clip pops open, size up or use a stronger-hold styling product to tighten the base first.
19. High Curly Puff With a Jumbo Clip

Hover on images and discover how pinning can transform your collection of favorites!
The high puff lifts curls to the crown for maximum height. It is held by a jumbo clip instead of a band that can dent coils. It suits thick curly and coily hair long enough to reach the crown. Smooth the edges with gel and gather the hair upward with your palms or a wide-tooth comb. Then clamp a clip of 4 inches or wider horizontally at the crown so the curls spill over the top. Dense coils need the largest, sturdiest clip you can find, because smaller clips may not hold.
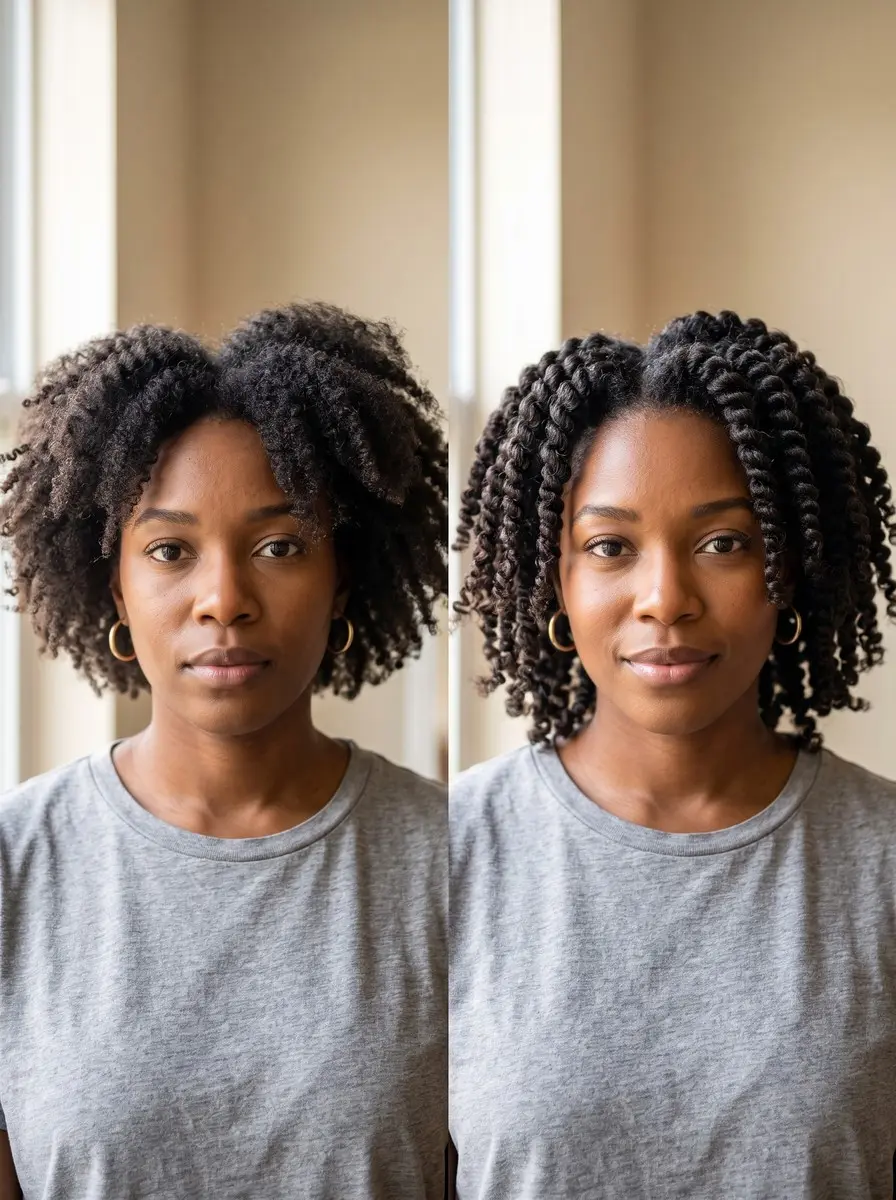
20. Jumbo-Clip Updo for Twists and Locs

Hover on images and discover how pinning can transform your collection of favorites!
Two-strand twists, braids or locs are gathered into a high updo and held by a jumbo clip, which skips the tight elastic many updos need. It suits shoulder-length or longer twists and locs, especially dense sets. Gather the twists upward loosely with your hands, rotate them once into a soft coil and clamp a clip of 4 inches or wider over the base. Heavier sets may need two large clips side by side. Keep the front twists loose at the hairline rather than pulling them tight.
You Might Also Like
- ponytail styles for thick hair
- braided hairstyles for thin hair
- two-strand twist hairstyles
- how to get rid of static hair
- make a blowout last longer
The clip only works when it fits the hair. Use mini or small clips for fine hair and partial sections, a large clip with a firm spring for thick hair and tight coils, and a little grip prep for anything silky. Texturizing spray at the roots, light backcombing and dry shampoo at the crown fix most slipping before you ever need a bobby pin.
One tip works for every look: twist the hair flat against your head before you clamp, so the clip grips the twist instead of hair yanked up into its jaws. If you bend tendrils with a flat iron or wand, use a heat protectant first. Keep the iron near 150C/300F for fine or bleached hair or 180-200C/355-390F for coarse hair, and use it only on completely dry hair.
Frequently Asked Questions
What size claw clip do I need for thick hair?
Thick or high-density hair needs a large, sturdy clip, roughly 4 inches or wider with a firm spring, because smaller clips may not close around all of it and tend to pop open. Tight coils also need a larger clip, or a stronger-hold product to compact the hair first. Save mini and small clips for fine hair or partial sections.
How do I stop a claw clip from slipping out of fine or silky hair?
Give the hair grip before clipping. Mist texturizing spray at the roots, lightly backcomb the section the clip will hold, and use dry shampoo at the crown so the volume doesn't collapse. A matte clip with interlocking teeth tends to hold better than a glossy one. Very fine hair may still need one or two bobby pins crossed under the clip as backup.
Can you wear a claw clip with short hair or a bob?
Yes, and a half-up style is the easiest way. Gather the top section from the temples to the crown, twist it once and secure it with a small or medium clip, leaving the rest down. Layered or choppy cuts hold best with texturizing spray at the roots first, plus a mini clip at each side to catch shorter pieces that fall out.
How do I put in a claw clip without it pulling or leaving a dent at the crown?
Twist the hair flat against your head, then open the clip and slide it in over the twist so the teeth catch the twist and a little hair beneath it, instead of yanking hair up into the jaws. If the clip strains to close, it is too small, so size up. Take it out before sleeping or leaning back against a headrest, which presses it into the scalp.
Are claw clip hairstyles a lasting classic or a passing trend?
Claw clips were a '90s staple that came back because they solve a practical problem: a fast updo that leaves no elastic crease. Clip colors, materials and shapes will keep changing with fashion, but the twist-and-clip method itself is a lasting classic for office days, errands and weddings alike.
Sources
- Thick or high-density hair needs a larger, sturdier clip, and tight coils need a larger clip or a stronger hold product. Smaller clips may not hold. latest-hairstyles.com
- A very fine-haired person may need bobby pins as backup, and a clip spreads hair along its length instead of compressing it at one point like an elastic. This is why it can look fuller on fine hair. latest-hairstyles.com