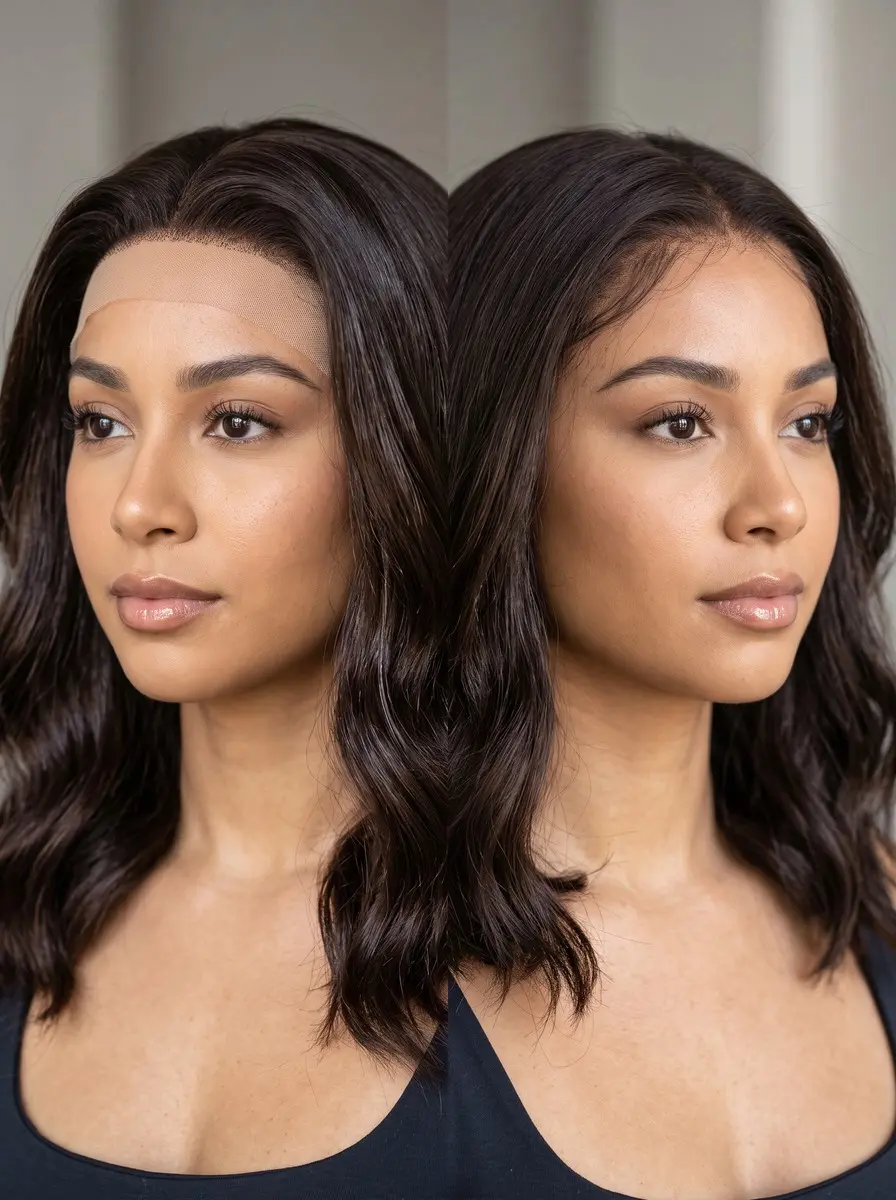
Quick answer To make a wig look natural, get the fit snug with a wig grip, tint the lace to your scalp and set it with translucent powder, then use little product and dull the shine. Pluck the hairline and cut the lace after a test-wear, since neither can be undone.
Most wigs don’t look fake because of the hair. They give themselves away at the edges: a hairline that is too thick and straight, lace that catches the light, a cap that lifts at the temples, or fibre that shines like plastic under a phone flash. Knowing how to make a wig look natural mostly means fixing those few giveaways, and once you do, the same wig looks like your own hair.
This guide works for lace fronts and synthetic wigs, and the steps come in a set order. The first five steps can all be undone: choosing the wig, fitting it, tinting the lace, styling and blending. Try them first and wear the result for a day or two.
Bleaching the knots, plucking and cutting the lace come next and are clearly marked, because none can be reversed: a wig’s hair and lace never grow back. The final step is a proper test-wear before any event.
Time 1-2 hours, plus a few days of test wearDifficulty IntermediateSteps 9
What Gives a Wig Away, and How to Fix It
| Giveaway | Try first (reversible) | Last resort (permanent) |
|---|---|---|
| Slips or lifts at the temples | Wig grip band, tighter straps | None needed |
| Pale or shiny lace edge | Lace tint, translucent powder | Cut the lace on your head |
| Plastic-looking shine | Dry shampoo or powder | None needed |
| Dark dots at the part | Concealer under the lace | Bleach knots (human hair only) |
| Hairline too thick or blunt | Lay your own edges, move the part | Pluck to a gradient |
What You’ll Need
As an Amazon Associate, HairAide earns from qualifying purchases. Product links in this guide are affiliate links: they cost you nothing extra and help keep these tutorials free.
- Velvet wig grip band Holds the cap in place so the wig doesn’t slide back or lift at the temples, the first thing that makes a wig look fake.
- Lace tint spray Tints the underside of the lace to your scalp tone so the hairline edge disappears.
- Translucent setting powder Gives the lace and part a matte finish so they don’t catch the light.
- Slant-tip tweezers Let you pluck a few hairs at a time for a gradual hairline without gripping the lace.
- Dry shampoo Turns down synthetic fibre shine to a soft, natural lustre without adding weight.
Step-by-Step
Step 1 Choose a believable density and length
Start before the wig is even on your head. Density is the amount of hair on the cap, usually labelled as a percentage: around 130 to 150 percent looks like everyday hair for most people, while 180 percent and up is a full, glam look that tends to read as a wig in daylight.
Pick a length and colour you could plausibly have grown, ideally a rooted shade that is slightly deeper at the root, because real hair is rarely one flat colour from scalp to ends.
If you already own a very full unit, the parting and plucking steps below can soften the front, but they won’t make the whole wig lighter. It’s right when the wig, held next to your face in a mirror, looks like a good hair day rather than a costume.
Step 2 Get the fit right first
A bad fit looks fake no matter what else you do, so measure before you style. Run a soft tape measure around your hairline, above the ears and around the nape, then match the number to the brand’s own size chart, because ‘average’ caps vary from maker to maker.
Flatten your own hair under a wig cap or flat braids so there are no lumps, add a velvet wig grip band so the wig can’t slide back, and tighten the adjustable straps until it feels snug but not tight enough to give you a headache.
The fit is right when the ear tabs sit just in front of your ears, there’s no gap at the temples, and the wig stays put when you shake your head.
Step 3 Match the lace to your scalp
Even transparent or HD lace can show as a pale, shiny strip against your forehead. Spray a lace tint, or dab a foundation or concealer that matches your scalp, onto the inside of the lace along the hairline and part, so the colour sits under the hair and doesn’t rub off on your skin.
Once it’s completely dry, press a little translucent setting powder over the front edge and the part with a soft brush to take away the sheen that makes lace catch the light.
It’s done when the edge disappears into your skin in daylight instead of outlining your forehead. This is temporary: tint, foundation and powder wash out, so redo them after every wash, and again if you later bleach the knots or cut the lace.
Step 4 Style lightly and dull the shine
Too much styling product weighs the fibres down and makes a wig look flat, greasy and unnatural, so use a fraction of what you’d put on your own hair. Real hair moves, while a wig coated in serum, gel and spray hangs in one heavy sheet. Many synthetic fibres also have a glossy, plastic-looking shine.
A light mist of dry shampoo from 15 to 20 centimetres (6 to 8 inches) away, or a dusting of translucent powder, brushed through the lengths turns it down to a soft lustre. Stop when the hair looks soft and matte rather than glassy, and repeat after every wash, since washing removes it.
Step 5 Blend it with your own hair
A wig looks most natural when nothing around its edges gives it away. If you wear a leave-out or U-part wig, set your own hair to match the wig’s texture, with flexi rods or a twist-out for curly units and a smooth wrap set for sleek ones, so there’s no visible line where one texture ends and the other begins.
If your natural edges are intact, you can sit the lace just behind them and lay your own baby hairs over the front with a touch of edge control.
Place the part where your own hair naturally falls and keep the colour close to your brows, so your face and hair look like they belong together. Then wear the wig for a day or two with only these reversible fixes in place: if it already passes in daylight, you can skip the permanent steps that follow.
Step 6 Bleach the knots (advanced, optional)
Knots are the tiny dark dots where each hair is tied to the lace, and lightening them makes the part and hairline look like hair growing straight from skin. This step is advanced, optional and permanent, and it works only on human-hair wigs: synthetic fibre doesn’t lighten like hair, so on a synthetic unit, dab scalp-matched concealer under the lace instead.
Always work with the wig off your head, turned inside out on a canvas head, and never use the mix near your scalp or skin. Follow the kit’s mixing and timing instructions exactly and strand-test a small patch of lace at the nape first, because over-processed knots weaken and start shedding hair.
Rinse as soon as the dots fade, well before the hair on the outside of the lace begins to lighten, and do this before plucking, so you judge the hairline’s density after any shedding rather than before it.
Step 7 Pluck a soft hairline (permanent)
This step can’t be undone, so do it only if the hairline still looks too thick after the steps above. Put the wig on a canvas head and use slant-tip tweezers to pluck the hair, not the lace, because gripping or tugging the lace can rip it.
Start at the hairline near one ear and work along it in tiny sections, pulling a few hairs at a time back, away from the face and toward the back of the head. Aim for a gradient that is sparse at the very front and builds to full coverage behind it, the way a real hairline does.
Check in a mirror every few minutes and stop while it still looks slightly too full: over-plucking leaves a permanent thin patch, and you can always take more out later but never put any back.
Step 8 Cut the lace on your head (permanent)
Lace wigs ship with extra lace, and it should be cut while the wig is on your head, because trimming it on a stand never quite matches your real hairline. The lace won’t grow back, so for your first wig, have a stylist experienced with wigs do the cut and watch how they shape it.
If you do it yourself, secure the wig, pull the hair back off your face with a band, and use small, sharp scissors to snip in tiny zigzags just in front of the knots: a jagged edge blends into skin, while a straight line looks like a border.
Work slowly from the centre toward each ear and check often, because cutting off a few millimetres too much can’t be fixed. Finish by re-tinting and re-powdering the lace as in the scalp-matching step, since any bleach rinse washes the tint out and the freshly cut edge needs its own matte finish.
Step 9 Test-wear it before any event
Test-wear happens in two rounds. The first round is a day or two with only the fit, the lace tint and powder, and light styling in place. It belongs before you bleach, pluck or cut anything, because those reversible fixes are often all a wig needs and the permanent steps can’t be taken back.
The second round comes now: wear the finished wig through several ordinary days, ideally a week, before any event, including errands, a windy walk and a few hours at your desk.
Real life shows what the mirror misses, like a lace edge that lifts by afternoon, straps that ache after three hours or a part that drifts, and it breaks the habit of touching and adjusting the wig, which gives it away faster than any hairline. Check it in daylight and in a phone photo with the flash on, re-powder the edge if needed, and fix anything that bothers you while there’s still time.
Common Mistakes to Avoid
- Plucking, bleaching or cutting a wig straight out of the box, before wearing it for a day or two with only the fit, tint and styling fixes.
- Plucking big clumps from one spot, or tugging on the lace while you pluck. Both leave permanent gaps or rips.
- Cutting the lace in a straight line, or trimming it on a stand instead of on your head.
- Bleaching the knots on a synthetic wig, or bleaching with the wig on your head.
- Choosing a density of 180 percent or more for everyday wear, then piling on serum and spray.
- Wearing a new wig for the first time on the day of a wedding or photo shoot instead of test-wearing it first.
Pro tip Before any permanent step, photograph your hairline twice, once in window light and once with your phone flash. Flash exaggerates lace shine and knot dots, so a hairline that passes the flash photo will pass in person, and if it fails, you’ll know which step to fix.
The Bottom Line
A natural-looking wig comes down to a few small details: a snug, flat cap, lace that disappears into your skin, fibre that moves instead of shining, and a hairline that thins out the way real hair does. The reversible fixes come first for a reason: wear them for a day or two, and often you won’t need to bleach, pluck or cut at all.
Re-tint and re-powder the lace after every wash, since both wash out, and again after bleaching the knots or cutting the lace. Recheck the fit whenever the hair underneath changes, such as a new braid pattern. If the wig was expensive or you’re unsure about plucking, cutting or bleaching, take it to a stylist experienced with wigs first, because those changes are permanent.
Frequently Asked Questions
What wig density looks the most natural?
For everyday wear, densities around 130 to 150 percent look like real hair for most people, since natural hair is thinner at the hairline and part than a full wig. 180 percent and above gives a glam, voluminous look that suits evenings and photos but tends to read as a wig in daylight. Density labels vary slightly by brand, so compare photos too.
How do you make a synthetic wig less shiny?
Mist a light layer of dry shampoo from 15 to 20 centimetres (6 to 8 inches) away, or dust translucent powder over the lengths, then brush it through so no white patches remain. Both tone the plastic-looking gloss down to a soft lustre without weighing the fibre down. Washing removes them, so reapply after every wash, and use as little styling product as possible in between.
Should I pluck and cut my wig myself or go to a stylist?
Plucking and cutting lace are both permanent, so if the wig was expensive or it's your first one, have a stylist experienced with wigs do the first cut and watch how they shape it. You can safely pluck small amounts at home on a canvas head if you work slowly and stop before it looks thin, since plucked hair never grows back.
Can you bleach the knots on a synthetic wig?
No. Knot bleaching only works on human-hair wigs, because synthetic fibre doesn't lighten the way hair does and bleach can damage it. On a synthetic lace wig, dab a concealer that matches your scalp onto the underside of the lace at the part and hairline instead. It hides the dark dots, washes out, and carries no risk to the wig.
How long should I wear a new wig before an event?
Aim for several days of ordinary wear, ideally a week, before any event where you want it to look flawless. That's long enough to notice a lifting lace edge, aching straps or a shifting part, and to stop touching it constantly. If you plan to pluck, bleach or cut, which are permanent, first wear it a day or two with just the fit, lace tint and light styling.
Keep Reading
Sources
- How to make a wig look natural shop.mayvenn.com
- 5 secrets to the most natural looking lace front envywigs.com