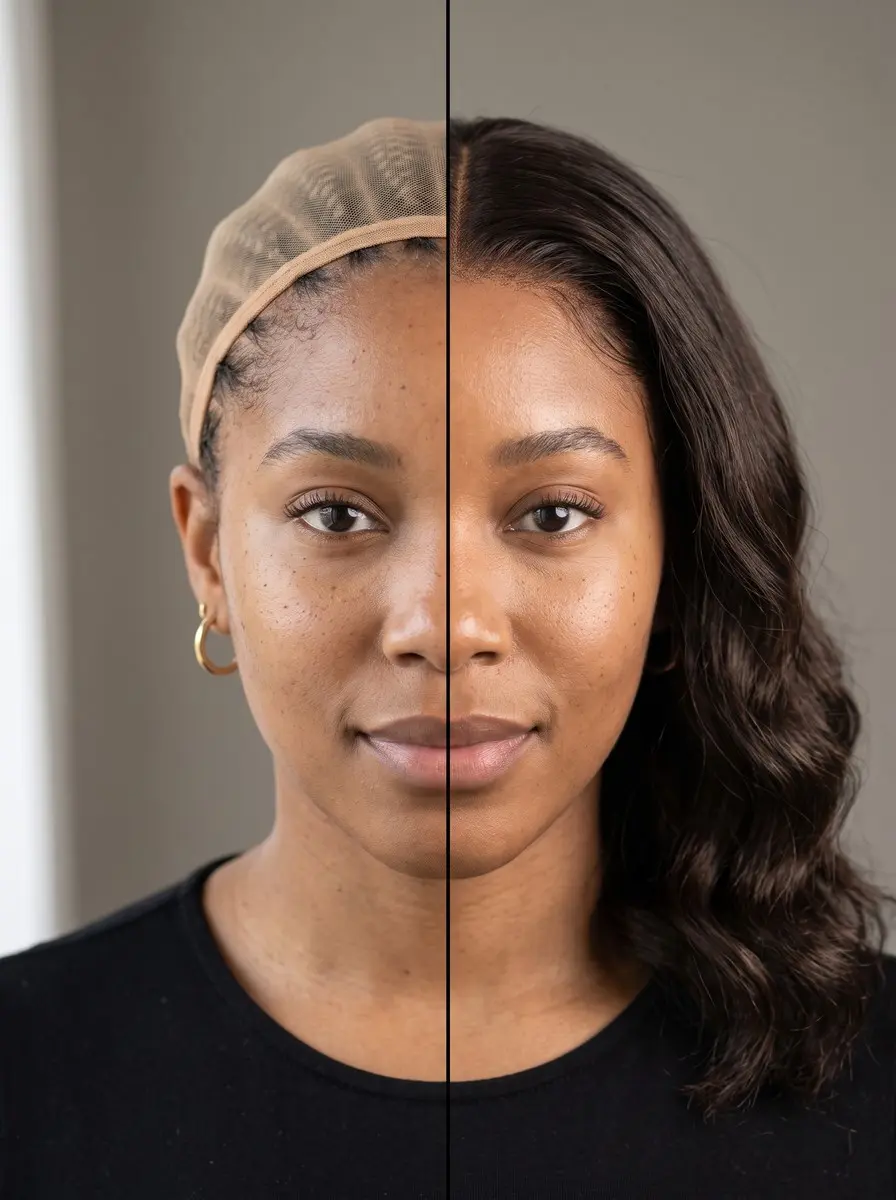
Quick answer To install a glueless wig, braid or flatten your hair to the scalp, then put the wig on with your head upright. Line the lace up with your hairline, tighten the straps until snug but not tight, slide the combs into your base and trim the lace gradually.
A glueless wig promises a natural-looking hairline without adhesive, solvent or a salon appointment, which makes it an easy first wig. Learning to install a glueless wig at home is easier than it looks, but glueless doesn’t mean technique-free.
With nothing gluing it down, three things decide whether it looks like your own hair or creeps back by lunchtime: the fit of the cap, how flat the base underneath is, and how the lace is trimmed and blended.
All you need is a mirror, a measuring tape and some patience. Plan on close to an hour the first time, because plucking the hairline and trimming the lace are one-time jobs. After that, putting it on takes about fifteen minutes. This guide covers sizing, base prep for your hair type, fitting, securing and lace work, plus quick fixes for lifting, sliding and visible lace and how to wear it comfortably.
Time 45-60 minutes for the first install, then about 15 minutesDifficulty BeginnerSteps 9
Flat Base by Hair Type and Length
| Your hair | Flat base | Then add |
|---|---|---|
| Long, thick, or curly to coily | Flat cornrows, ends tucked | Nylon wig cap |
| Shoulder-length or shorter, straight to wavy | Two low flat braids or pin curls | Nylon wig cap |
| Fine or thin | Smoothed back and pinned flat | Wig cap plus grip band |
| Very short or close-cropped | No base needed | Velvet wig grip band |
What You’ll Need
As an Amazon Associate, HairAide earns from qualifying purchases. Product links in this guide are affiliate links: they cost you nothing extra and help keep these tutorials free.
- Glueless lace wig The straps and combs hold it in place without adhesive, so check that the listing includes both before you buy.
- Nylon wig caps Press your braided base into a smooth surface and keep a different color from showing at the part.
- Velvet wig grip band Adds friction so the wig doesn’t slide back, and is the main anchor for very short or fine hair.
- Canvas wig head with T-pins Holds the wig steady while you pluck and soften the hairline before the first wear.
- Lace tint spray Tints the lace to match your skin so the edge disappears without trimming it closer.
Step-by-Step
Step 1 Measure your head for cap size
Wrap a soft measuring tape around your head along the hairline. Start at the center of your front hairline, run it just above the ears and around the nape, then bring it back to the start.
Most brands build their ‘average’ or ‘medium’ cap around roughly 22 to 22.5 inches (about 56-57 cm), but charts differ, so compare your number with that brand’s own size chart. Adjustable straps and combs can take a cap in a little, but they can never make it bigger, so if you fall between sizes, choose the larger cap and tighten it.
If you’d have to pull the straps all the way in to stop it moving, go down a size, because an over-tightened strap bunches the cap and lifts the lace at the front.
Step 2 Pre-pluck the hairline on a wig head
Before the first wear, pin the wig to a canvas or foam wig head with T-pins and look at the front hairline in good light. Even wigs sold as ‘pre-plucked’ are often thicker at the front than a real hairline, and that density is what makes a wig look like a wig.
With slant-tip tweezers, pull out a few hairs at a time from the first row or two of the hairline in a slightly uneven zigzag rather than a straight line, because real hairlines are soft and irregular.
Step back and check it from a few feet away after every pass. You can always pluck more, but you can’t undo a bald patch in the lace.
Step 3 Build a flat base underneath
The flatter the base, the more naturally the wig sits and the less it shifts, so match the prep to how much hair you’re tucking away. Braid long, thick or curly-to-coily hair into flat cornrows and wrap and tuck the ends instead of leaving a bump at the nape.
Shoulder-length or shorter straight-to-wavy hair can go into two low, flat braids or flat pin curls. Cover either base with a nylon wig cap close to your scalp tone, which presses down flyaways and keeps a different color from showing at the part.
Fine or thin hair can simply be smoothed back and pinned flat under the cap, with a velvet wig grip band on top because a slippery base gives the combs little to hold. Very short or close-cropped hair needs no base at all, just the grip band. Keep braids firm but never tight at the edges, because constant pull on the hairline can cause traction hair loss.
Step 4 Set the hairline and tighten the straps
Stand at a mirror with your head upright. Bending forward to put the wig on tends to leave uneven spots, and you can’t see where the hairline really lands.
Hold the wig by the ear tabs, set the front lace slightly low on your forehead, then ease it back until the wig’s hairline lines up with your own and your edges are hidden under the lace. Check that the ear tabs sit evenly in front of each ear and that the part falls where you want it before you touch the straps.
Then tighten the nape and side straps or hooks one notch at a time until the cap stays put when you shake your head. Stop before it presses, and if you feel a band of tightness or the start of a headache, loosen it a notch.
Step 5 Anchor it with combs, clips and pins
The built-in combs and clips do the job glue would do, so where they go matters more than how many you use. Slide each comb horizontally into your braids or base near the hairline and at the sides, catching real hair and not only the cap.
Close each clip onto a braid rather than loose strands, which slip out. For extra hold at the temples and nape, cross two bobby pins in an X through the edge of the wig cap into the braid underneath, because crossed pins resist pulling in both directions.
If your wig has a sewn-in elastic band, check that it lies flat and untwisted against the nape. On very short hair the combs have little to catch, so let the grip band and straps do the holding instead of forcing pins against a bare scalp.
Step 6 Trim the lace in small passes
Once the wig is secure, trim the extra front lace with small, sharp scissors in short sections from one ear tab to the other. On the first pass, leave a narrow strip of roughly 0.5-1 cm (about 1/4 to 3/8 inch) beyond the hairline. Retailer guides vary, so treat that as a starting point, not a rule.
Follow the curves of the hairline in small snips rather than one long cut, because a perfectly straight lace edge is easy to spot. Only go closer in tiny passes, and only where lace still shows after you’ve tinted and laid it in the next step, because you can’t add cut lace back.
Step 7 Blend the lace into your skin
Visible lace is usually a color problem, not a cutting problem, so tint it before you trim any closer. Mist lace tint spray onto the underside of the lace, or dab on a little powder or foundation that matches your skin, along the hairline and the part.
Build it up lightly so the mesh disappears instead of looking painted.
To press the lace flat without glue, tie a satin scarf or elastic band snugly over the hairline for 10-20 minutes, then take it off and brush a few of the wig’s front baby hairs forward over the lace line. On a low-effort day, a headband or scarf worn just behind the hairline hides the lace edge completely.
Step 8 Fix lifting, sliding and visible lace
Lifting at the nape usually means the back is loose or the base is bulky there. Tighten the nape strap a notch, flatten or re-tuck the braid ends, and add a crossed pair of bobby pins at the nape.
A wig that creeps back during the day usually has its front combs in loose hair or a cap sliding over a smooth base. Push the front combs firmly into a braid, tighten the side straps a notch, and add a velvet grip band.
Lace that still shows after tinting is either lifting or simply too wide, so tie the scarf on for another few minutes and then trim only the spots that still stand out. If none of this holds, the cap is probably the wrong size, and no amount of strap-pulling will fix that.
Step 9 Remove it nightly to rest your scalp
The big advantage of a glueless wig is that it comes off in minutes, so take it off before bed instead of sleeping in it. That saves the lace from pillow friction and your edges from tension around the clock.
Open the clips and ease the combs out before lifting the wig off, then set it on a stand so the cap and hairline keep their shape. When you can, take a wig-free day or two between long stretches of wear, and use them to cleanse your scalp and moisturize the hair under your braids.
Tenderness, small bumps, redness or thinning at the temples mean the straps, combs or braids are too tight. Loosen them and rest the area, and if thinning continues, see a dermatologist.
Common Mistakes to Avoid
- Choosing a cap that’s too big and pulling the straps tight to make up for it. The cap bunches and the lace lifts, so size by your measurement and use the straps only for fine-tuning.
- Putting the wig on while bending forward, which leaves the hairline crooked and uneven. Keep your head upright at the mirror.
- Sliding the combs into loose hair or only the wig cap, so the wig creeps back. Seat them in a braid and add a velvet grip band.
- Cutting the lace right to the hairline in one long, straight pass. Leave roughly 0.5-1 cm and go closer in tiny snips only where it still shows.
- Over-plucking the hairline in one sitting. Work on a wig head, a few hairs at a time, and step back to check after every pass.
- Tightening the straps or braids until they ache, or sleeping in the wig. Constant pull on the edges can cause traction hair loss.
Pro tip Do a dress rehearsal the evening before you need the wig: wear it for an hour while you walk around, turn your head and look down, and note anywhere it pinches or lifts. At home, a fit problem takes a strap notch or a re-tucked braid to fix; in a bathroom mirror at work, it’s miserable.
The Bottom Line
Once the one-time work is done (the right cap size, a softened hairline and lace trimmed to your shape), a glueless wig goes on in about fifteen minutes: flat base, hairline set with your head upright, straps snug, combs in a braid. Be realistic about the finish. Without adhesive the lace won’t lie quite as flat as a glued install, but tinted, laid lace looks natural at normal talking distance.
Redo the base when your braids turn fuzzy or lumpy, and re-tint the lace when the color fades. Book a stylist for your first trim if you’d rather not risk the lace. If soreness, bumps or thinning show up at your edges, rest your scalp and see a dermatologist if it doesn’t settle.
Frequently Asked Questions
Do glueless wigs actually stay on without glue?
Yes, if the cap fits. A glueless wig is held by adjustable straps, built-in combs and clips, and often an elastic band, and a well-fitted one stays put through normal daily wear. When one slips, the usual causes are a cap that's too big, combs in loose hair instead of a braid, or a slippery base. A velvet wig grip band fixes the last one.
Do I need to braid my hair under a glueless wig?
Not always. It depends on your hair. Long, thick or curly-to-coily hair lies flattest in flat cornrows under a nylon wig cap. Shoulder-length or shorter straight-to-wavy hair can go into two low braids or pin curls, and fine or thin hair can be smoothed back and pinned. Very short or close-cropped hair needs no base, just a velvet wig grip band.
How long can I wear a glueless wig each day?
Wear it through the day and take it off at night. Sleeping in it rubs the lace and keeps tension on your edges around the clock. When you can, give your scalp a wig-free day or two between long stretches of wear to wash it and check your hairline. Tenderness, bumps or thinning at the temples mean the fit or your braids are too tight.
How much lace should I leave when trimming a glueless wig?
Retailer guides commonly suggest leaving roughly 0.5-1 cm (about 1/4 to 3/8 inch) beyond your hairline on the first pass, so treat that as approximate. Trim with small, sharp scissors in short snips that follow your hairline's curves. Only go closer where lace still shows after tinting and laying it flat, since you can't add cut lace back.
How do I care for a glueless wig between wears?
Detangle it with a wide-tooth comb, starting at the ends. Wash it with a mild wig-specific shampoo and conditioner when it looks dull or feels heavy with product. Air dry it on a wig stand away from heat and direct sun, and store it on the stand so the hairline and cap keep their shape.
Keep Reading
Sources
- How to install a glueless wig jaliza.com
- Simple steps to apply glueless lace wig glueless wig cap luxshinehair.com