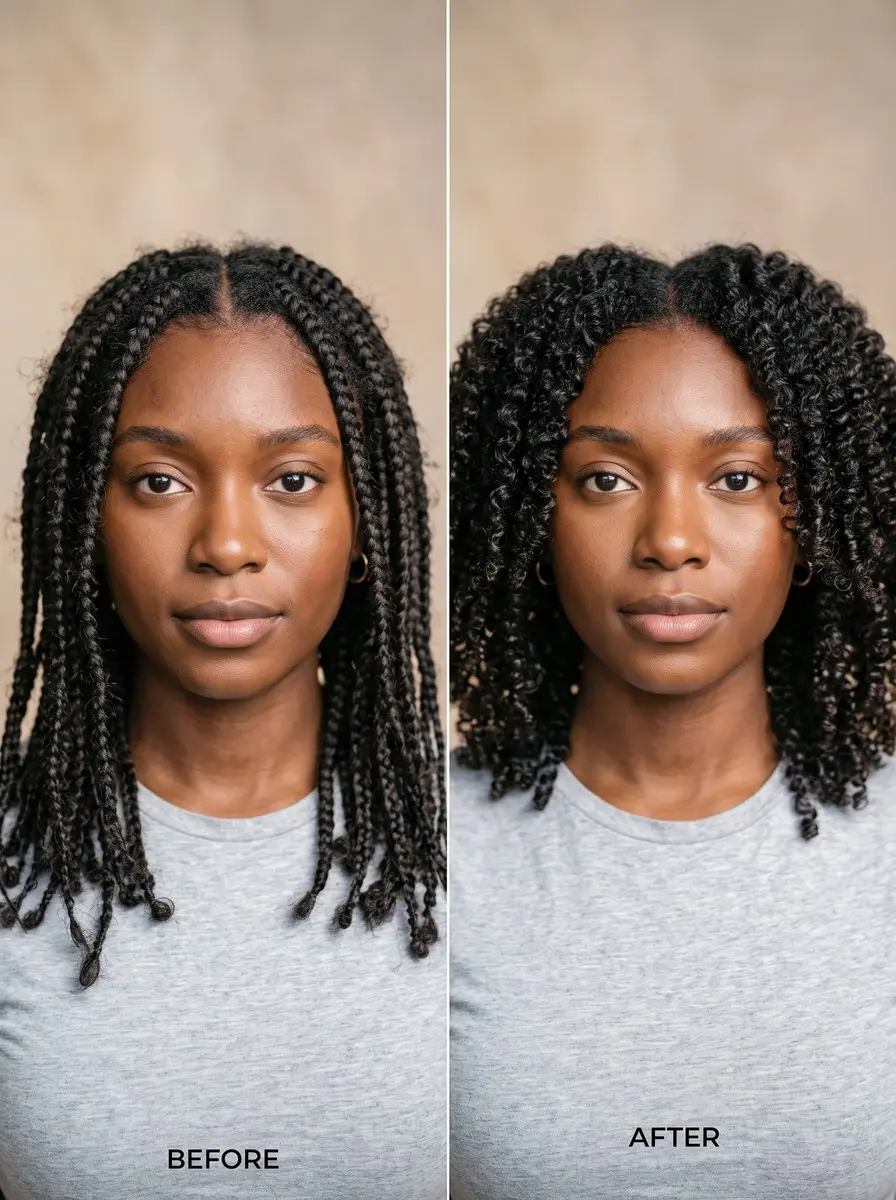
Quick answer Standard box braids last about 4–6 weeks, never past two months; jumbo braids come out around six weeks and micro braids last up to about three months. To take them down, dampen each braid, mist with detangler and unravel from the ends toward the root by hand.
Box braids are sold as the low-maintenance option, and for the first few weeks they are. But how long box braids last comes down to braid size and care, and the real risk sits at the end.
A set left in too long, or pulled out dry and in a hurry, is where the damage happens: the matted knot at the base of a two-month-old braid, and the sewing needle used to pick it apart, cost you far more hair than the braids ever did.
This guide follows a set from install to removal. You’ll get how long each braid size lasts, a daily, nightly and wash-day routine that keeps braids fresh, the signs it’s time, and a take-down done in the right order: dampen, add detangler, unravel from the ends up, and comb only once every braid is out. None of it needs a salon, just patience, a good detangler and a free evening.
Time 2-6 hours to take down (micro braids can take a full day)Difficulty BeginnerSteps 9
How Long Box Braids Last by Braid Size
| Braid type | How long to wear | Take down by |
|---|---|---|
| Standard (medium) box braids | 4–6 weeks | 2 months at most |
| Jumbo box braids | Up to about 6 weeks | Around 6 weeks |
| Micro braids | Up to about 3 months | Around 3 months |
| Knotless braids (medium) | 4–6 weeks | 2 months at most |
What You’ll Need
As an Amazon Associate, HairAide earns from qualifying purchases. Product links in this guide are affiliate links: they cost you nothing extra and help keep these tutorials free.
- Detangling spray Softens matted new growth at the base so strands slide apart instead of snapping during the take-down.
- Wide-tooth comb Gives the whole head one clean detangle from the ends up once every braid is out, with far less pulling than a fine-tooth comb.
- Silk scarf or satin-lined bonnet Cuts nightly friction against the pillowcase so braids stay smooth for the full wear window.
- Lightweight scalp oil Keeps the scalp along the parts comfortable day to day and doubles as the weekly warm-oil treatment without heavy buildup.
- Deep conditioning mask Brings back softness and slip after take-down, so hair starts the rest period soft rather than dry and brittle.
Step-by-Step
Step 1 Match wear time to braid size
Your braid size sets the clock, so note the install date in your phone the day you leave the chair. Standard medium box braids last about 4–6 weeks and should never stay past 2 months; jumbo braids are best removed around 6 weeks, while micro braids can last up to about 3 months.
Knotless braids follow the same window as box braids of the same size, so a medium knotless set also lasts about 4–6 weeks and comes out by 2 months at most: the knotless base is gentler at the root, but it doesn’t change how quickly new growth builds up underneath.
Setting the take-down date now stops you stretching a set past the point where your own hair starts to mat at the base.
Step 2 Moisturize daily and wrap nightly
Each morning, mist your braids with a light leave-in spray or a water-and-light-oil mix, then touch a few drops of lightweight oil onto the scalp along your parts. Keep it light, because heavy butters and greases sit at the base and become the buildup you’ll be combing out later.
Once a week, warm a little oil until it’s comfortably warm, not hot, and massage it into the scalp as a deeper treatment. At night, wrap the braids in a silk scarf or tuck them into a satin-lined bonnet, which cuts the friction that turns braids fuzzy against a cotton pillowcase.
As new growth appears, refresh only the hairline rather than redoing the whole set; the cue it’s all working is braids that feel soft rather than crunchy and a scalp that isn’t flaking.
Step 3 Wash mid-style without frizz
The sources disagree on how often to wash braids: some stylists say cleanse the scalp weekly, others every two to three weeks, so let itch and visible buildup decide rather than the calendar.
Dilute a gentle shampoo in an applicator bottle, apply it straight to the parts and massage with your fingertips, then squeeze the suds down the lengths instead of rubbing, since rubbing is what roughs braids up. Pulling a stocking cap or nylon over the braids while you wash holds them flat and cuts frizz further.
Follow with a light leave-in spray, then dry completely, either air-drying for several hours or sitting under a hooded dryer, because braids packed with extension hair stay damp inside long after the surface feels dry, and trapped moisture leads to a musty smell and an itchy scalp. Never go to bed on wet braids.
Step 4 Spot the take-down signs
Even before the date in your phone comes up, your hair will tell you when the set is done. Hair grows about half an inch a month, so by six weeks there is roughly three-quarters of an inch of loose new growth under each braid, and past that it starts to twist and mat at the base.
Watch too for braids slipping or loosening, fuzz you can’t smooth down, itch or white buildup that a wash doesn’t clear, and a tight or sore scalp or small bumps along the parts. Soreness and bumps mean too much tension, so take those braids out early instead of waiting out the planned window.
Step 5 Snip the extensions and section
Clear an evening, because micro braids take the longest by far; split a micro set across two sessions if you need to. Pinch a braid and slide your fingers down until you feel where your own hair ends and the smooth extension carries on, then snip the extension at least an inch below that point, so you unravel less length without ever cutting your own ends.
Divide your head into four sections with clips and work through one at a time, so freed hair doesn’t tangle with braids you haven’t reached yet. Blunt-tip scissors are for the extension only and never go near the base.
Step 6 Dampen and mist with detangler
Lightly dampen the section you’re working on with a spray bottle of water, then saturate the base and lower part of each braid with a detangling spray or a watered-down conditioner. Dry, matted new growth snaps when you pull it apart, while water and slip let the strands glide past each other instead.
Aim for damp, not dripping, so the hair stays soft but the braid pattern is still easy to see and follow. You’re ready when the base of the braid feels soft and slippery rather than stiff.
Step 7 Unravel each braid and clear shed hair
Start at the cut end and unravel each braid upward toward the root with your fingers, separating the three strands as you go. Working from the ends up means every tangle is met from below and slides off, rather than being dragged down and tightened the way it is when you start at the root.
For a stubborn plait, add more detangler and ease it loose with your fingertips alone, never a sewing needle, pin or seam ripper, which can catch and split the strand.
As the extension slides free, pinch out the small clump of shed hair at the root with your fingers straight away: it’s the hair you’d normally lose day to day, trapped in the braid for weeks, and left in place it winds into the new growth and mats. Then twist the freed hair loosely and clip it out of the way before starting the next braid; no comb touches your hair until every braid is out.
Step 8 Detangle once every braid is out
Once every braid is out, work back through your twists one at a time for a single, full detangle. Undo a twist, mist it with detangling spray, and comb with a wide-tooth comb from the ends, moving up a few inches at a time until you reach the root.
Combing once at the end, rather than braid by braid, means each section is handled a single time with plenty of slip, instead of being raked through again and again while the take-down goes on around it.
Check the loose strands as you go: full-length hairs with a tiny white bulb at one end are normal shedding, while short, uneven pieces with no bulb are breakage. Retwist each section when the hair feels soft and slips through the wide-tooth comb from root to ends without snagging.
Step 9 Deep condition and rest your hair
Keep the hair in its loose twists and wash out the oil and buildup with a gentle shampoo focused on the scalp, so the detangled lengths don’t knot back up.
Smooth a deep conditioning mask from mid-length to ends and cover it with a plastic cap; it brings back the softness and slip that hair loses sitting dry inside braids for weeks, which cuts further breakage in the days after take-down. Rinse once a strand pulled from under the cap feels soft and slippery between your fingers rather than rough or straw-like.
Then give your hair a break before the next install: aim for about a month off, two weeks at the very minimum, and at least four weeks if you saw breakage, a sore scalp or bumps. Fill the gap with low-tension styles such as loose twists or a twist-out, which let your scalp and edges recover.
Common Mistakes to Avoid
- Stretching a standard set past two months to save on the next install; matted new growth at the base turns the take-down into a breakage session.
- Starting the take-down at the root or pulling braids apart dry, which drags tangles down and tightens them instead of releasing them.
- Picking at stubborn sections with a sewing needle, pin or seam ripper, which can catch and split the strand.
- Combing each section as it comes free, before the shed hair at the base is out, which works the loose hair into a mat; save the comb for one detangle after every braid is out.
- Going to bed with damp braids after a wash, which leaves a musty smell and an itchy scalp.
- Reinstalling braids the same week instead of giving your hair at least two weeks off, and four or more if you saw breakage.
Pro tip Twist each section loosely as soon as it’s free and clip it out of the way. Freed, crinkled hair tangles back on itself fast, and a loose twist keeps it ready for one clean detangle at the end instead of three rough ones.
The Bottom Line
Done well, a take-down leaves you with soft, detangled hair, a pile of shed hair that is completely normal, and very little breakage. Mark the next install on your calendar about a month out and keep the in-between care simple: a deep conditioning mask, a light leave-in, and a silk scarf or bonnet at night.
See a stylist or a dermatologist instead if your edges look thinner after each set, if bumps or soreness don’t settle within a few days of the take-down, or if a section has matted into a knot that detangler and patience can’t ease out. A pro can work a mat loose without taking extra length, which is worth far more than the appointment costs.
Frequently Asked Questions
How long can you keep box braids in?
Standard box braids last about four to six weeks and shouldn't stay in past two months. Jumbo braids are best removed around six weeks, and micro braids can last up to about three months. Past that point, new growth mats at the base and the take-down gets harder on your hair, so take them out sooner if your scalp is sore or the roots are matting.
Do knotless braids last longer than box braids?
Not meaningfully, because braid size sets the timeline more than the base does. Knotless braids start with your own hair and feed the extension in gradually, which puts less tension on the root, but new growth still builds up underneath at the same rate. Plan on the same window as box braids of the same size, about four to six weeks for a medium set, and watch for the same take-down signs.
How often should you wash box braids?
Sources disagree: some stylists recommend cleansing the scalp weekly, others every two to three weeks. Wash when itch or buildup appears, using diluted shampoo on the parts and squeezing rather than rubbing the lengths. Always dry the braids completely before bed, and if you speed that up with a hooded dryer or a blow-dryer on a low setting, mist a heat protectant over the braids first.
Is it normal to lose a lot of hair when taking out braids?
Yes, within reason. The hair you would normally shed each day stays trapped in the braid for weeks, so a clump at each base is expected. Shed hairs are full length with a tiny white bulb at one end, while short, bulb-free pieces are breakage. If your edges or a patch look visibly thinner, see a dermatologist, since repeated tension can cause traction alopecia.
How long should you wait before getting braids again?
Aim for about a month between sets. Two weeks is the bare minimum, and if you noticed breakage, soreness or bumps along the parts, give your hair at least four weeks. Use the break to deep condition and wear low-tension styles like loose twists, so your scalp and edges recover before the next install.
Keep Reading
Sources
- How long box braids last styleseat.com
- How to avoid damage when undoing your braids news24.com