Quick answer To do crochet braids at home, cornrow clean, moisturized, stretched hair into a flat base that doesn't pull. Then use a latch hook to loop pre-looped or loose extension hair under each cornrow and cinch it snug. A full install takes about 2-3 hours and usually lasts 4-8 weeks.
You can realistically do crochet braids at home as a protective style. You don’t braid extension hair into every section strand by strand. Instead, you cornrow your own hair flat and use a latch hook to loop ready-made braids, twists, locs or curls underneath. A full install usually takes about 2-3 hours, and your own hair stays tucked away and low-maintenance for weeks.
The catch is that the base does all the work. Cornrows braided too tight cause tender spots and bumps and strain your edges. A lumpy or damp base shows through and can turn musty.
This guide covers how to choose the hair and how many packs to buy, how to prep and cornrow a flat, comfortable base, and the loop-and-cinch technique. It also covers washing, refreshing and taking the style down without losing length. If you can cornrow, or have a friend who can, you can do this.
Time About 2-3 hours, plus wash-and-dry time the day beforeDifficulty IntermediateSteps 9
How Many Packs of Crochet Hair to Buy by Length
| Finished length | Packs to buy |
|---|---|
| Short style | About 4 |
| Medium length | 5-6 |
| Long length | 6-8 |
What You’ll Need
As an Amazon Associate, HairAide earns from qualifying purchases. Product links in this guide are affiliate links: they cost you nothing extra and help keep these tutorials free.
- Crochet hair The extension hair itself: pre-looped braids, twists or curls are the fastest to install, while loose bulk hair lets you size each piece.
- Sulfate-free shampoo Cleans the scalp before the install and on wash days without stripping moisture from hair that stays tucked away for weeks.
- Deep conditioner Gives slip for detangling before you cornrow and brings back softness after takedown.
- Leave-in conditioner Moisturizes hair before braiding, tames frizzy pieces while you wear the style and adds slip for detangling at takedown.
- Rat-tail comb Its fine tail makes clean, even parts so the cornrow base lies flat.
- Latch hook crochet needle Pulls each piece of hair under the cornrows and tucks the cornrow tails out of sight.
- Satin bonnet Cuts friction overnight so the extension hair tangles and frizzes less.
- Small sharp scissors Trims frayed ends while you wear the style and cuts pieces free at takedown without nicking your own hair.
Step-by-Step
Step 1 Choose your hair and pack count
Pick the hair first, because it decides your cornrow pattern and how long the install takes. Pre-looped hair (braids, twists, locs or curls with a small loop at the top) is the fastest and easiest for beginners.
Loose bulk hair is folded in half by hand, which lets you control the size of every piece and the overall fullness. Synthetic fiber is the lower-priced pick and holds its pattern well, but it usually lasts nearer four weeks; human hair costs noticeably more and tends to last longer.
As a rough guide, buy about 4 packs for a short style, 5-6 for medium and 6-8 for long, plus one spare, since strands per pack vary by brand. If your own hair is fine or your scalp is sensitive, choose a shorter, lighter style, because a long, dense install hangs more weight off every cornrow.
Step 2 Wash, moisturize and stretch your hair
Start with clean hair, because it will be tucked away for weeks and buildup trapped under cornrows makes the scalp itch. Wash with a sulfate-free shampoo, which cleans the scalp without stripping the moisture your hair needs to get through the install.
Then apply a deep conditioner and finger-detangle from the ends up while it gives slip. Rinse, smooth in a leave-in conditioner, and let your hair air-dry in a few large twists or braids so it dries stretched.
Stretched hair cornrows more neatly and with far less pulling. Make sure it is completely dry before you braid, because hair sealed under a crochet install stays damp for a long time and can turn musty.
Step 3 Cornrow a flat, comfortable base
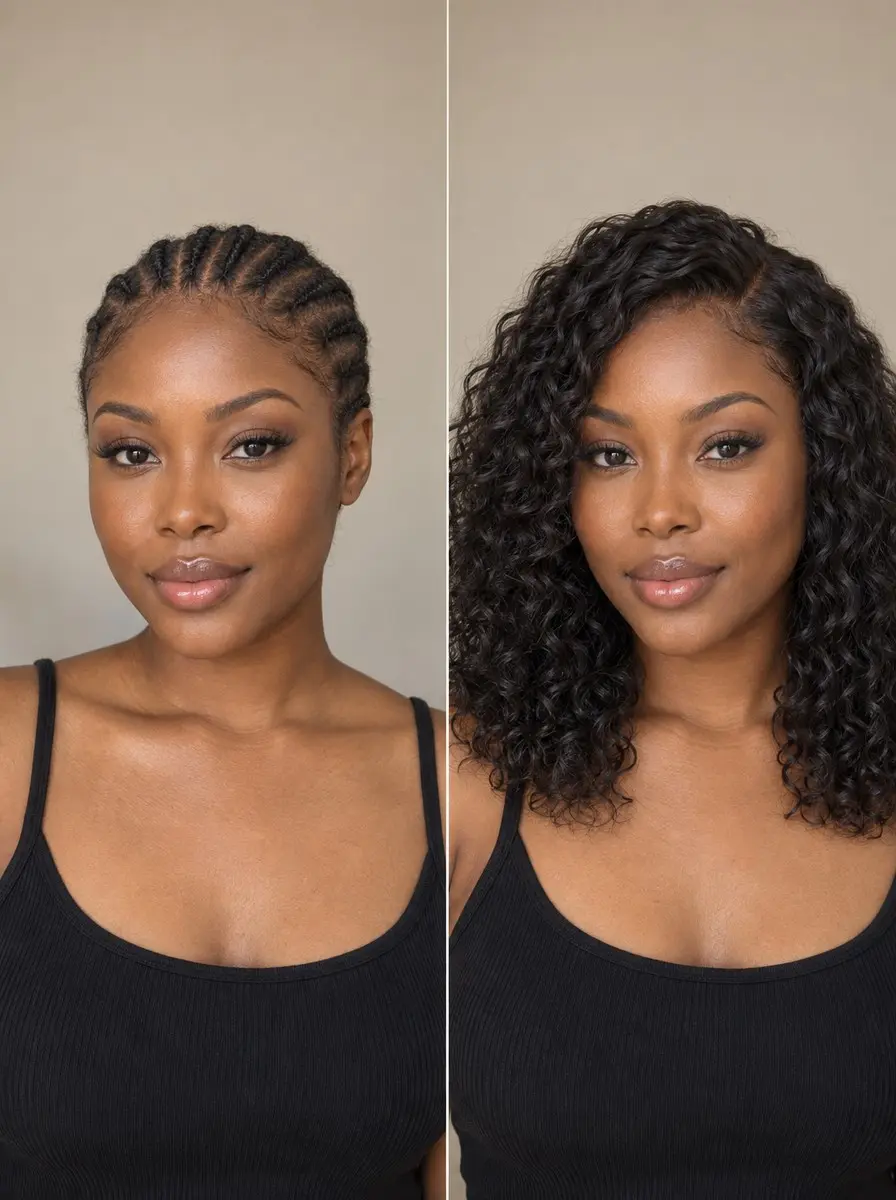
Part your hair with a rat-tail comb and cornrow it flat to the scalp in the pattern your style needs. Use straight-back rows for a swept-back look, a beehive (cornrows spiraling around the crown) for curly styles you want to part anywhere, or rows angled to one side for a side part.
Roughly 8 to 12 medium cornrows suit most installs: very small rows take longer and create more pull points, and very large ones leave a bulky base. Braid snugly enough that the rows don’t slide, but stop well short of pain.
If the skin lifts at the root or you feel a pull when you raise your eyebrows, redo that row. Keep the hairline row the gentlest, leave fragile baby hairs out rather than forcing them in, and use the latch hook to tuck each cornrow tail under a neighboring row so the base lies flat.
Step 4 Loop and cinch with a latch hook
Start at the nape and work up toward the front, so the neatest pieces land on top where they show. Slide the latch hook under a cornrow, open the latch and hang the hair’s loop (or the folded middle of a loose bundle) on the hook.
Close the latch and draw the hook back under the braid so the loop sits on your side. Open the latch, pass the free ends of the hair through that loop (hook loose ends through, or feed a full pre-looped braid through by hand), and tug down so the knot cinches flat against the cornrow.
Aim for snug, not tight: yanking the knot only adds tension at the root, while a loose knot slips and leaves gaps. A finished piece lies flat and doesn’t slide along the row when you tug it gently.
Step 5 Space and stagger the pieces
Place a piece roughly every finger-width along each cornrow. Stagger them between neighboring rows like bricks, so the gaps never line up and the base stays hidden.
Go slightly fuller around the part and the hairline, where a gap would show, and sparser through the back of the crown, which trims weight without changing the look. At the hairline, use thinner pieces so your edges carry less weight and the front looks softer: many pre-looped curly styles can be split in two, and loose hair can be folded into smaller bundles.
Shake your head every row or two. If you see cornrow between pieces, add one; if the hair already feels heavy, you have enough.
Step 6 Check tension and scalp comfort
Check the finished install for comfort before you call it done, and again over the next couple of days. Some snugness on day one is normal. Sharp pain, a headache that won’t fade, tenderness when you press the base or small bumps along the cornrows all mean something is too tight.
Don’t wait it out: redo the offending row, take weight off by removing a few pieces, and if a whole area hurts, take the style down. Repeated pulling on the same roots is what leads to traction alopecia, hair loss that often starts at the edges and can become permanent if the strain continues.
Step 7 Wash, sleep and refresh gently
Cleanse your scalp about every one to two weeks, since washing much more often loosens the knots and tangles the hair faster. In the shower, work a little sulfate-free shampoo along the parts with your fingertips and let the suds run down the lengths.
Rinse with the water pointing downward, without scrubbing or rubbing the extensions together. Squeeze the water out with your hands and let the install air-dry completely; washing in the morning gives the cornrows underneath all day to dry. Every night, gather the hair loosely into a satin bonnet to cut friction.
Finger-detangle any knots from the ends up rather than brushing, because brushing frizzes most synthetic curls. To refresh, rub a small dab of leave-in conditioner between wet palms and scrunch it into frizzy pieces, then snip any frayed ends with small scissors.
Step 8 Cut the loops out safely
Take crochet braids down within about 4-8 weeks. Synthetic and loose-wave styles usually tangle and frizz sooner, and leaving any install in too long lets new growth and shed hair mat at the base.
To remove a piece, hold the extension away from your head and cut it just below the knot with small, sharp scissors. Keep the blades on the extension side and well clear of your cornrow. The leftover loop then slides off the cornrow, or you can ease it out with the latch hook.
Work in good light, one row at a time, and never cut anything you can’t see clearly, because a rushed snip near the cornrow is how your own hair gets cut.
Step 9 Detangle and deep-condition after
Unbraid the cornrows one at a time from the ends up. Work leave-in conditioner through each one for slip and finger-detangle it before you move to the next. Expect a lot of loose hair: it is weeks of normal shedding that stayed trapped in the braids, not breakage, so gently tease it out rather than pulling.
Once every row is undone and detangled, wash with sulfate-free shampoo, focusing on the scalp. Then apply a deep conditioner for the time on its label to bring back softness after weeks of tension and dryness. Give your hair at least a week or two between installs so your scalp and edges can recover.
Common Mistakes to Avoid
- Braiding the cornrow base tight enough to hurt, which causes bumps and headaches and strains your edges.
- Installing over damp hair, which stays wet under the cornrows for a long time and can turn musty.
- Buying far more packs than the length needs, which adds weight to every cornrow and makes the style look less natural.
- Scrubbing or rubbing the extensions together on wash day, which knots curly crochet hair into tangles.
- Cutting close to the cornrow at takedown and snipping your own hair along with the extension.
- Keeping the style in well past eight weeks, so new growth and shed hair mat at the base.
Pro tip Hook under the full width of a cornrow stitch, not just a few loose hairs on its surface. A full stitch spreads the weight across the whole braid, while a shallow grab hangs the extension from a handful of strands that pull and break.
The Bottom Line
Done well, crochet braids give you weeks of low-effort style on a base that feels comfortable from the first day. Most of the work happens up front: clean, fully dry hair, a flat cornrow base that never pulls, and knots that sit snug rather than tight. After that, cleanse your scalp every week or two, sleep in a satin bonnet and finger-detangle as you go.
Plan to take the style down after four to eight weeks, then detangle, deep-condition and rest your hair before the next install. Book a braider who specializes in crochet installs if your edges are already thin, your scalp is sensitive or the base hurts however carefully you braid. A skilled braider can build a flatter, gentler base that spares fragile hair.
Frequently Asked Questions
How long do crochet braids last?
Crochet braids usually last about 4-8 weeks. Human hair tends to last longer than synthetic, and loose-wave and curly textures tangle sooner than braids or twists. Washing only every one to two weeks, finger-detangling and sleeping in a satin bonnet help you reach the longer end, but take them down by about eight weeks so the base doesn't mat.
Do crochet braids damage your natural hair?
Not when they're installed and removed gently. The risk comes from tension: cornrows braided too tight, heavy long styles and repeated installs on a fragile hairline can cause traction alopecia. Keep the base comfortable, use lighter pieces at the edges, take the style down if it hurts, and give your hair a week or two between installs.
How long does it take to install crochet braids?
A full crochet install usually takes about 2-3 hours. Pre-looped hair is quicker than loose bulk hair, which you fold and size piece by piece, and a short style goes faster than a long, full one. If you're cornrowing your own base for the first time, allow extra time, and wash and dry your hair the day before.
Can you wash crochet braids?
Yes, about every one to two weeks. Work a little sulfate-free shampoo along the parts with your fingertips, let the suds run down the lengths and rinse without scrubbing so the extension hair doesn't tangle. Squeeze out the water and let the cornrows underneath air-dry completely, ideally by washing in the morning, because a base that stays damp can smell musty.
Should I use pre-looped or loose crochet hair?
Choose pre-looped hair if you want the quickest, most uniform install, since each braid, twist or curl arrives ready to hook. Loose bulk hair takes longer because you fold and size every piece, but it lets you control fullness and use thinner pieces at the hairline. Beginners usually find pre-looped easier.
Keep Reading
Sources
- How to make crochet braids last 8 weeks without tangling ywigs.com
- How to install crochet hair shop.luvmehair.com