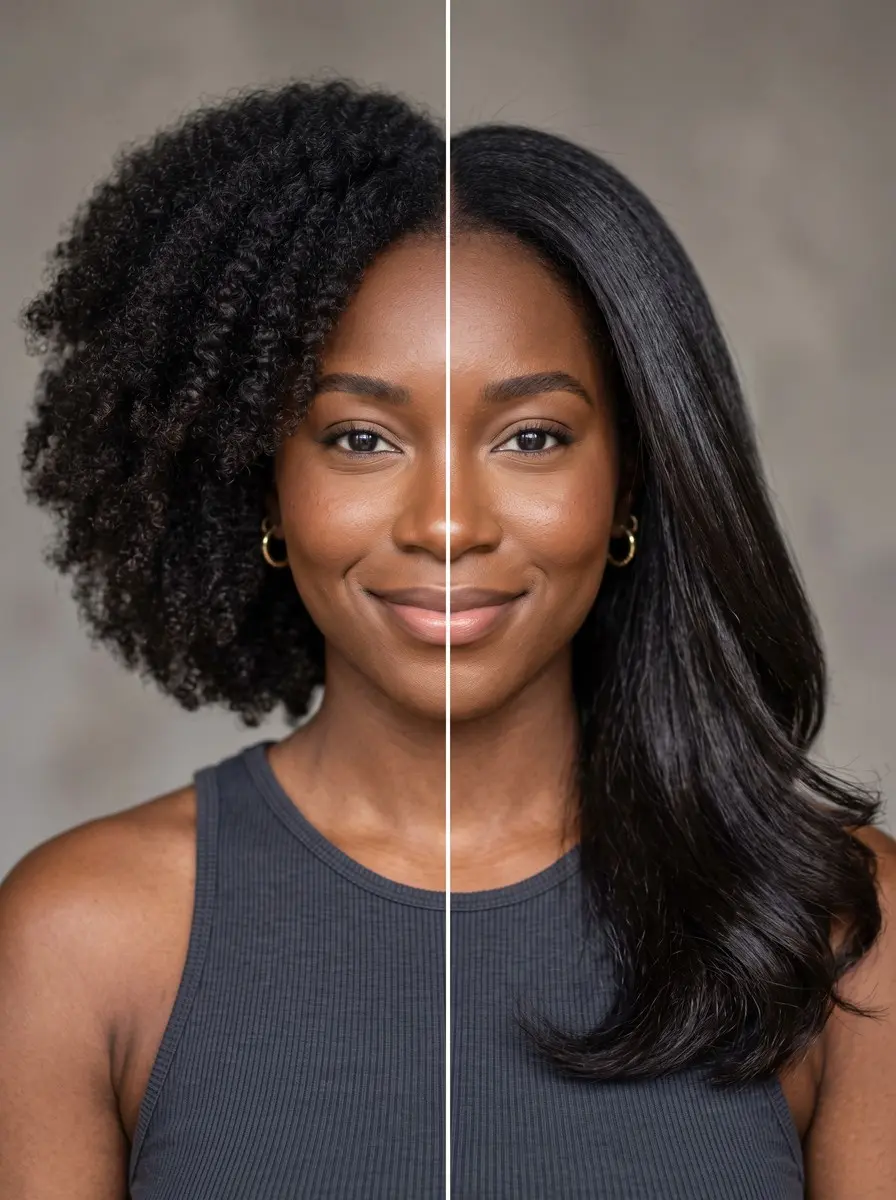
To do a silk press at home, clarify and deep condition, apply heat protectant to damp hair, blow-dry it fully dry and stretched in small sections, then flat iron thin sections in one pass at a temperature matched to your hair's condition, and wrap it nightly under satin.
A good silk press looks like it was done in a salon chair: hair that swings, catches the light and moves like it was never coiled, then springs back to its natural texture on the next wash day. A bad one gives you puffy roots by Tuesday. Worse, it can leave ends that stay limp and straight after you wash, because the heat went too far.
What separates the two is mostly the process, not talent. This guide treats the press as a routine for limiting damage: a quick check of whether your hair can take heat today, a strand test before you do the whole head, a temperature matched to your texture and condition, and a plan to stop it reverting in humidity. Set aside an unhurried afternoon and work in small sections, and you can get a sleek, lasting press at home.
What You’ll Need
- Clarifying shampoo (residue-removing shampoo) — Strips gels, butters and oils so the press comes out light and doesn’t smoke or look greasy under the iron.
- Heat protectant spray (for flat irons and blow-dryers) — Goes on damp hair before the first blow-dry, so it protects your hair from both the dryer and the iron.
- Blow-dryer with comb attachment — The comb nozzle stretches and dries each section right at the root with even tension, so the iron needs only one pass.
- Adjustable-temperature flat iron (ceramic or titanium plates, digital display) — A precise readout lets you set the exact temperature your strand test gave you instead of guessing on a dial.
- Satin scarf and satin bonnet — Holds the nightly wrap in place and cuts friction, so the press stays smooth for one to two weeks.
As an Amazon Associate, HairAide earns from qualifying purchases. Some links above are affiliate links — they cost you nothing extra and help support free tutorials.
Step-by-Step
-
A silk press is meant for natural, unprocessed hair, anywhere from loose curls to tight coils, so start by checking that yours is ready for heat today. Gently stretch a wet shed strand. Healthy hair stretches slightly and springs back. Hair that snaps instantly, or stretches like gum and doesn’t recover, is too fragile to press, and this stretch test is a quick read on how much stress your strands can take. Also look for pieces that already stay straight after washing, which is a sign of earlier heat damage. If your hair is bleached, relaxed or recently colored, or you’re seeing active breakage, book a salon press instead: chemically processed hair tolerates less heat, and a stylist can judge it as they work.
-
Wash with a clarifying shampoo to strip away the gels, butters and oils left from curly styling. Heavy residue weighs the finished press down, makes it look greasy by day two, and can sizzle and smoke under hot plates. If your hair feels squeaky afterward, follow with a moisturizing shampoo. Then apply a deep conditioner and leave it on under a plastic cap for 15-30 minutes. Shampooing and deep conditioning properly helps prevent reversion and swelling in the days after a press, so don’t skip this to save time. You’re done when your hair feels soft and slippery and detangles easily with your fingers.
-
Squeeze out excess water with a microfiber towel or cotton T-shirt so your hair is damp, not dripping, then divide it into four sections. In each section, apply a lightweight leave-in conditioner and a heat protectant, combing them from roots to ends with a wide-tooth comb so every strand is coated. Damp hair takes up product evenly, and the protectant has to be on before the blow-dryer, which is the first heat your hair will see. Twist or clip each finished section. You’re ready when the whole head is detangled, evenly coated and still damp.
-
Working one quadrant at a time, take sections about 1-2 inches wide and blow-dry them on medium heat with a comb attachment or round brush, moving from roots to ends. Keep the hair taut enough to stretch smoothly, but stop before it pulls at the scalp. Too little tension leaves kinks the iron then has to fix, and too much strains your edges and hairline. Dry every section completely before moving on, including the nape and the hair right at the roots, because any leftover moisture turns to steam under the flat iron. A section is done when it feels warm, light and fully dry, with no cool or damp spots when you touch it.
-
Before you press the whole head, choose your iron and test it on a small section at the nape. Ceramic plates heat evenly and are more forgiving for fine or color-treated hair. Titanium heats fast and holds high heat, which suits coarse, dense hair but punishes mistakes. Start low: around 300°F (150°C) for fine, bleached or color-treated hair, about 340-370°F (170-188°C) for healthy medium-density hair, and 355-390°F (180-200°C) for coarse, dense hair, never above 400°F. Press the test section once. If it comes out smooth and swinging, that’s your setting. If it’s still wavy, try a thinner section first, then raise the heat 10-20 degrees at a time without going past your ceiling.
-
Take sections no wider than about an inch, and thinner on coarse or dense hair. Press each one from root to end in a single, steady pass, keeping the iron moving so it never rests in one spot. Carol’s Daughter’s rule holds here: never go over the same section more than once. Repeat passes pile more heat onto the same strands, and that accumulated heat is what leaves curls that won’t come back. Work from the nape up and from the back toward the front, clipping finished sections out of the way. A section is done when it’s smooth, light and moves freely, with soft ends rather than stiff, poker-straight ones.
-
Let your hair cool for a few minutes before you touch, brush or style it. Hair holds the shape it cools in, so handling it while it’s warm costs you smoothness. Then warm a pea-sized drop of lightweight serum between your palms and smooth it over the mid-lengths and ends only, keeping it off the roots. A light serum adds shine and slip and helps the hair resist humidity, while heavy oils, butters or grease weigh the press down, flatten its movement and make roots look greasy within a day. You’re finished when your hair swings and catches the light without feeling coated.
-
Every night, comb your hair smoothly around your head in one direction and pin it flat (a wrap, sometimes called a doobie), then cover it with a satin scarf and a satin bonnet. For more volume, set large pin curls instead. The wrap keeps the hair stretched flat against your head, and satin cuts the friction that roughs up the hair and creates frizz. On humid or sweaty days, use an anti-humidity spray and wear a satin-lined cap or headband to work out. When the roots puff, wrap tighter overnight or wear a sleek bun instead of pressing again. Plan your next wash for one to two weeks out, or sooner if your scalp needs it.
Common Mistakes to Avoid
- Flat-ironing hair that still feels damp at the nape or roots: the trapped water turns to steam under the plates, and that’s the fastest way to cause heat damage.
- Turning the iron up to 425-450°F to get done faster. Staying under 400°F and using thinner sections gets you the same sleekness with far less risk.
- Going over the same section two or three times instead of making the section thinner.
- Pressing unwashed hair or skipping the deep condition, which leaves the press heavy, dull and quick to revert.
- Pressing puffy roots again every couple of days instead of wrapping them, which piles more heat onto hair that has already had a full press that week.
Pro Tip
Use the chase method: run a fine-tooth comb through the section just ahead of the iron so the plates always meet smooth, taut hair. That’s what lets one pass at a moderate temperature do the work of three passes at a high one.
Frequently Asked Questions
How long does a silk press last?
A well-done silk press usually lasts one to two weeks. How long yours holds depends mostly on moisture: humidity, sweat, shower steam and rain all let hair revert toward its natural texture. Wrapping every night under satin, wearing a shower cap and keeping heavy products off the roots are what push it toward the two-week end.
Will a silk press damage my natural hair?
Done carefully, a silk press doesn't have to cause lasting damage, but heat is the risk you're managing. Apply a heat protectant before the blow-dryer and flat iron, and only flat iron hair that is completely dry, because wet hair under an iron is the mistake that really causes damage. Keep the iron around 300°F (150°C) for fine or bleached hair and 355-390°F (180-200°C) for coarse hair, never above 400°F.
How often can I get a silk press?
L'Oréal, citing American Academy of Dermatology guidance, recommends using hot tools once a week or less, and a full press is heavy heat. In practice, that means not pressing again between wash days. Refresh with wraps and pin curls instead. Wearing your natural texture or a protective style between presses gives your hair a longer break from heat.
Why did my silk press revert so fast?
Fast reversion almost always comes down to water or prep. Roots that weren't fully dried, a skipped deep condition, heavy oils on the scalp, or a humid day without a wrap or anti-humidity spray all let moisture back into the hair, and water undoes the temporary straight set that heat created. Check your blow-dry first: puffy roots usually mean the roots weren't fully stretched and dried.
How do I know if my silk press caused heat damage?
Check on your next wash day. If your curls or coils spring back to their usual pattern once your hair is wet, the press did no lasting damage. If some strands, often at the front or the ends, stay straight or limp, that's heat damage: the iron was too hot, passed over those sections too often, or met damp hair. Heat-damaged lengths won't recover, so trim them off gradually and lower your temperature next time.
You Might Also Like
- 15 short silk press ideas to inspire your next look
- 20 veil-ready Black wedding hairstyles to inspire your big-day look
- how to make a blowout last longer
- how to tame thick hair frizz from wash day to bedtime
- how to trim your own curly ends at home
- how to diffuse curly hair between presses
- slip-proof updos for thick hair on humid days
Done this way, a silk press gives you smooth, swinging hair and a curl pattern that comes back intact when you wash. Most of the work comes first: a clean, moisturized base, a full blow-dry, a tested temperature and one pass per section. After that it’s just maintenance: a nightly wrap under satin, a light serum on the ends only and a plan for humid days.
Wash again after one to two weeks, and let your hair spend some time in its natural texture before the next press. Go to a salon instead if your hair is bleached, relaxed or recently colored, if it failed the stretch test, or if your last press left straight, limp pieces behind. A stylist can judge how much heat your hair can take and adjust as they go.
Sources
- One guide recommends staying under 400°F, drying hair 100% before flat-ironing, and starting with a clarifying shampoo and deep conditioning. lorealparisusa.com
- Design Essentials says proper moisture from shampooing and deep conditioning helps prevent reversion and swelling in the days after a silk press. purewow.com
- Carol's Daughter advises working in small sections and never going over the same section more than once. carolsdaughter.com