Quick answer To get rid of flyaways, first work out whether they're short new growth, snapped strands or static. Blot with a microfiber towel, detangle with a wide-tooth comb, blow-dry only the roots, then smooth strays with hairspray misted onto a spoolie or half a drop of oil.
You smooth your hair, step outside, and within an hour there’s a fuzzy halo along your part and a row of short strands standing straight up at your hairline.
Flyaways are one of the most common complaints for fine, straight and wavy hair, and they aren’t the same problem as frizz. Most come from three sources: short new hairs growing in, strands that have snapped partway along their length, and static, which makes both worse in cold, dry months.
That’s why one product rarely fixes them all. This guide shows you how to get rid of flyaways by working out which kind you have, stopping new ones on wash day, and taming the strays already there without stiff, crunchy lines. One honest note before you start: existing flyaways won’t vanish overnight. The realistic goal is fewer new ones and a finish that keeps the rest lying flat.
Time 20-30 minutes on wash day, 2 minutes to finishDifficulty BeginnerSteps 8
Flyaway Types and How to Fix Each
| Flyaway type | How to spot it | Main fix |
|---|---|---|
| New growth | Short, tapered strands at hairline and part | Hairspray on a spoolie |
| Breakage | Uneven, frayed or split strands at crown and part | Blot, comb from the ends, dry only the roots |
| Static | Full-length strands that lift and cling | Half a drop of oil, less friction |
What You’ll Need
As an Amazon Associate, HairAide earns from qualifying purchases. Product links in this guide are affiliate links: they cost you nothing extra and help keep these tutorials free.
- Thin microfiber hair towel Blots water out of wet hair with far less friction than rubbing with a regular towel, so fewer strands snap.
- Wide-tooth comb Detangles damp hair from the ends up without tearing strands, and spreads the leave-in evenly.
- Leave-in conditioner with heat protection A light mist protects the root zone you blow-dry, and a fuller pass cuts friction on the mid-lengths and ends.
- Hair dryer with a cool setting Dries just the roots on medium heat, with a cool blast at the end to set the shape.
- Light-hold hairspray Gives short new growth enough grip to lie flat without stiff, crunchy lines.
- Spoolie brush or clean soft toothbrush Places hairspray precisely on strays at the hairline and part instead of coating the whole head.
- Lightweight hair oil Half a drop smooths static-charged strands and softens dry ends so they snap less.
- Snag-free hair elastics Holds a sleek ponytail or bun without catching and breaking hair at the crown.
Step-by-Step
Step 1 Identify which flyaways you have
Stand at a mirror in daylight and look closely at a few strays along your hairline, part and crown. Short strands of a similar length with fine, tapered tips are new growth; uneven strands with blunt, frayed or split ends are breakage; full-length hairs that lift, float and cling to your sweater are static.
Most heads have a mix, so note which type dominates and where it sits. This matters because new growth needs hold, breakage needs gentler handling, and static needs less friction and a little oil, and the wrong fix (oil on short regrowth, for example) just makes hair look greasy.
Step 2 Blot with a microfiber towel
After washing, squeeze the water out with your hands, then press a thin microfiber towel around your hair and blot instead of rubbing. Wet hair stretches further and breaks under less force than dry hair, and the back-and-forth scrubbing of a regular terry towel roughs up the surface and snaps strands along the crown and part.
A smooth, thin microfiber pulls water away with far less friction. You’re done when the hair is damp and no longer dripping, usually after two or three minutes of gentle pressing.
Step 3 Detangle with a wide-tooth comb
Use a wide-tooth comb, never a fine brush, to work out knots while hair is still damp. Start with the bottom two inches, then move up a few inches at a time until the comb glides from root to tip.
Starting at the ends loosens each knot from below instead of dragging it down into a tighter tangle, and the wide gaps let strands pass between the teeth instead of being torn, so fewer of them snap. If the comb catches, stop, hold the hair above the knot and ease it apart with the comb’s tip rather than tugging through.
Step 4 Protect and moisturize before heat
Mist a leave-in conditioner that includes heat protection over damp hair in two passes. First give the zone from your roots down to ear level, the hair you’re about to blow-dry, one or two light sprays from about eight inches away so everything that meets the dryer is covered.
Then use four to six sprays through the mid-lengths and ends (a few more for longer hair) and run the wide-tooth comb through once to spread it evenly. This is the step that prevents next month’s breakage: the conditioning layer cuts friction from combing, towels and pillowcases, and the heat protection buffers the strands from the dryer.
Keep the root pass lighter than the lengths, because fine roots go flat under a heavy coat; if they feel coated or limp once dry, drop to a single spray there next time.
Step 5 Blow-dry only your roots
Set the dryer to medium heat, attach the narrow nozzle if your dryer has one, and dry just the first two or three inches from the scalp, lifting sections with your fingers and pointing the airflow down the hair shaft rather than up against it.
Stylists recommend drying only the roots because that’s where you want lift, while the older, more fragile mid-lengths and ends skip the extra heat and don’t get dried out. Once the roots are dry, let the lengths air-dry or finish them on the cool setting. End with a few seconds of cool air on the roots so the shape sets as it cools.
Step 6 Tame new growth with a spoolie
For the short new hairs at your hairline and part, mist light-hold hairspray onto a clean spoolie or soft toothbrush from about six inches away, never straight onto your head.
Brush the strays in the direction they naturally grow, then press them flat with a fingertip for a few seconds. One or two sprays covers the whole hairline; if strands clump into stiff, shiny lines or feel crunchy, you’ve used too much, so brush through and start again with less.
These hairs grow at about half an inch a month and keep standing up until they’re long and heavy enough to lie down, which is why this is a daily finish rather than a cure.
Step 7 Smooth static with a touch of oil
For full-length strands that float and cling, warm half a drop of lightweight hair oil between your palms until they look barely shiny, then glide your hands lightly over the top layer from mid-length to ends and finish by skimming the crown with what’s left.
A thin film cuts the friction that builds static charge and adds just enough weight for the strands to lie down, and it softens dry ends so they snap less.
On fine hair, too much shows up within hours as flat, separated, greasy-looking pieces, so start smaller than you think and add more only to the ends. In cold months, static peaks when you pull off a wool hat or sweater, so make this palm-skim your post-hat reset.
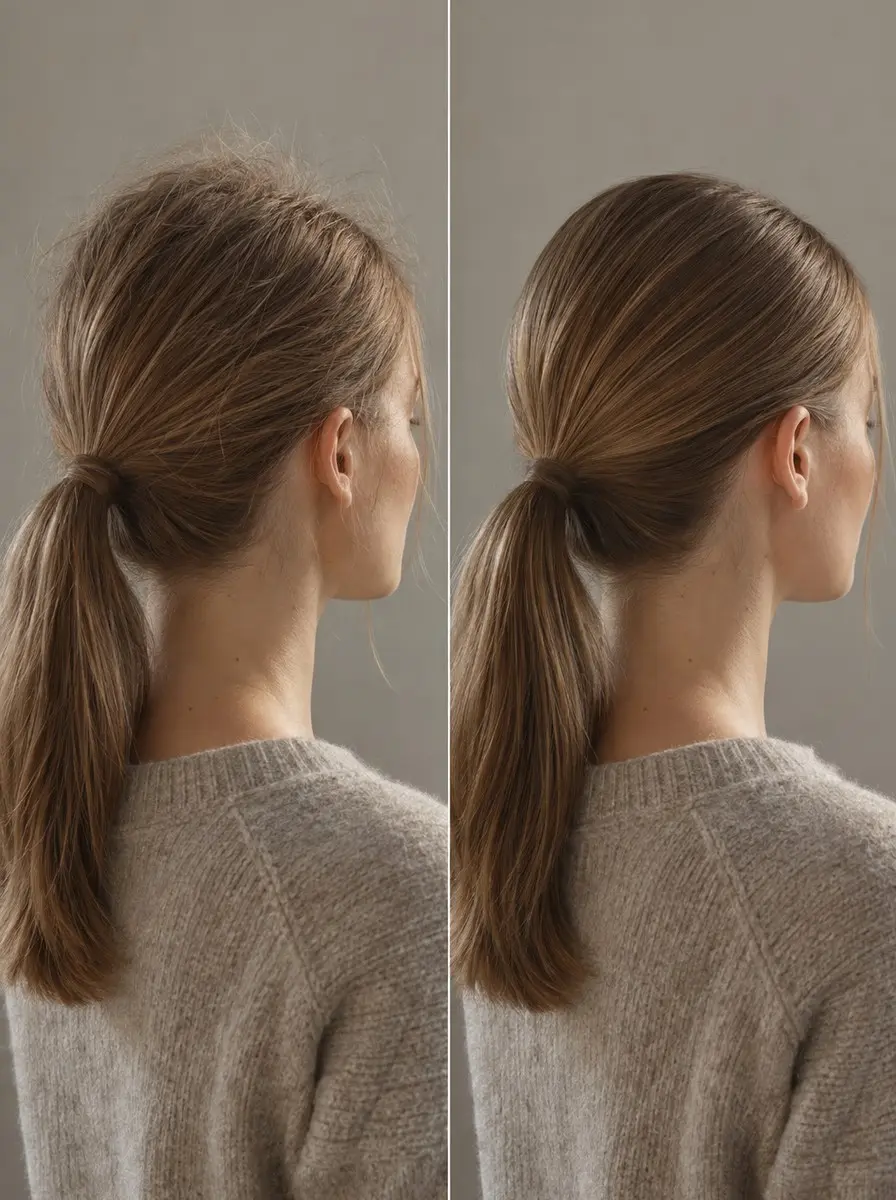
Step 8 Build a sleek ponytail without a halo
Starting on fully dry hair, mist one or two sprays of light-hold hairspray onto your palms, rub them together and smooth your hair back with flat hands to the height you want.
Gathering with palms instead of a brush keeps friction and static down, so you don’t lift a fresh layer of snapped strands at the crown. Secure it with a snag-free elastic that’s snug rather than tight, and for a bun, twist the length, coil it around the base and fix it with a second elastic.
Finish by running the hairspray-misted spoolie along your hairline and part. Change the ponytail height from day to day so the tension never lands on the same strands, a common source of breakage at the crown.
Common Mistakes to Avoid
- Rubbing wet hair with a regular terry towel, which roughs up the strands and snaps them along the crown and part.
- Brushing soaking-wet hair from the roots down instead of combing out from the ends with a wide-tooth comb.
- Spraying hairspray straight onto your head, which glues strands into stiff, shiny lines instead of laying them flat.
- Putting oil on short new growth at the roots, which makes fine hair look greasy without holding the strays down.
- Pulling a tight ponytail into the same spot every day, which concentrates tension and creates fresh breakage at the crown.
- Drying the mid-lengths and ends on high heat when only the roots need it.
Pro tip Mist the hairspray onto the spoolie and wait two or three seconds until it feels tacky before you touch your hair: tacky spray grips short strays and holds them flat, while wet spray clumps them into shiny, stiff lines.
The Bottom Line
Flyaways are a maintenance job, not a one-time fix. Once you know which kind you’re dealing with, the wash-day changes (blotting, combing from the ends and drying only the roots) cut down on new breakage, while the spoolie and half a drop of oil keep the strays you already have lying flat.
Give the gentler routine a few months, as new growth lengthens and starts to lie with the rest of your hair.
See a stylist if breakage keeps spreading despite gentler handling or strands keep snapping in the same place; they can tell whether colour, heat or tension is behind it. See a dermatologist if you notice thinning patches or heavy shedding rather than short new hairs, since that can have a medical cause.
Frequently Asked Questions
What causes flyaways?
Flyaways come from three main sources: short new hairs growing in around the hairline and part, strands that have snapped, frayed or split partway along their length, and static. Static and humidity make all of them worse, especially in cold seasons. Rough towel-drying, brushing wet hair and tight ponytails add to the breakage kind.
Will my flyaways ever go away?
Existing flyaways won't simply disappear, so the realistic goal is preventing new ones and taming the ones you have. New growth lengthens at about half an inch a month and blends in once it's long and heavy enough to lie with the rest, which takes months. Snapped strands grow out the same way, and trimming your ends won't remove breakage higher up the strand.
Is hairspray or oil better for flyaways?
Use light-hold hairspray on a spoolie for short new growth at the hairline and part, because those strands need hold to stay down. Use half a drop of lightweight oil for longer, static-charged strands and dry ends, which need a little weight and less friction. On fine hair, keep oil on the ends; at the roots it looks greasy within hours.
Do I need a heat protectant if I only blow-dry my roots?
Yes, because the roots are exactly the hair the dryer hits. On damp hair, mist one or two light sprays of a heat protectant over the zone from your roots to ear level, then give the lengths a fuller pass. Keep the dryer moving on medium heat with the airflow pointed down the shaft. The light root dose shields that zone without flattening fine hair.
How do I stop flyaways in winter?
Winter flyaways are mostly static: cold, dry air plus wool hats and sweaters build up charge, so strands lift and cling. Cut friction with a microfiber towel and a wide-tooth comb, keep the leave-in on your ends, and smooth half a drop of lightweight oil over the top layer after you take off your hat. Our static guide covers the full winter routine.
Keep Reading
Sources
- Hair maintenance tame fly aways colorwowhair.com
- How to tame flyaway hair livingproof.com