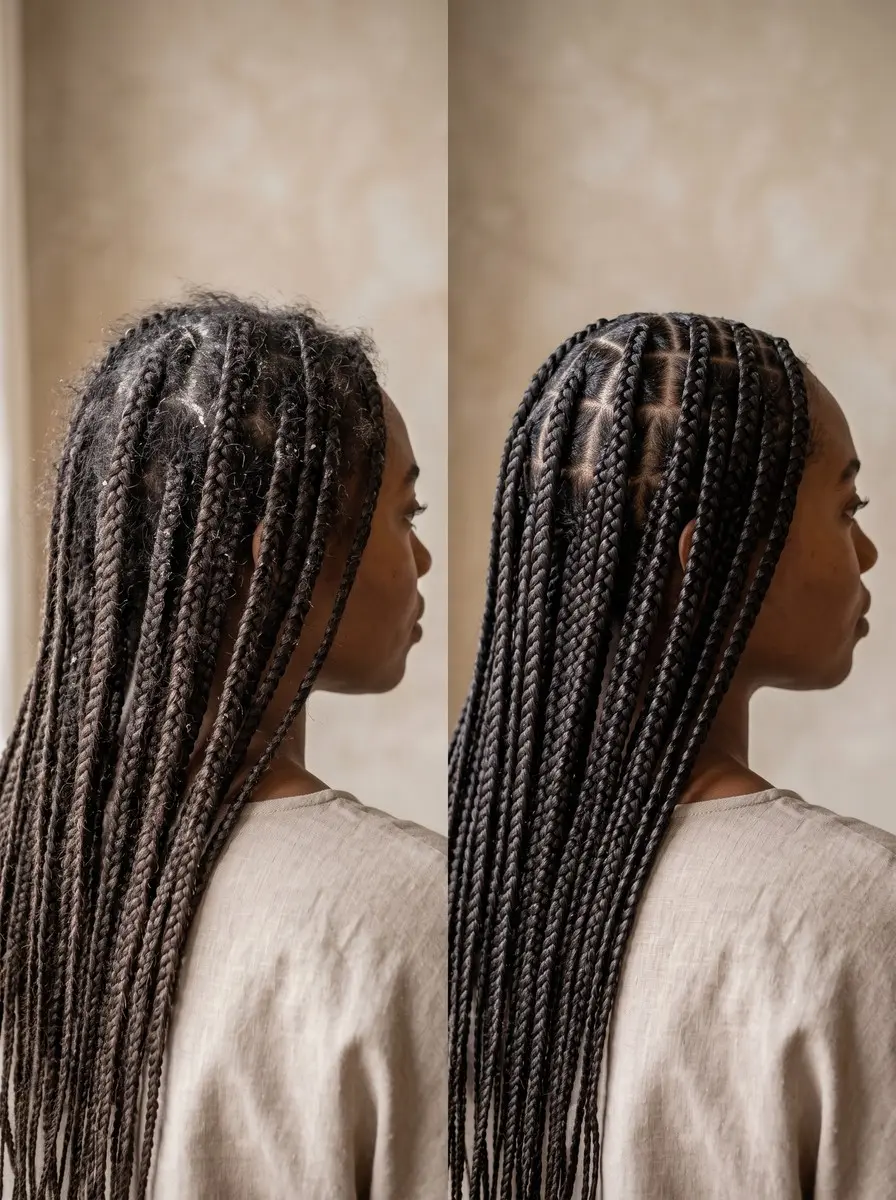
Quick answer To wash box braids, put diluted sulfate-free shampoo in a nozzle bottle and apply it only to the scalp, section by section. Massage with your fingertip pads and let the rinse water run down the braids without scrubbing. Skip rinse-out conditioner, mist on a light leave-in, then dry the braids all the way through.
Learning how to wash box braids is the part of an install most people dread. Shampoo the wrong way and the base fuzzes up after one rinse. Skip washing and your scalp gets itchy, flaky and coated.
Leave the braids damp and they pick up a musty, mildewy smell that no spray covers. The advice on how often to wash also conflicts, so plenty of people just wait it out, which is exactly how scalp trouble starts.
The fix is a routine built on one idea: clean the scalp and handle the braids gently. Below you’ll find a simple schedule: a scalp cleanse every 1-2 weeks, a fuller wash about every 3, and a hard stop at 4-8 weeks.
Every step comes with the reason behind it. You’ll also get adjustments for knotless and traditional braids, and what to do between washes. All you need is a shower, a nozzle bottle and a morning to let everything dry.
Time 30-45 minutes, plus several hours of dryingDifficulty BeginnerSteps 9
Box Braid Wash Schedule
| When | What to do | Why |
|---|---|---|
| Between washes, as needed | Vinegar-and-water wipe, then light oil | Lifts sweat and flakes without soaking braids |
| Every 1-2 weeks | Scalp-only cleanse with diluted shampoo | Clears oil and sweat at the parts |
| About every 3 weeks | Full wash with clarifying shampoo | Lifts residue from the braid lengths |
| Weeks 4-8 | Watch for takedown signs | New growth loosens the base |
| Week 8 at the latest | Take the braids down | Prevents tension and matting at the root |
What You’ll Need
As an Amazon Associate, HairAide earns from qualifying purchases. Product links in this guide are affiliate links: they cost you nothing extra and help keep these tutorials free.
- Applicator bottle with nozzle tip Sends diluted shampoo straight down each part to the scalp instead of onto the braids.
- Sulfate-free shampoo plus a clarifying shampoo The gentle shampoo handles regular scalp cleanses, and the clarifier lifts residue from the lengths on the three-week full wash.
- Lightweight leave-in conditioner spray Softens your own hair inside the braid without the trapped residue a rinse-out conditioner leaves.
- Microfiber hair towel Squeezes water out of the braids without the snagging and frizz that terry cloth causes.
- Soft bonnet hooded dryer Dries braids through to the core on low to medium heat so no damp pockets are left to turn mildewy.
Step-by-Step
Step 1 Choose a scalp cleanse or full wash
Before you get wet, decide which wash this is, because the two do different jobs. A scalp cleanse every 1-2 weeks clears sweat, oil and flakes from the parts. A full wash with a clarifying shampoo about every 3 weeks, starting around week 3, also lifts the product residue that builds up along the braid lengths.
Oily or active scalps sit at the weekly end of that range, while dry or sensitive scalps can stretch to two weeks with an apple cider vinegar refresh in between. Advice on frequency varies because scalps vary, so let an itchy, tight or shiny-looking scalp tell you when it’s time.
Step 2 Dilute your shampoo in a nozzle bottle
Fill an applicator bottle with a nozzle tip, or a spray bottle, with roughly one part sulfate-free shampoo to three or four parts warm water, then shake until it’s evenly cloudy. Diluted shampoo flows straight down each part to the skin instead of sitting in a thick blob on top of the braids.
It also rinses out of the plaits much more completely, and that’s what prevents the white, flaky residue that dulls braids. For the full wash, mix your clarifying shampoo the same way. The mix is ready when it squirts out in a thin, steady stream.
Step 3 Section the braids and cleanse the scalp
Divide the braids into four to six sections and clip or loosely tie each one out of the way so every part is visible. Run the nozzle along each part and massage in small circles with the pads of your fingertips.
Never use your nails, which scratch the skin and rough up the base of the braid. Knotless braids have a flatter base that shampoo reaches easily, but that base is only your own hair, so keep the pressure light or it will fuzz.
Traditional box braids have a bulkier knot, so press the nozzle right against the part to get past it, and stop once every part has been worked and the whole scalp feels evenly sudsy.
Step 4 Let the rinse water run downward
Step under the shower and tilt your head so the water runs from the scalp down the braids in the direction they hang. The lather cleans the lengths on its way out, so on a scalp-cleanse day that’s all they need.
On a full-wash day, squeeze the suds down each section between flat palms, the way you’d press a sponge, instead of rubbing braids together. Rubbing wet braids pulls loose hairs out at the base and roughs the extension fiber into frizz. Keep rinsing until the water runs clear and a squeezed braid no longer foams or feels slippery, because leftover shampoo dries into flakes.
Step 5 Swap conditioner for a light leave-in
Skip rinse-out conditioner entirely. It soaks deep into the braid, and you can’t work it out of the plait the way you can with loose hair, so it leaves a waxy film that attracts lint and can smell stale. Instead, mist a lightweight, water-based leave-in spray over the scalp and lengths while the braids are still damp.
Hold the bottle far enough back that the spray lands as a fine layer and doesn’t drip. This gives your own hair inside each braid softness and slip without coating the extensions, so stop when the braids feel soft and lightly damp, not wet or tacky.
Step 6 Squeeze the water out with microfiber
Take one section at a time and squeeze it inside a microfiber towel or an old cotton T-shirt, pressing from root to tip. Then wrap your whole head for 10 to 15 minutes so the fabric draws out more water.
Braids hold a surprising amount of water deep in the plait, and getting most of it out now is what makes a complete dry realistic. Microfiber’s smooth weave doesn’t catch on the braids the way terry-cloth loops do, so the base stays neat. Move on when a squeezed braid no longer drips.
Step 7 Dry every braid all the way through
Finish under a hooded dryer on low to medium heat, or let the braids air dry hanging loose for several hours. Long or thick sets can take most of a day, which is why a morning wash beats an evening one.
Moisture trapped inside a braid is what causes the mildew smell, and it can sit unnoticed for days under a bonnet or in a bun. Traditional box braids need extra time at the knot, where water collects, while knotless braids dry faster at the root but still hold water in the lengths.
To test, press a braid against the inside of your wrist near the base and again near the ends: if either spot feels cool, keep drying, and don’t tie the braids up or sleep on them until both feel dry.
Step 8 Refresh the scalp between washes
On days between cleanses when your scalp feels itchy or coated, mix equal parts apple cider vinegar and water, dampen a clean cloth with it and wipe along each part.
The diluted vinegar lifts sweat and flakes from the skin without soaking the braids, so there’s nothing to dry afterward. If your skin is sensitive, patch-test it first. Follow with a few drops of a light oil, such as jojoba or grapeseed, rubbed into the parts.
Skip heavy pomade and grease, which clog the scalp, catch lint and build up into a gummy residue at the base that even a full wash struggles to lift; the scalp should feel clean and comfortable, not slick.
Step 9 Know when to take them down
Even with a perfect wash routine, box braids have a ceiling: plan to take them down somewhere between 4 and 8 weeks after install, and at week 8 at the latest.
Hair grows about half an inch a month, so by weeks 6 to 8 the new growth at the root has loosened the base. The braid’s weight then hangs on less secure hair, which is when tension and matting creep in.
Take them down sooner if the base is fuzzy and won’t lie flat, buildup at the roots won’t wash out, the itch comes back within a day of cleansing, or the braids still smell after a full dry. Removing them on time protects your own hair far more than squeezing out one more week.
Common Mistakes to Avoid
- Scrubbing or rubbing the braid lengths together in the shower, which pulls loose hair out at the base and frizzes the extension fiber.
- Using a rinse-out conditioner or heavy cream that stays trapped inside the plait as a waxy residue that catches lint.
- Tying the braids up, putting on a bonnet or going to bed while they’re still damp, which is the fastest route to a mildew smell.
- Greasing the scalp with heavy pomade between washes, which clogs it and builds a gummy residue at the base.
- Skipping washes to protect the style, which leaves sweat and oil on the scalp and invites bacterial or fungal problems.
Pro tip After the final rinse, before you squeeze the lengths, press a folded, clean cotton towel along each part for a few seconds to wick out the water that pools at the base, especially around the knots of traditional box braids. The base is the last spot to dry and the first to smell musty, so blotting it first means no damp root is left hiding under the braids.
The Bottom Line
Done right, a wash leaves you with a clean, comfortable scalp, braids that look as neat as they did on install day, and no musty smell. Keep the rhythm simple: a scalp cleanse every 1-2 weeks, a full clarifying wash about every 3, a vinegar refresh whenever the scalp itches in between, and a complete dry every time.
If your scalp stays itchy, sore or flaky after a proper cleanse, or you notice bumps along the parts, see a dermatologist or your braider rather than adding more product. When the 4-to-8-week ceiling arrives, book the takedown. Your own hair underneath is the reason you put the braids in.
Frequently Asked Questions
How often should you wash box braids?
Cleanse the scalp every 1-2 weeks and give the braids a full wash with a clarifying shampoo about every 3 weeks. Oily scalps do best at the weekly end. Dry or sensitive scalps can stretch to two weeks with an apple cider vinegar wipe in between. Going much longer without washing invites bacterial or fungal scalp problems.
How long does it take box braids to dry after washing?
Air drying takes several hours, and long or thick sets can need most of a day, so wash in the morning. Squeezing the braids in a microfiber towel first and finishing under a hooded dryer on low to medium heat shortens this. To confirm they're done, press a braid to your inner wrist near the base and near the ends; if either spot feels cool, keep drying.
Can you wash knotless braids the same way as traditional box braids?
Yes, the method is the same: diluted shampoo on the scalp, no scrubbing, a light leave-in and a full dry. Knotless braids have a flatter base that is easier to reach and quicker to dry at the root. That base is only your own hair, though, so it frizzes sooner if rubbed. Traditional braids hold extra water in the knot, so give the roots longer to dry.
Why do my box braids smell musty after washing?
A musty smell almost always means the braids weren't fully dry, so moisture sat inside the plait and turned mildewy. Cleanse the scalp again, squeeze out the water and dry the braids all the way through before tying them up. If the smell comes back after a thorough dry, or comes with a persistent itch, it's time to take the braids down.
What should I put on my scalp between box braid washes?
Wipe the parts with a cloth dampened in equal parts apple cider vinegar and water, then rub in a few drops of a light oil such as jojoba or grapeseed. Skip heavy grease and pomade, which clog the scalp, trap lint and leave residue at the base that is hard to wash out. Patch-test the vinegar mix first if your skin is sensitive.
Keep Reading
Sources
- How to wash box braids theskimm.com
- How wash box braids styleseat.com