Quick answer To dye gray hair at home, use permanent color with 20 volume (6%) developer if you're 50% or more gray, or a demi-permanent to blend under about 30%. Pick a natural-based shade, apply to the most resistant temples first, and process 30-45 minutes without heat.
If you want to dye gray hair at home and get full coverage, the method has to match how much gray you have. Gray hair doesn’t take color the way pigmented hair does: it has no pigment of its own to build on, it can be coarser and wirier than the hair around it, and it tends to cluster at the temples and part, the places people see first.
That’s why a box dye that worked well ten years ago can suddenly leave silver showing at the hairline, or come out flat and darker than the picture.
The good news is that full, natural-looking coverage is very doable at home. This guide starts with that first decision, cover or blend. It then covers shade choice, developer, prep and safety tests, and the application order that gets stubborn grays to take color. It also explains what to do if the color comes out too dark or the gray won’t budge.
Time 60-90 minutes, plus a patch and strand test 48 hours aheadDifficulty BeginnerSteps 9
Gray Coverage Method by How Much Gray You Have
| Gray amount | Method | Developer | What to expect |
|---|---|---|---|
| Under about 30% | Demi-permanent or gloss | Low-volume, per kit | Blends, fades faster |
| About 30-50% | Demi to blend, permanent to cover | Per kit / 20 vol (6%) | Choose by goal |
| 50% or more | Permanent | 20 vol (6%) | Full coverage |
| Resistant, wiry gray | Permanent, natural-based shade | 20 vol, box ratio | Temples first, full time |
What You’ll Need
As an Amazon Associate, HairAide earns from qualifying purchases. Product links in this guide are affiliate links: they cost you nothing extra and help keep these tutorials free.
- Madison Reed Radiant Color Kit An ammonia-free permanent kit with its developer included and a shade-matching quiz, so the ratio question is already answered.
- ESalon custom-blended permanent hair color A colorist builds the formula around your gray percentage and natural shade, which takes the guesswork out of choosing a natural base.
- 20 volume (6%) cream developer The standard strength for covering gray when you use salon-style tube color with a separate developer.
- Hair color applicator bottle, tint brush and sectioning clip set Lets you place color exactly at the temples and part and keep each quadrant cleanly separated.
- Root touch-up spray or powder Hides the regrowth line between sessions; wash it out 24-48 hours before your next color.
Step-by-Step
Step 1 Decide whether to cover or blend
Part your hair at the crown, both temples and the nape, and look in daylight to estimate how much is gray. Under about 30% gray, a demi-permanent color or gloss softens the contrast and lets the silver blend in.
At 50% or more, you’ll usually need permanent color for full coverage. Demi uses a gentler, low-volume developer and is built to deposit color rather than lock it into the hair the way permanent dye does, so it won’t fully cover gray and it fades faster.
Between 30 and 50%, choose by goal: demi to soften, permanent to erase. You’re ready to shop once you can name your rough gray percentage and whether you want it gone or softened.
Step 2 Choose a natural-based shade
Match the box shade to your natural, non-gray color, not to the gray itself. Gray has no pigment, so pure fashion tones like ash, red or gold can look thin or see-through on it; choose a natural-series (N) or gray-coverage shade instead, because its built-in natural base gives the color something to sit on.
If you’re using salon tube color and want a fashion tone, blend it with a natural shade of the same level the way pros do: Wella’s guidance makes about a third of the mix natural for 30-50% gray and half for 50-100% gray.
With 50% or more gray, the result can read lighter than the swatch, so follow your box’s shade chart and consider going one level darker if the brand suggests it. The old rule of picking the lighter of two shades, because too dark is harder to fix than too light, applies only when you’re under about 50% gray or your box gives no guidance.
Step 3 Patch test and clear buildup
Two days before you plan to color, do the allergy patch test your box describes, usually behind the ear or inside the elbow, and leave it for the full 48 hours.
Permanent dyes can cause reactions even in people who have colored for years, so if the spot itches, burns, reddens or swells, don’t use the product. In the 24 to 48 hours before color day, also wash out leave-in conditioners, styling products and root concealer sprays or powders, and skip them until you’ve colored.
These coatings can stop the color from reaching the hair and leave patches of gray. Keep the kit handy, because the strand test runs alongside the patch test.
Step 4 Mix developer to your box’s ratio
20 volume (6%) developer is the standard for gray coverage: it lifts about one level and gives the dye enough strength to develop fully on resistant gray. 30 volume lifts about two levels and adds damage you don’t need when you’re matching your shade or going darker, and 40 volume is high-risk for home use, so skip it.
Box kits come pre-measured; if you’re using tube color with a separate developer, mix at the ratio printed on that product.
Brands really do disagree here: Wella’s pro guidance is 1:1, while Naturtint suggests about 25% less developer than colorant for resistant gray, because each ratio is set for that brand’s own color cream. For the strand test, mix just a small amount in a non-metal bowl at that same ratio; with a box kit, follow its strand-test directions or take a little of each part in the same proportion as the full tube and bottle.
On color day, mix the full batch the same way right before you apply and throw away any leftovers, because mixed color starts reacting straight away and can’t be saved.
Step 5 Strand test before color day
Snip a small strand that includes some gray from a hidden spot, such as underneath at the nape or behind the ear, then wash and dry it. Coat it fully with your test batch, leave it for the full processing time on the box, then rinse, dry and check it in daylight.
This is the only reliable preview of your result, because gray often reads lighter than the swatch and resistant strands show whether your shade and timing are enough.
If gray still peeks through, switch to a natural-series shade or go one level darker rather than reaching for stronger developer; if the strand is darker than you want, go one level lighter. When the strand shows covered gray in the shade you wanted and the patch test is clear, you’re ready to color on dry hair, as most kits direct.
Step 6 Section and protect your hairline
On color day, divide dry hair into four quadrants, forehead to nape and then ear to ear, and clip each one away. Smooth barrier cream or petroleum jelly along your hairline and ears, put on gloves, and drape an old towel over your shoulders.
Clean, clipped sections matter more with gray than with any other color, because any strand that gets only a light coat will show silver through the finished color. Keep your bowl, brush, clips and timer within reach before you start so you don’t lose minutes mid-application.
Step 7 Color resistant gray first, ends last
Apply color first where gray is densest and most stubborn, usually the temples, hairline and front part, so those areas get the longest processing time, and start the timer once that first area is covered.
Then work across the rest of the roots in thin subsections about a quarter-inch (5 mm) deep, applying generously: gray needs more product than you’d expect, a thin coat is the most common reason it doesn’t take, and thick or past-the-shoulder hair may need a second kit. Only once the roots are done, turn to the mid-lengths and ends.
Previously colored lengths are more porous than new growth and grab extra pigment every time permanent color is pulled through, until the ends look darker than the roots, so on repeat sessions keep permanent color on the regrowth only.
If the lengths have faded, use a lighter formula on them, as Wella’s guidance suggests, or refresh them with a demi-permanent gloss instead of the full-strength permanent mix; on a first-ever color, follow your box’s order so the ends match the roots rather than landing a shade deeper.
Step 8 Process, check, then rinse
Leave the color on for 30-45 minutes at room temperature, without a heat cap, unless your box says otherwise. Wella suggests 30-40 minutes and Naturtint 40-45 for resistant gray, so your own product’s timing wins.
Before rinsing, wipe a small temple section clean with a damp cloth and check it: if gray still shows and you haven’t reached the box’s maximum time, use the time you have left, but never go past it. Rinse until the water runs clear, apply the kit’s conditioner, and check your dry hair in daylight; treat any stubborn spots at your next touch-up rather than recoloring right away.
Step 9 Plan root touch-ups and upkeep
Hair grows about half an inch a month, so a gray line usually shows at the part within 4-6 weeks. Touch up then, on new growth only, so you aren’t layering permanent color onto the lengths. Between sessions, a root concealer spray or powder hides the line; just wash it out 24-48 hours before you color again.
Use a sulfate-free, color-safe shampoo to slow fading, and if brown color starts looking brassy, a blue-toned shampoo cancels orange (violet cancels yellow on lighter shades). Moving your part to the other side also buys a little time between touch-ups.
Common Mistakes to Avoid
- Coloring over leave-ins, dry shampoo or root concealer instead of washing them out 24-48 hours ahead, which leaves patches of gray uncovered.
- Pulling permanent color through already-colored ends every session, which builds up pigment until the ends are darker than the roots.
- Expecting a demi-permanent to fully cover 50% or more gray, then seeing silver show through within a few washes.
- Reaching for 30 or 40 volume developer ‘for stronger coverage’: it adds lift and damage, not grip on gray.
- Skipping the 48-hour patch test because you’ve used the brand before.
- Choosing an ash or red fashion shade with no natural base and getting see-through, off-tone coverage on the gray.
Pro tip Colorists apply to the temples and front hairline first and start the clock there, because that’s where resistant gray usually is. If a strand test shows those grays still peeking through at full time, they add more natural shade to the formula rather than reaching for a stronger developer.
The Bottom Line
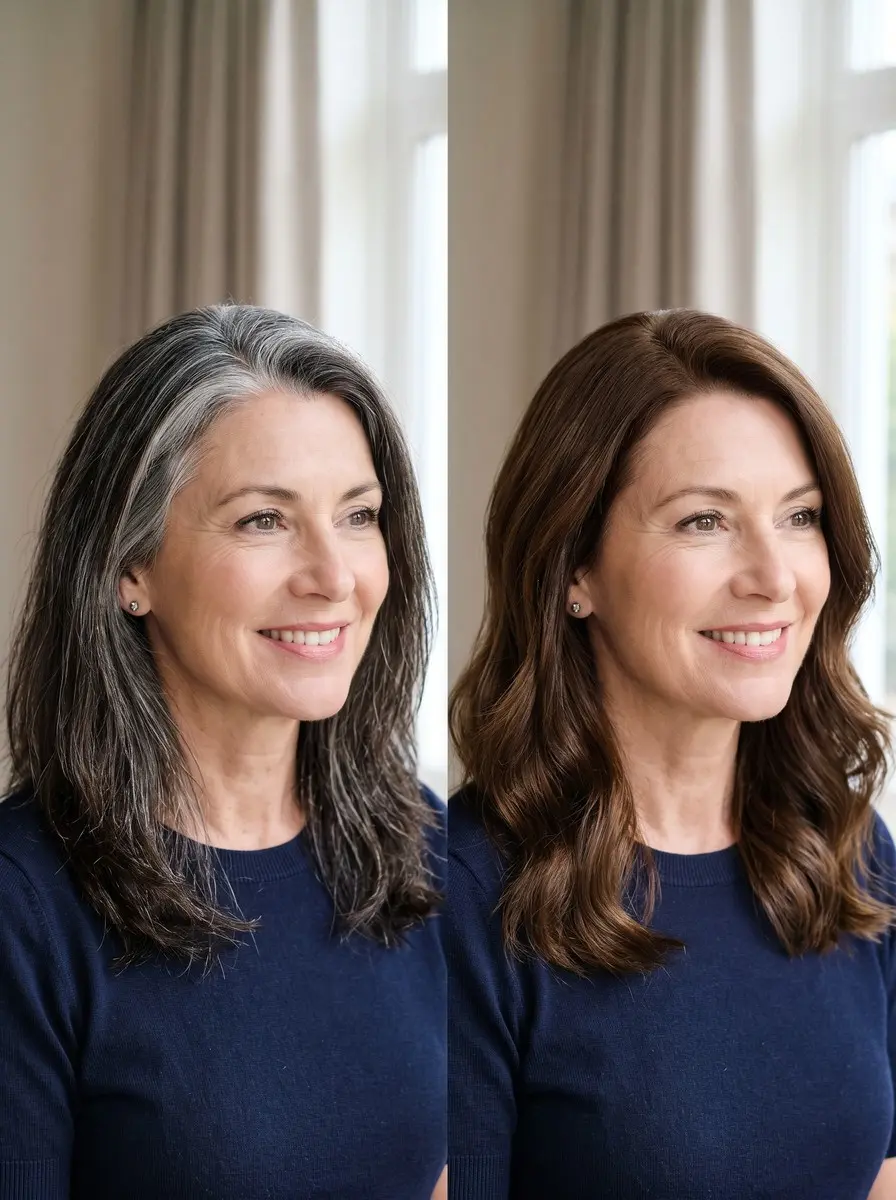
Done well, at-home gray coverage looks like your own color: even from temple to tip, no silver at the hairline, and ends that match the roots. The method is what gets you there: the right product for your gray percentage, a natural-based shade, 20 volume developer at your box’s ratio, and the most resistant areas colored first.
Plan root touch-ups every 4-6 weeks, on new growth only, and keep a concealer and color-safe shampoo on hand between sessions. Book a colorist if you want to go lighter than your natural shade, if the gray still won’t take after a careful strand test, or if a result needs a major correction.
Frequently Asked Questions
Why won't my gray hair take dye?
It's usually one of three things: product buildup blocking the color, too little color on the strand, or a shade with no natural base. Wash out leave-ins and concealers 24-48 hours ahead, apply generously to the temples first, use the full processing time and choose an 'N' or gray-coverage shade. If the gray still resists, a colorist can pre-soften it before coloring.
Should I use 20 or 30 volume developer to cover gray?
20 volume (6%) is the standard for gray coverage. It lifts about one level, which is all you need when you're matching your natural color or going darker. 30 volume lifts about two levels and only makes sense if you're deliberately going lighter. Avoid 40 volume at home, and always mix at the ratio your product states.
Is demi-permanent color enough to cover gray?
Demi-permanent blends gray rather than covering it. On hair that's under about 30% gray, it softens silver into natural-looking dimension, but it won't give solid coverage on 50% or more and it fades faster than permanent color. If you want the gray gone completely, choose permanent; if you want softer regrowth lines, demi is the gentler option.
What should I do if my gray coverage came out too dark?
Start with a few washes using a clarifying shampoo, which can soften fresh color slightly. If it's still too dark after that, a color remover made for permanent (oxidative) dye can take out some of the excess; strand test it first. For a big correction, or if you were thinking about bleaching, see a colorist rather than layering more chemicals at home.
How often can I dye my gray roots?
Every 4-6 weeks is typical: hair grows about half an inch a month, so the regrowth line is visible by then. Apply permanent color to the new growth only, because overlapping it onto previously colored hair builds dark bands and adds damage. A root concealer or a part switch can stretch the time between sessions.
Keep Reading
Sources
- 10 tricks to help you color resistant gray hair us.wella.professionalstore.com
- Resistant gray hair naturtintusa.com
- How to color resistant gray hair madison-reed.com